
The VLC media player is a free yet powerful tool that you can rely on to play, download, convert, and stream videos safely. Actually, you can also use it to record a screen.
How to go on VLC screen capture?
In this post, I will show you the step-by-step guide. Follow it, and you can record the screen instantly.
However, the VLC screen recorder only allows for full-screen capture, and you can’t annotate while recording. Hence, I would like to offer an alternative way to record screen. With this solution, you can record any particular area as you like, or add notes in the recording process.
Let’s move on.
1. How to Record Screen with VLC?
VLC screen recorder enables you to record screen without any watermark or time limit.
How to record with VLC? Please follow the steps below.
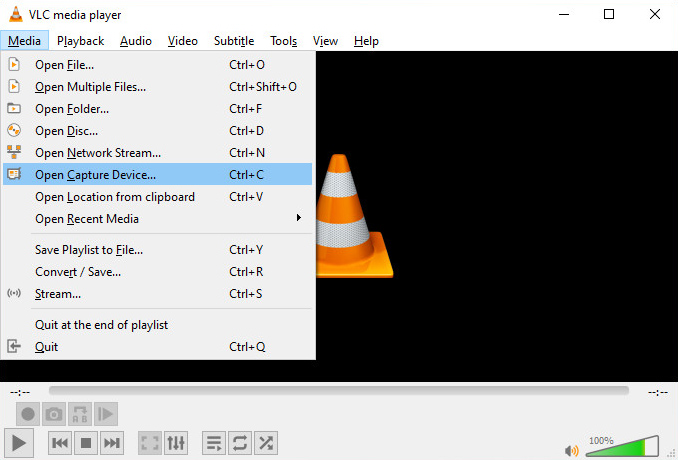
- Run the VLC media player and click the Media menu in the top left corner. Then pick the “Open Capture Device…” option.
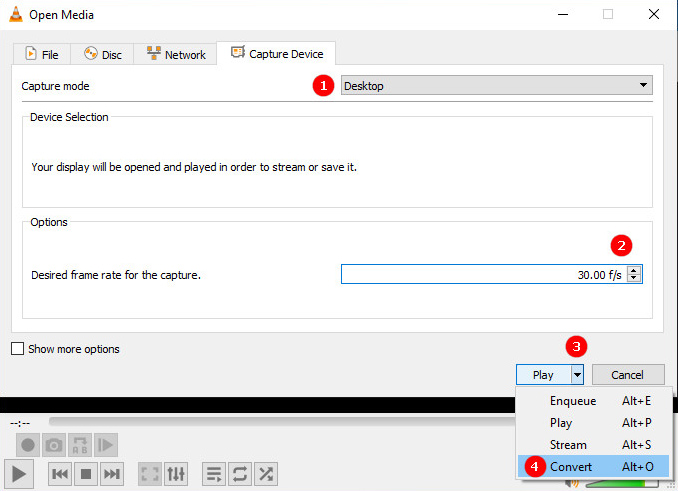
- On the Capture Device tab, change the Capture Mode to desktop. Then you can set the frame rate to 30 fps. (Notice: If you want a smooth video, try to increase the frame rate. However, the higher frame rate requires greater computing power and resources of your computer.)
- Click on the small triangle icon near the play button, and select Convert.
- Now, you need to designate a destination for your output video. Hit the Browse button, and select a location. Then you can click the Start icon to initiate the recording process.
- When you are ready to finish the recording, hit the grey square icon to stop it.
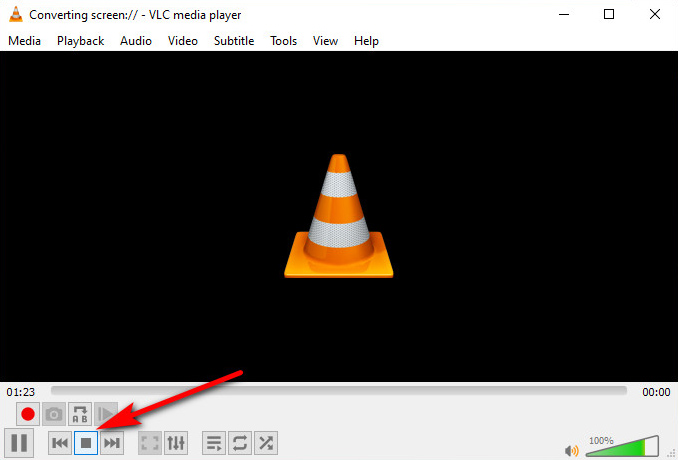
Then go to the designated file place, and you can get the recording.
Some users feel frustrated as there is not any countdown to start recording. Some others complain that the VLC application will be included in the screencast as one needs to open it and hit the stop icon. Even worse, VLC can only capture full screen, and you can’t make any annotation in the recordings.
Don’t be upset. Below I will show you a good way to capture the screen. With it, you can set the desired recording area, annotate, or even trim the video based on your demand.
Please keep reading.
Alternative Way to Record Screen You Don’t Want to Miss Out
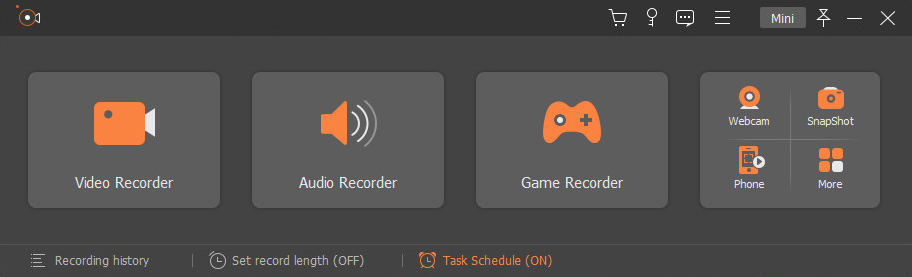
Besides the VLC media player, there are various screen recorders on the market. Among them, AmoyShare Screen Recorder outstands with its all-in-one recording function. It features an independent video recorder, audio recorder, game recorder, webcam recorder, and snapshot module to meet your demands on various occasions.
Key features:
● Recording full screen, a window, a particular area of the screen.
● Save recordings up to lossless quality.
● Advanced recording mode to lock and record window, exclude window and record, or record around/follow the mouse.
● Record screen with webcam and audio from system and microphone at the same time.
● Editing in the recording process.
● Versatile settings for a schedule recording.
● Hotkeys
How to use this great VLC alternative to record screen?
Please install AmoyShare Screen Recorder on your Windows or Mac computer and follow the easy steps below.
Screen Recorder
Capture HD video and audio instantly
- for Windows 11/10/8
- for Mac OS X 14+
- for Android
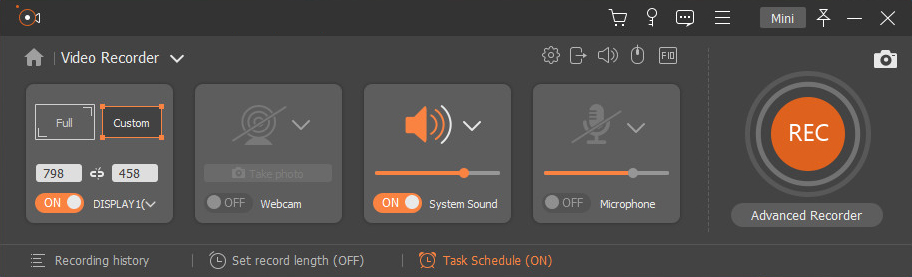
- Run Screen Recorder, and go to the Video Recorder. Now enable the DISPLAY icon and select the desired recording area, toggle on the webcam, system sound, and microphone if necessary. Then hit the REC to initiate recording. By default, there is a 3 seconds countdown before the start.
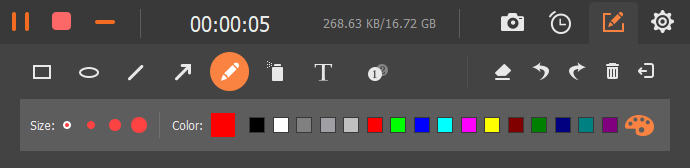
- In the recording process, you can annotate with text, line, shape, etc., to express yourself well.
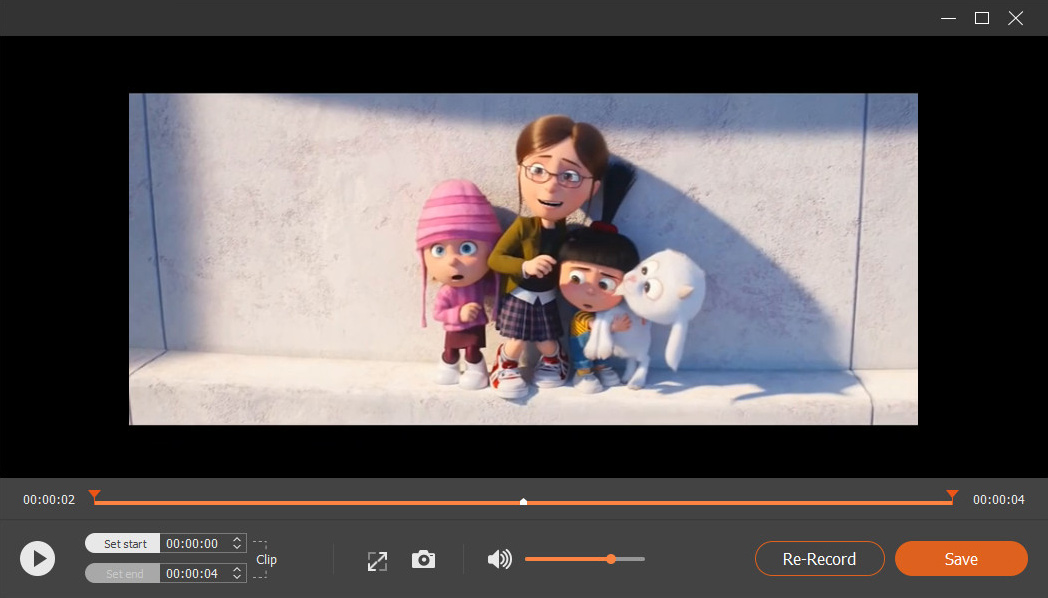
- Use the hotkey or hit the red square icon to finish the recording. Now you can preview or trim the recording before saving it.
The screen capture process is easier than that on VLC, isn’t it?
Give it a shot now!
Conclusion
Follow the steps above, and you can go on the VLC screen capture easily. However, there are some limitations you should keep in mind. First, there is no way to record your voice in your screencast. And you can only record the full desktop, which will lead to large-sized videos.
If you want to capture the screen with audio or capture only a part of the desktop, try AmoyShare Screen Recorder. It helps you record any area of the screen, with audio capture from the system and microphone. Moreover, you can even annotate in the recording process to highlight key information.
Give it a shot now!
Screen Recorder
Capture HD video and audio instantly
- for Windows 11/10/8
- for Mac OS X 14+
- for Android
Frequently Asked Questions
Where does VLC save recordings?
You need to designate the destination location for your recordings if you follow our steps above. Otherwise, please find the video in the VLC default file path: This PC - Video.
Does VLC screen capture screen with audio?
No. VLC only allows for screen capture, and it doesn't record audio or voice automatically during the recording process. Yet, you can use the Screen Recorder powered by AmoyShare to perform the task easily.