There are many reasons why you would want to screen record on Windows 11. For example, do you have a presentation you would like to record? Do you like to record your gaming to post on social media? These are just two examples that screen recording on a PC can be helpful.
Knowing how to screen record on Windows 11 will benefit someone who spends most of their work hours behind a computer.
Actually, screen recording on Windows 11 can be simple if you know how to use the built-in recorder or a downloadable application.
This article looks at the different Windows 11 screen recorder options. In addition, we also give you step-by-step instructions on how to screen record on a PC using a fantastic application.
Let us dive in.
Part 1. Best Way to Record Screen on Windows 11
Although there are built-in Windows 11 screen recorder options, if you are serious about high-quality screen recordings, AmoyShare will be the best screen recording software.
This advanced screen recorder lets you record screen on Windows 11 with audio at the same time. And it offers various output formats and quality for choice. On top of it, you can save the recordings without a watermark. That is very helpful.
Then how to screen record on Windows 11 with audio via AmoyShare Screen Recorder?
Before we start, please install the recorder on your Windows 11 device. By the way, AmoyShare is compatible with Windows 10/8/7 and Mac.
Screen Recorder
Capture HD video and audio instantly
- for Windows 11/10/8
- for Mac OS X 14+
- for Android
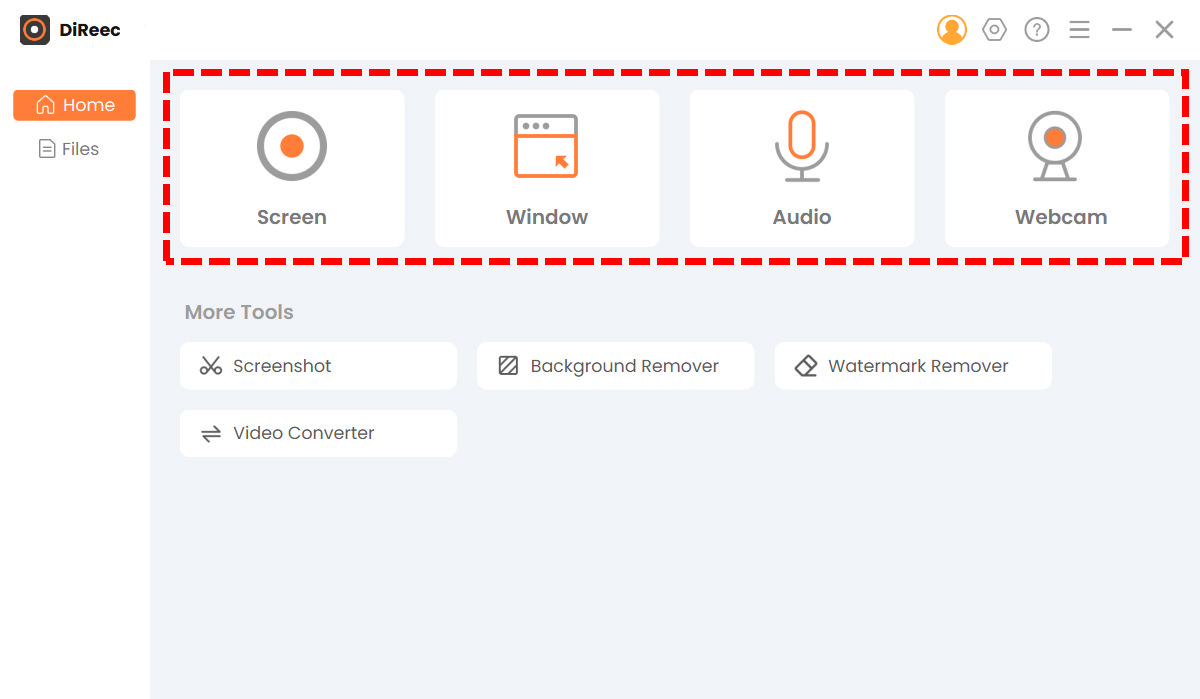
- After downloading the application, open the Windows 11 screen recorder from AmoyShare. You will see different tabs. First, locate the one labeled “Screen.” Click on this one to open different settings.
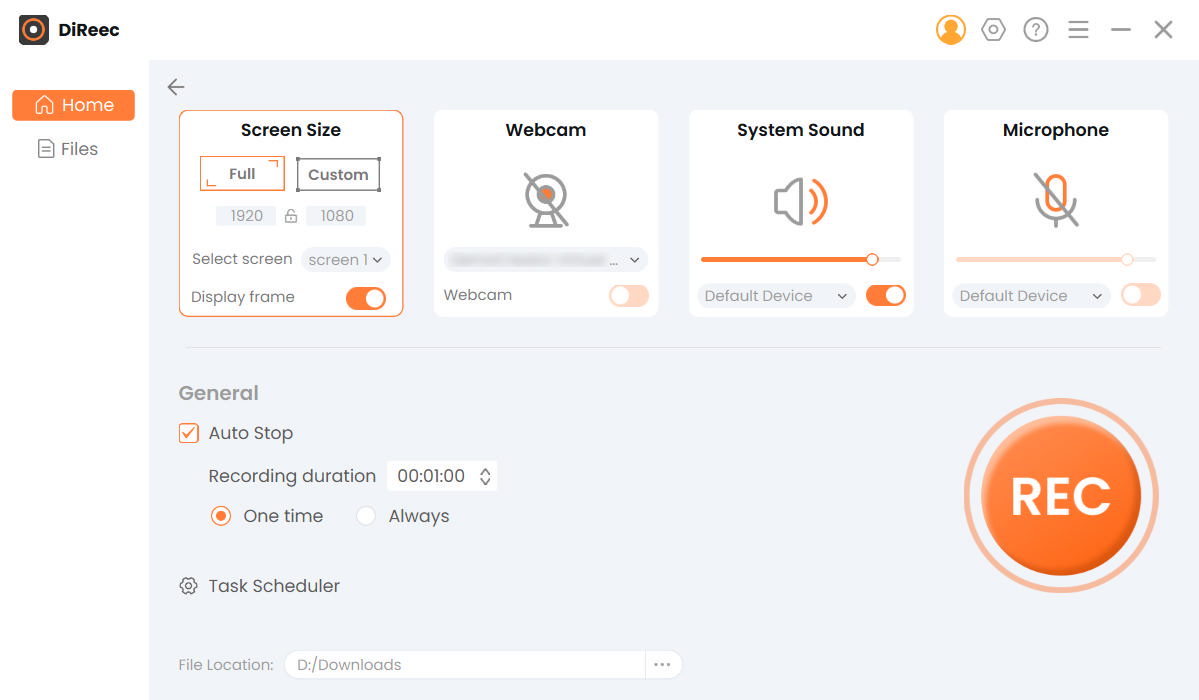
- You will now notice an adjustable orange square pop-up. There are dotted lines on all sides of the square. Click and drag them to fit the screen you could like to record or select full screen if you prefer. To record screen with audio, please enable the microphone and system sound. Then, use the “Hotkeys” F7 on your keyboard to start recording or stop anytime. You can click on the REC icon in the application if you prefer.
Tips: You may also get interested in 10 Best Screen Recorders on Windows 10.
Part 2. How to Screen Record on Windows 11 Using VLC
Now that we know of an easy Windows 11 screen capture option, it is time to look at another application that allows you to do the same. VLC has been around for ages but has mostly been used to watch videos. Yet, you may never know that it can be used to record screen on Windows 11.
How to do Screen Capture with VLC? Please follow the steps below.
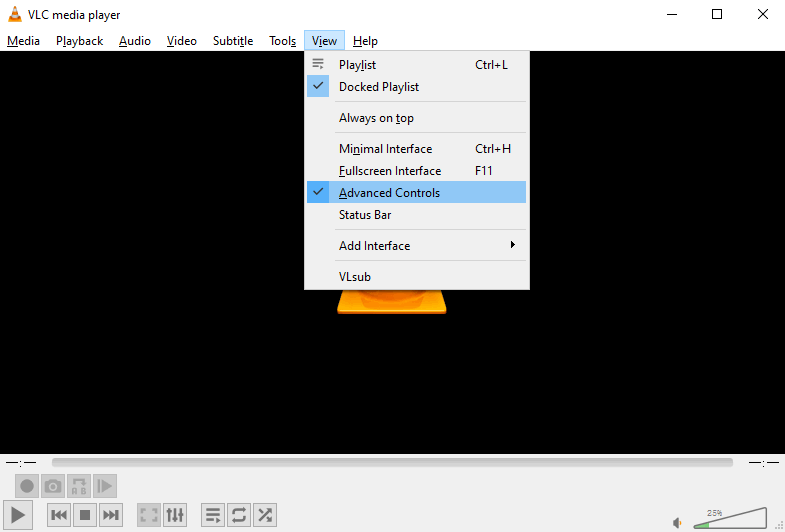
- Open the VLC application on your device and click on the drop-down button called “view,” then select the button called “Advanced Control” and enable it. You will now see a play and pause button on your VLC player’s screen.
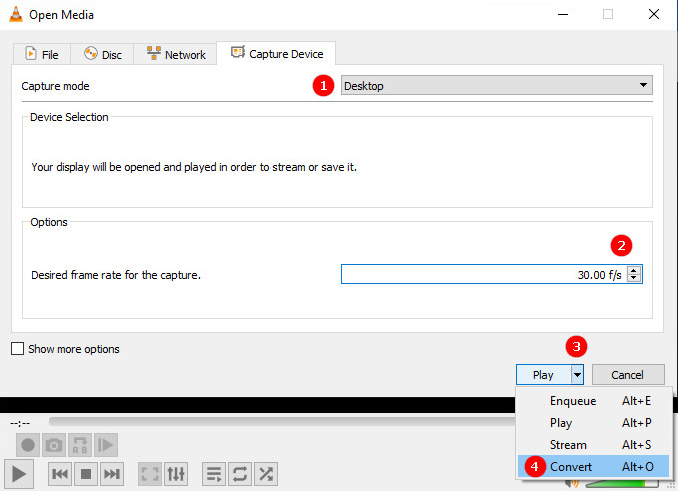
- Once you have enabled the advanced settings, select the “Media” button and click on the button labeled “Open capture device.” Select the tab called “Desktop” that you can find on the drop-down menu in the capture mode. Next, decide on the frame rate you prefer and select the “Convert” button that you see under the “Play” menu. Finally, select the profile as “Video-H.264+MP4”.
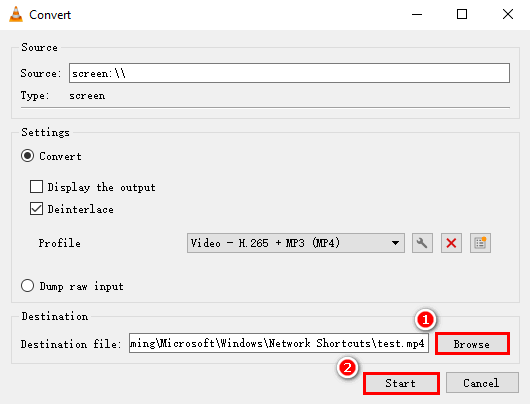
- Once you choose the video profile, select browse and decide where you would like your files to be saved after screen recording, click on save and select start to begin recording.
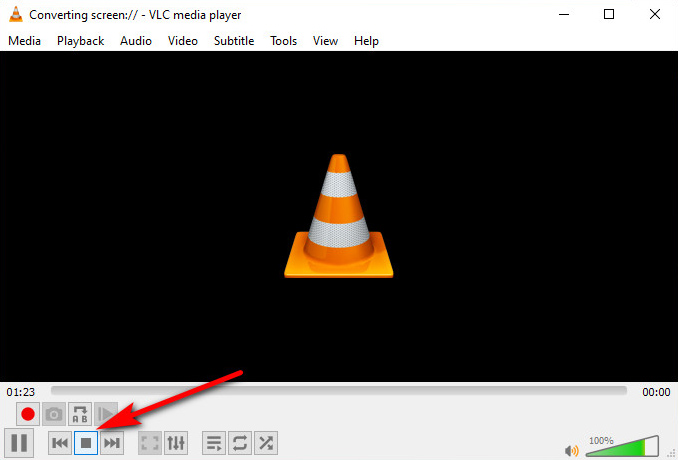
- You may notice an active record button in the advanced controls. Click here to stop recording when you are done.
Part 3. How to Capture Video with Xbox Game Bar
Alright, if you have made it this far, you are looking for the built-in option. You are probably wondering how do I record my screen on Windows 11 for free. Windows 11 Xbox Game Bar has a feature that can capture video on a PC easily. The only downside of the built-in Windows 11 screen recorder is that it can only record the videos rather than the screen activity on your desktop or laptop.
How to screen record on Windows 11 with Xbox Game Bar? Here are the steps.
- Please play the video you’d like to record.
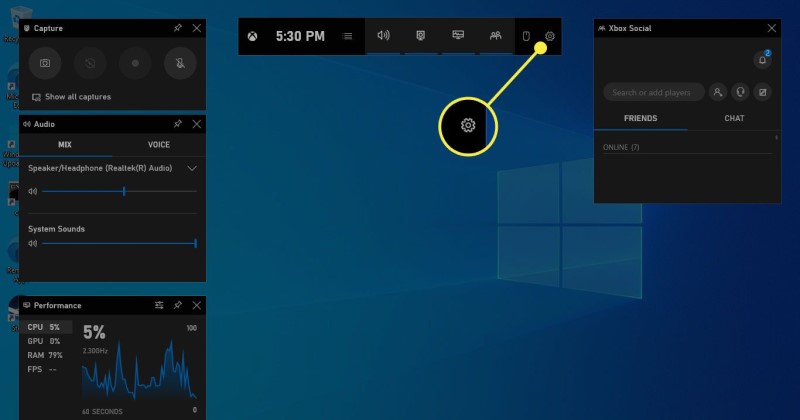
- Press the Windows button + Alt + G on your keyboard, which will launch the game bar immediately.
- There are various options on the panel. You can set the parameter as you like. Of course, you can directly hit the capture icon, then further hit the record icon to start the recording.
- When you are done, hit the red stop button. Then you can view the recording.
Tip: You should play the video before the recording starts. Otherwise, the recorder won’t work correctly.
How to Record Screen on Windows 11 via Snipping Tool [Newest Way]
It’s great news that Windows 11 offers another built-in feature to help you screen record on Windows 11, in addition to the Xbox Game Bar: Snipping Tool. Many of you may already be familiar with it due to its primary function of taking snapshots. However, it has now expanded its capabilities to include the screen capture function that lets you record screen on Windows 11 without any limitations. It’s important to note that it primarily supports basic recording needs. If you prefer to require more advanced features, the AmoyShare screen recorder must be your best choice.
Anyway, how to screen record on Windows 11 with Snipping Tool? Here are the detailed steps below:
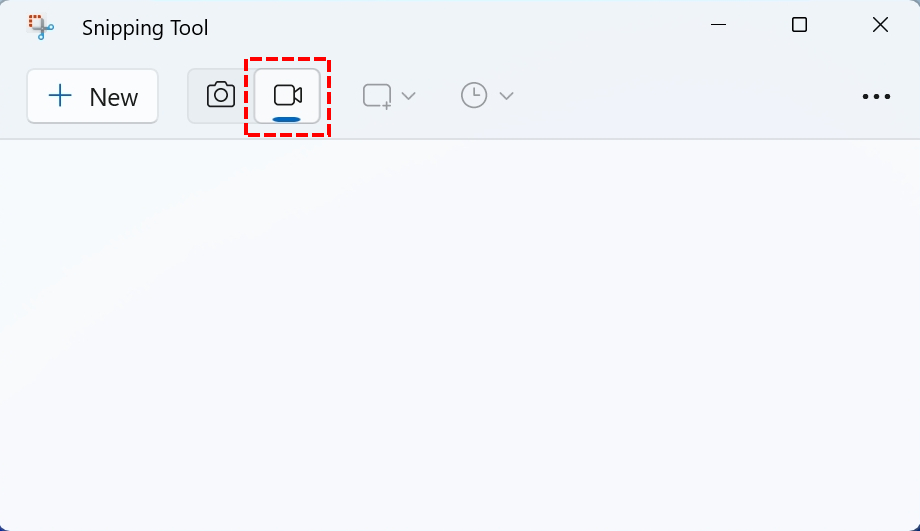
- Simply type “Snipping Tool” in the Windows search bar to locate this program.
- Once the app is open, switch to recording option by clicking the icon like a video camera (vidicon). Then hit the “+ New” button.
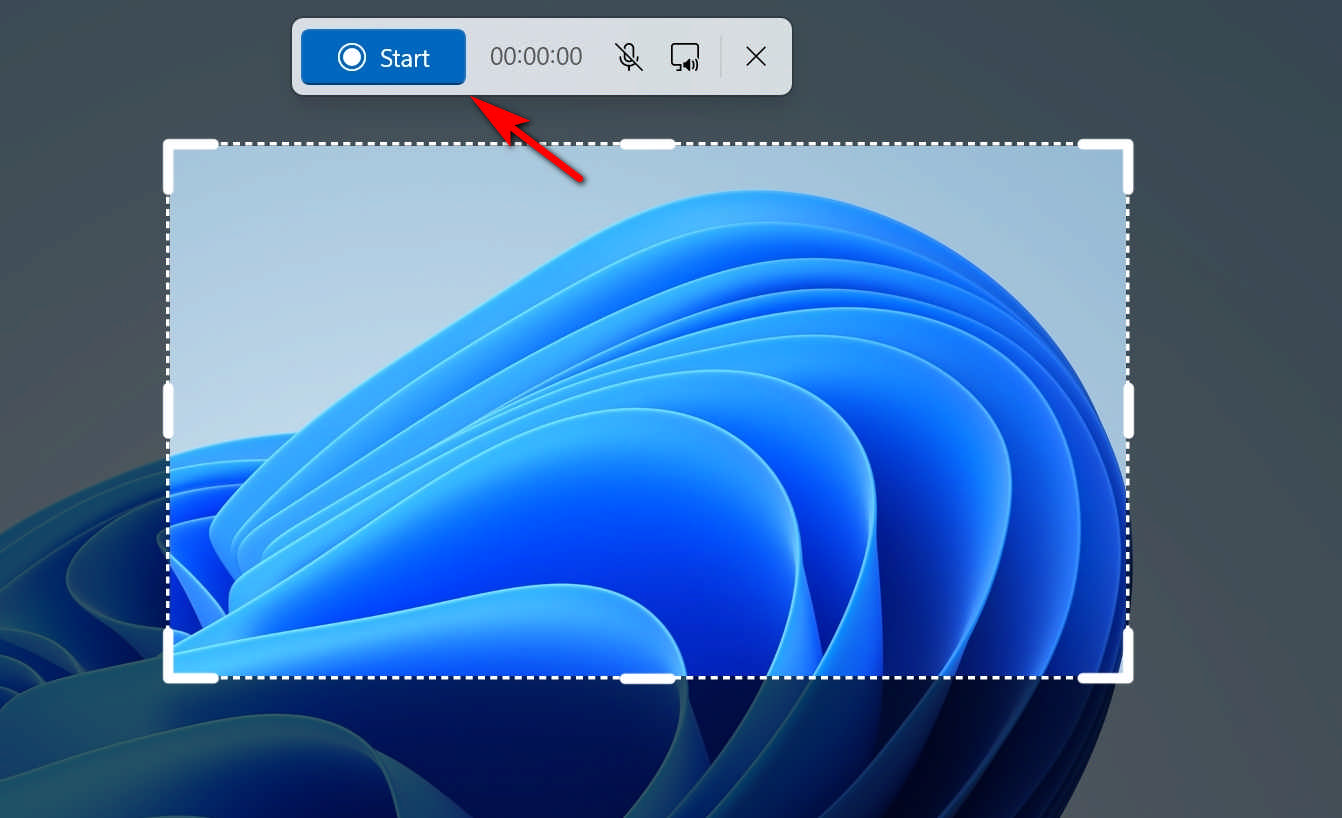
- When the dashed box appears, select your desired recording area and hit the “Start” button to initiate the screen recording on Windows 11.
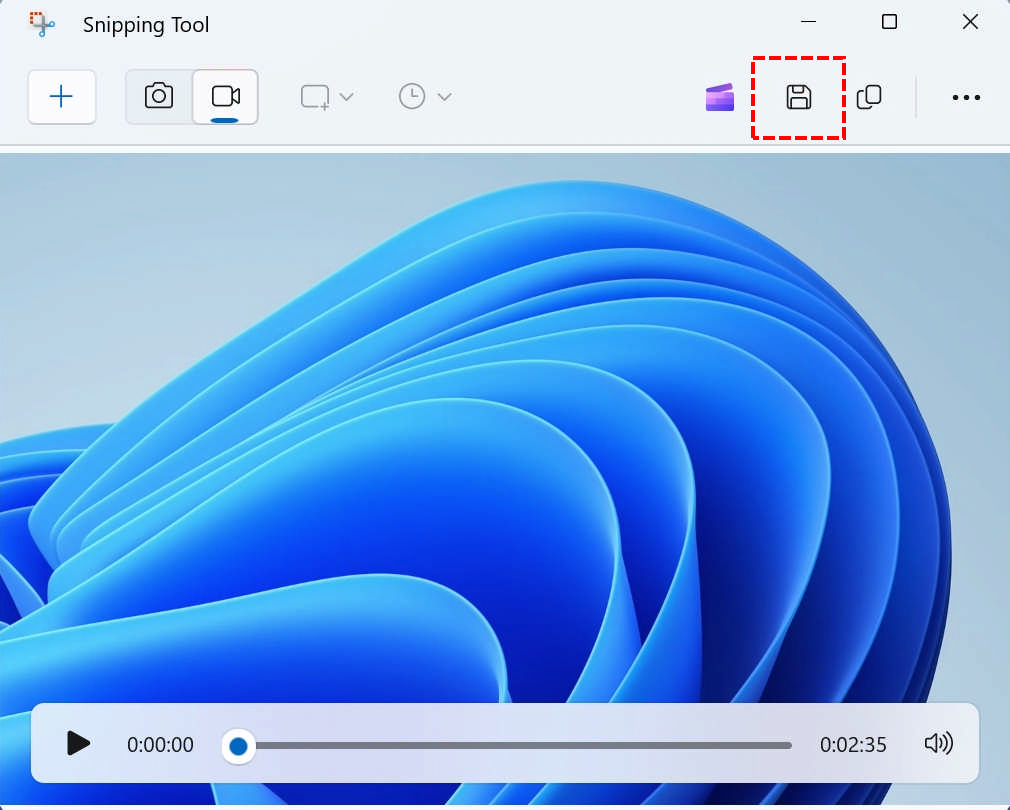
- To conclude the recording process, simply hit the red square button. The playback interface will then pop up. Click the “Save” icon if you’re satisfied with the recorded file.
Final Thoughts
How to screen record on Windows 11?
The steps are easy when you have practical tools at your disposal. There are many different applications that can help you, but AmoyShare offers a high-quality screen recorder with many adjustable settings.
Built-in Windows 11 screen recorders are great, but they do not always screen record with the best quality. At times they might even fail to record your whole video.
Give it a shot!
Screen Recorder
Capture HD video and audio instantly
- for Windows 11/10/8
- for Mac OS X 14+
- for Android
FAQ
Does Windows 11 have a screen recorder?
Yes, you can use the game bar to screen record on your Windows 11 PC. The game bar is built-in, so all Windows devices have them.
How to screen record on Windows 7?
Download the AmoyShare screen recorder , open the application, and click the record button after selecting your recording screen.
How to screen record on Windows 11 with audio?
You can use the AmoyShare screen recorder . It records the audio of your device while screen recording.