The modern era provides useful and innovative tools for us, humans, to utilize. One of these inventions is voice recording. Whether you are a frustrated voice-over artist, podcast content creator, or speech enthusiast, voice recording is a practical tool to hasten your skills.
Nowadays, software developers provide a functional pre-installed recorder on different devices that they are conceptualizing. One device that will come in handy is your Mac computer. This device has a built-in microphone allowing users to perform simple recording tasks.
If you are fascinated by how to record audio on Mac, this article is for you. Read through below the guideline and different third-party applications that might be a perfect tool for your taste.
Contents
- Part 1. How to Record Audio on Mac with AmoyShare Screen Recorder
- Part 2. How to Record Audio on Mac with QuickTime Player
- Part 3. How to Record Audio on Mac with Voice Memo
- Part 4. How to Record Audio on Mac with GarageBand
- Part 5. How to Record Audio on Mac with Easy Audio Recorder Lite
- Part 6. How to Record Audio on Mac with MP3 Audio Recorder
Part 1: How to Record Audio on Mac with AmoyShare Screen Recorder
Distinctive Features: When recording voice-overs, users can utilize its microphone enhancement and noise cancellation feature to provide better recording quality.
Supported Formats: It is designed to record and export with the most popular audio formats like MP3, WMA, M4A, AAC.
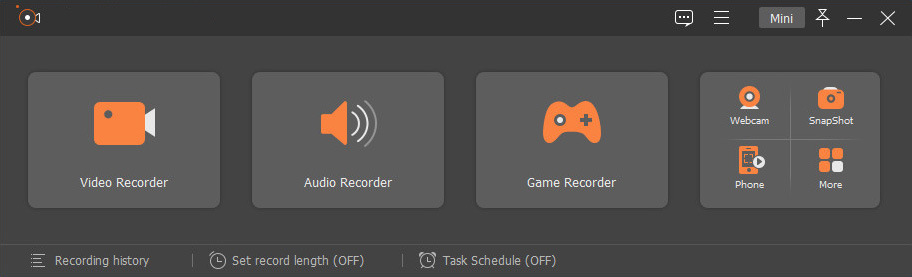
AmoyShare Screen Recorder is powerful screen recording software that enables users to record audio on Macintosh computers. This tool is prominent software that can record the internal audio of your Mac. Instead of downloading audios on different untrusted sites, AmoyShare Screen Recorder lets you capture various radio, audio, and music files directly into your device folder. Additionally, this tool enables users to record voice-overs with the help of an external microphone to provide crisp and smooth voice recordings. Furthermore, it has six levels of recording quality, and users can choose from lowest to lossless video and audio quality.
Key Features:
● It has a task scheduler that allows users to set a recording in a predetermined time frame.
● It has a sound checker that is helpful for users to preview audio quality before initiating the recordings.
● It can also set a specific length or duration of the recordings by utilizing the Record Length function.
Beneath is a detailed walkthrough on how to record audio on Mac using AmoyShare Screen Recorder.
Screen Recorder
Capture HD video and audio instantly
- for Windows 11/10/8
- for Mac OS X 14+
- for Android
- Install the Macintosh voice recorder
- First, hit the download above this walkthrough to install the AmoyShare Screen Recorder. Wait for the installation wizard to appear, then pass through any guidelines provided by the software. Once the installation has finished, launch the software to familiarize its navigation and functionalities.
- Optimize the Settings
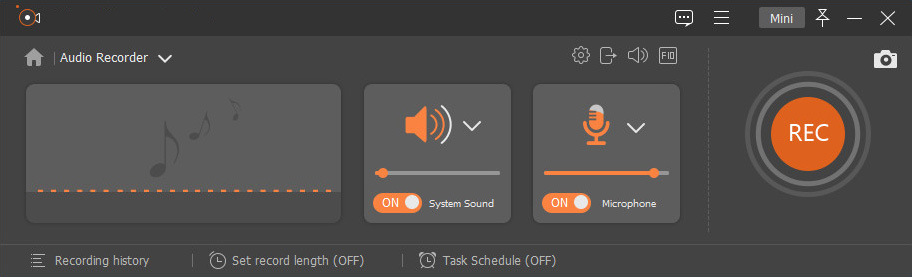
- Next, modify the recording setting by ticking the Menu button located at the upper-right part of the tool. Hover over at the Preference option, and a pop-up window will appear. Go to the Sound tab and utilize different features such as noise cancellation, microphone enhancement, soundcheck, changing output format, and more. Hit the OK button to save the changes that you have made. Then, it will redirect you to the tool’s interface.

- Next, modify the recording setting by ticking the Menu button located at the upper-right part of the tool. Hover over at the Preference option, and a pop-up window will appear. Go to the Sound tab and utilize different features such as noise cancellation, microphone enhancement, soundcheck, changing output format, and more. Hit the OK button to save the changes that you have made. Then, it will redirect you to the tool’s interface.
- Record Audio on Mac from the Internet
- Then, go to any streaming site that you can record for the audio files. Select any content on the audio streaming site and go back on the tool to prepare the recording. Click the Audio Recorder to access its recording functionality, hit the REC button to start recording.
- Then, go to any streaming site that you can record for the audio files. Select any content on the audio streaming site and go back on the tool to prepare the recording. Click the Audio Recorder to access its recording functionality, hit the REC button to start recording.
- Utilize Recording Features
- Afterwards, a pop-up window will appear, then you can utilize different functionalities including, play and pause, volume buttons, and more. The recording duration can also be seen at the upper part of the window to monitor the length of your audio recording. Finally, if all is settled and done, click the red-box button to stop the recording session.

- Afterwards, a pop-up window will appear, then you can utilize different functionalities including, play and pause, volume buttons, and more. The recording duration can also be seen at the upper part of the window to monitor the length of your audio recording. Finally, if all is settled and done, click the red-box button to stop the recording session.
- Play and Preview Recorded Audio
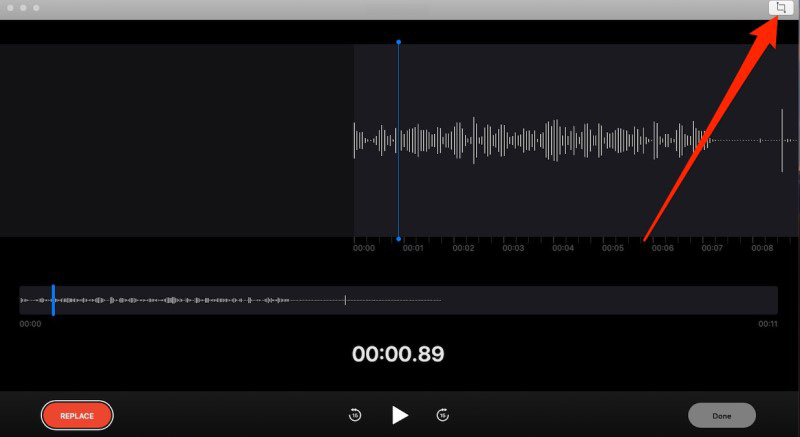
- Lastly, a built-in media player will appear to enable users to preview and trim their recorded audio once the recording has finished. If you are not satisfied with the output file, you can freely re-record the music by ticking the Re-record button located at the right-bottom part of the player. If the recording is enough, hit the Save button to export the audio files on your Mac device.

- Lastly, a built-in media player will appear to enable users to preview and trim their recorded audio once the recording has finished. If you are not satisfied with the output file, you can freely re-record the music by ticking the Re-record button located at the right-bottom part of the player. If the recording is enough, hit the Save button to export the audio files on your Mac device.
Part 2: How to Record Audio on Mac with QuickTime Player
Distinctive Features: It can edit, cut, and trim audio tracks easily and quickly.
Supported Formats: It can export audio formats such as FLAC, MP3, AAC, and more.
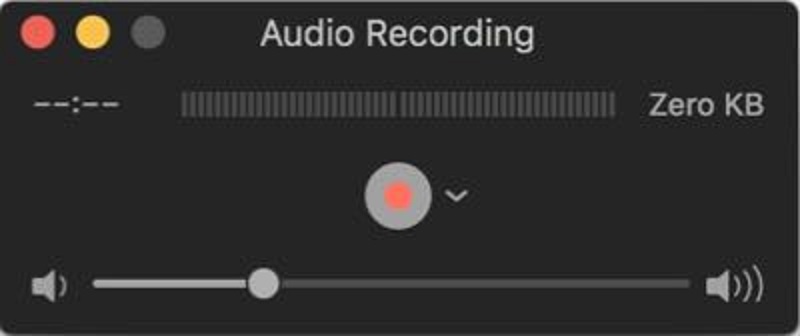
QuickTime Player is a built-in multimedia player on Mac OS. In addition to playing videos and audio, QuickTime Player can also be a screen and audio recorder. It can save and export audio files in any codecs supported by QuickTime Player.
Follow through these simple steps to know more about how to record internal audio on Mac using QuickTime. First, launch the software, hover over on the File menu and tick New Audio Recording. Afterwards, a pop-up menu will appear. Set then audio quality, then click the recording button to start and stop the recordings.
Key Features:
● It has output presets available for iPod, Apple TV, and iPhone.
● It can be navigated through shortcut keys.
● It has a built-in media player to preview and play output audio tracks.
Part 3: How to Record Audio on Mac with Voice Memos
Distinctive Features: It can automatically save recording files on cloud-based storage such as iCloud.
Supported Formats: It can save a single audio format using M4A.
Voice Memo is a pre-installed voice recording software that is purposely for audio recordings on macOS. Even though Voice Memos and QuickTime Player are the same pre-installed application on Mac, the main difference between the two software is, Voice Memos is centralized in easy audio capturing features. Additionally, it offers limitless audio recording for its users, allowing them to capture audio tracks as many as they can. Conveniently, the recordings of this tool can be accessed on different devices such as iPhone, iPad, etc., as long as users have the same Apple ID.
To learn how to record audio on Macbook Air using Voice Memos, simply open the application and hit the red button to initiate recordings. Afterwards, you can use a microphone to record voice-overs. Lastly, hit the bottom-right button to terminate the recording.
Key Features:
● It is a free and pre-installed software intended for voice recording
● It has a built-in player to preview recorded audio.
● It has a feature that can alter the playback speed, Skip silence, and enhance the quality of the recorded audio tracks.
Part 4: How to Record Audio on Mac with GarageBand
Distinctive Features: It is equipped with a Music lesson feature that enables users to download pre-record music lessons on their macOS.
Supported Formats: It can save audio formats such as MP3, WAV, AIFF and Piano Roll music.
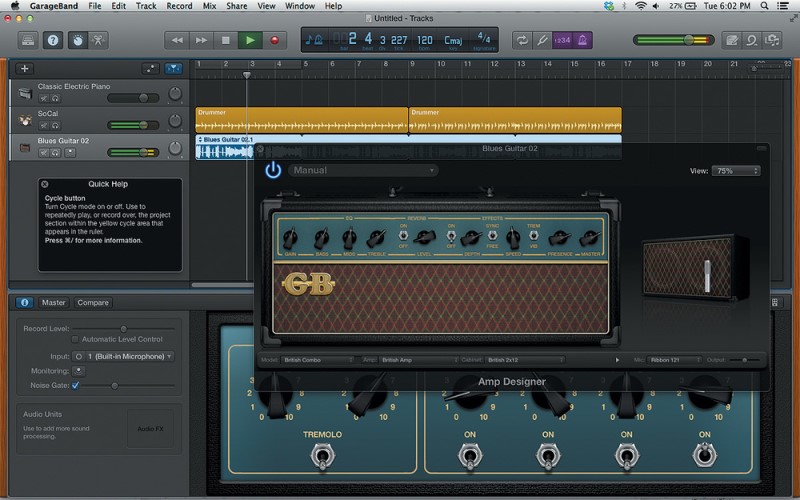
GarageBand is a digital workstation and audio sequencer developed by Apple Inc. in last 2004. This device enables users to create music and podcasts for different Apple devices like iPad, iOS, and macOS. It was once a part of iLife software, together with iDVD and iMovie. Its podcasts and music creation features allow users to create and compose multiple tracks with its premade MIDI keyboards. Additionally, it can playback and record various tracks of music with limitless duration. It also has built-in audio filters to enhance the quality of audio tracks.
To gain knowledge on how to record audio on Mac with headphones, just follow these steps. First, open the GarageBand via Finder or Spotlight, choose a new project, tick Audio > Record using a microphone. Afterwards, hit the Record button to initiate recording. Finally, click the red button to save it.
Key Features:
● It has the ability to record in both 16-bit and 24-bit audio resolution.
● It has a tuning system that helps users with pitch correction and auto-tunes effects.
● It also has a large selection of effects to choose from.
Part 5: How to Record Audio on Mac with Easy Audio Recorder Lite

Distinctive Features: It can directly send recorded audio files via email.
Supported Formats: It can save audio formats such as M4A, WAV, FLAC, AIFF, and CAF.
Easy Audio Recorder Lite is a simple yet powerful audio recorder built for macOS. It has a variety of recording rates that users can choose from. Some of these rates are 4800 Hz (DVD Quality) and 44100 Hz (CD Quality). It also has a set of bitrate up to 320 Kbps. Additionally, it enables users to customize the standard audio input (build-in input).
To master how to record audio on Mac without a mic, follow these simple steps. First, download and install the app on your Mac. Then, open the software to familiarize its function. Afterwards, you can click the red button to start the recordings. When you are done, click the square button to end the recording.
Key Features:
● This tool is free to use.
● It enables users to modify the metadata of the audio files.
● It can restore the deleted audio files.
Part 6: How to Record Audio on Mac with MP3 Audio Recorder
Distinctive Features: It supports an external microphone that is perfect for recording voice-overs.
Supported Formats: It can only save the MP3 file container.
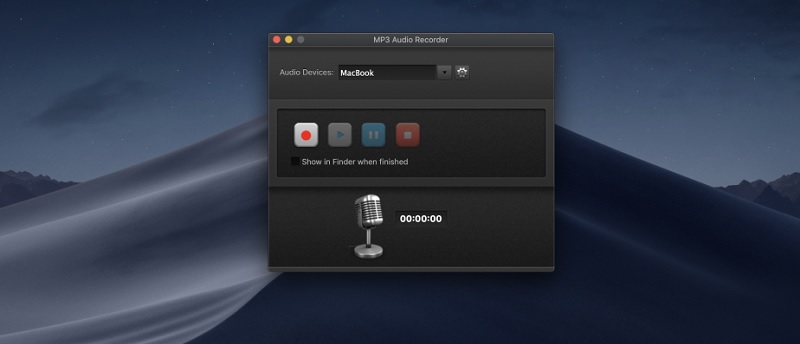
The last software that can record streaming audio MacBook is MP3 Audio Recorder. This tool allows users to capture and record various streaming sites such as Spotify, YouTube, and more. It has basic recording functions such as a pause and play button, quality settings, etc. It can also export and save recorded audio up to 320kbps. Furthermore, it also can modify the quality of the recorded audio from the lowest to best quality. It is quick and easy to use. To Mac voice record using this tool, simply install the software on the Apple Store and launch it on your Mac. Tick the Red button to start and initiate the audio recording. Afterwards, click the stop button to save and terminate the recording.
Key Features:
● It supports various bitrate encoding.
● It is free of charge to install.
● It is compatible with macOS 10.10 or later versions.
Frequently Asked Questions About Macintosh Voice Recorder
How to Record Audio on a Mac from YT?
A simple tool is needed for users to record audio tracks on different music-streaming platforms such as YT. This article recommends AmoyShare Screen Recorder due to its smart and useful recording features, such as a Task scheduler. Just open the application and hover over on the Audio Recorder. Afterwards, hit the Rec button to initiate the audio recording. Finally, click the stop button to save it fully on your Mac device.
How to Record Audio on a Mac with a Headphone?
Voice Memos is a suitable tool to record audio tracks on a MacBook using headphones. First, open the application and tick the red button to instigate recordings. Next, speak using a microphone and headset to capture voice-overs. Finally, click the bottom-right button to discontinue the recordings.
How to Record Internal Audio on Mac?
On this inquiry, QuickTime Player is a great tool to utilize when recording internal audio on Mac devices due to its vast number of output audio formats. First, launch the pre-installed application, go over on the File menu and click the New screen recording. Next, a screen recording dialogue box will appear. Finally, tick the recording button to instigate and terminate the recordings.