
Although it is always the photo subject that draws people’s attention, the background is a vital part of the photo. Therefore, we often try to remove background from image or make changes to the photo background to improve the image.
There are various photo editors that help you get rid of a less-satisfying background. Among them, GIMP shows off some professional plugins.
GIMP, personally speaking, is such an influential editor that it can be compared with worldwide Photoshop. Its toolkits are ample enough for an amateur photographer to perfect photos.
Today, we are going to witness how GIMP removes background with its powerful programs. Go ahead to enjoy the show!
3 Ways to Remove Background in GIMP
“Whether you are a graphic designer, photographer, illustrator, or scientist, GIMP provides you with sophisticated tools to get your job done.” This is a piece of the official introduction of GIMP.
Does that introduction tell the truth, or is it an overstating publication? Let’s have a test for it.
In this part, we are going to talk about how to remove background in GIMP. 3 methods are mentioned to deal with different backgrounds. Read on to see their variations.
1. Using the Fuzzy Select Tool
The Fuzzy Select Tool works on a continuous area tinted with the same color. Based on this principle, this tool should be utilized to change white background to transparent. Besides, the Fuzzy Select Tools display an excellent performance when the object has sharp edges and color contrast with its background.
Follow the steps below to see how to remove white background in GIMP.
- Open the image in GIMP.
Once you run GIMP, you enter its editor window. You first need to Choose File in the top menu bar and click Open to pick a photo from your files.
Tip: GIMP allows you to view the file details instead of icons. So, you’d better name your photo as clearly and exactly as possible when you save photos.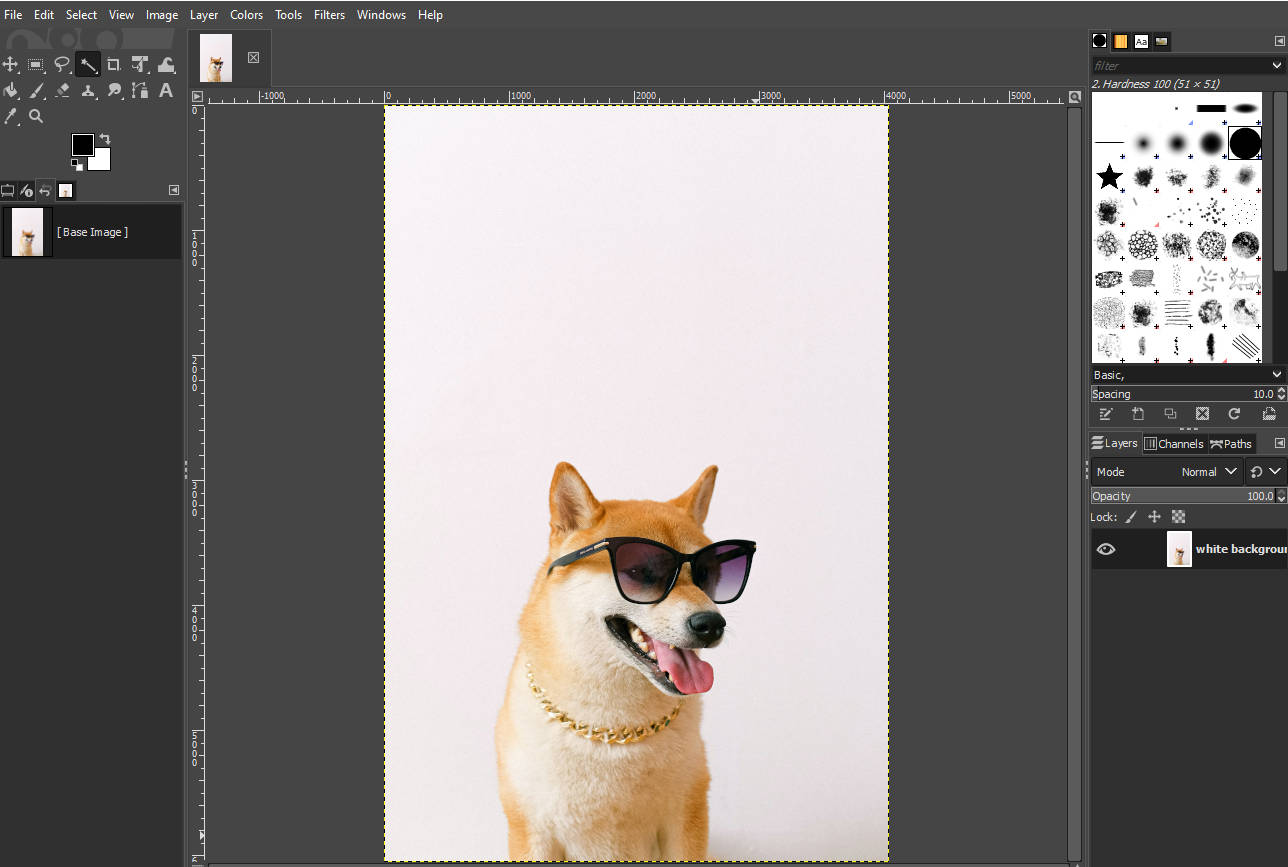
- Add an Alpha Channel.
Right-click on the photo zone, find the Layer > Transparency >Add Alpha Channel. The alpha channel could show a black and gray checkerboard to indicate that GIMP make background transparent if you have an action of deleting.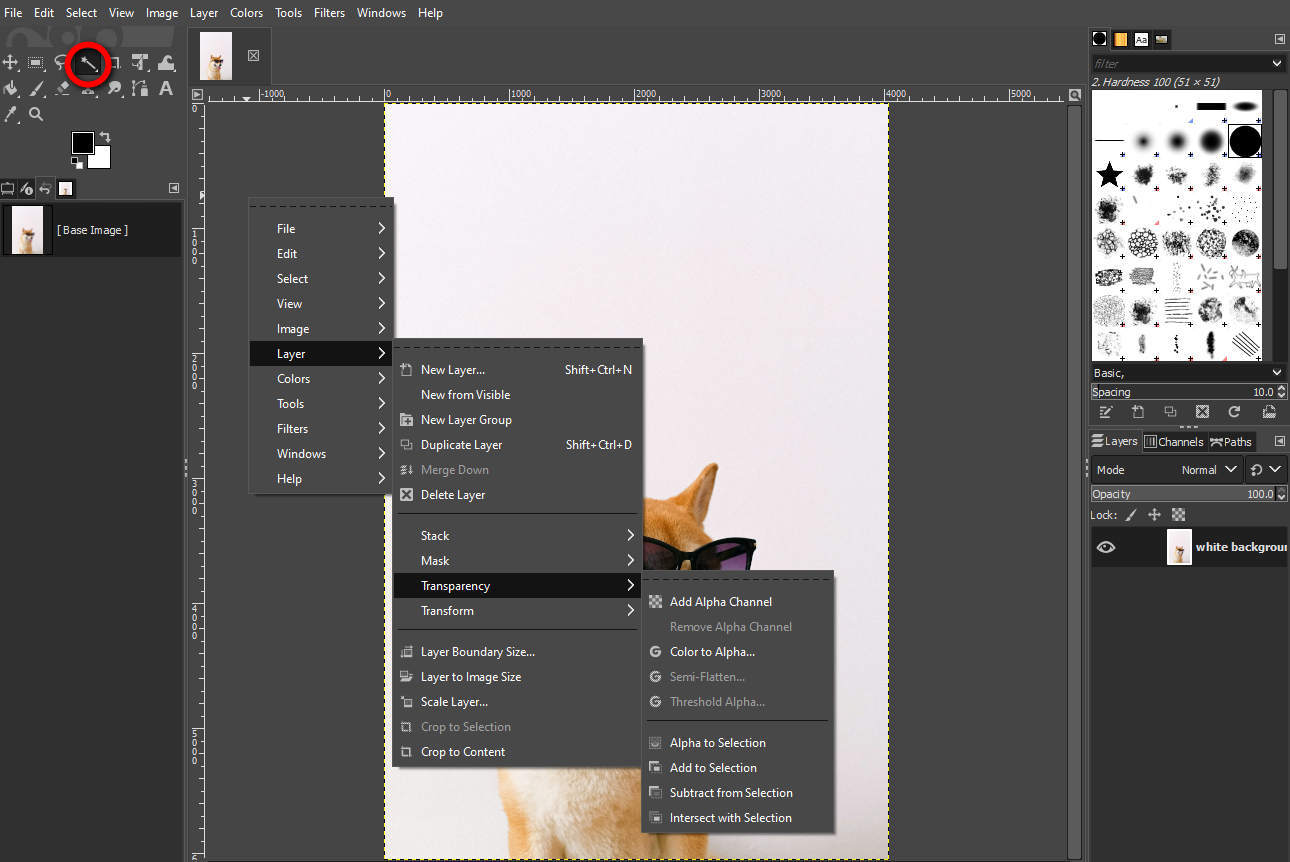
- Utilize the Fuzzy Select Tool.
Move your cursor to the magic wand icon, right-click it to choose the Fuzzy Select tool, and then click on the zone you want to remove.
Each operation is recorded to the left bar so you can visit the bar to check if you have completed the selection.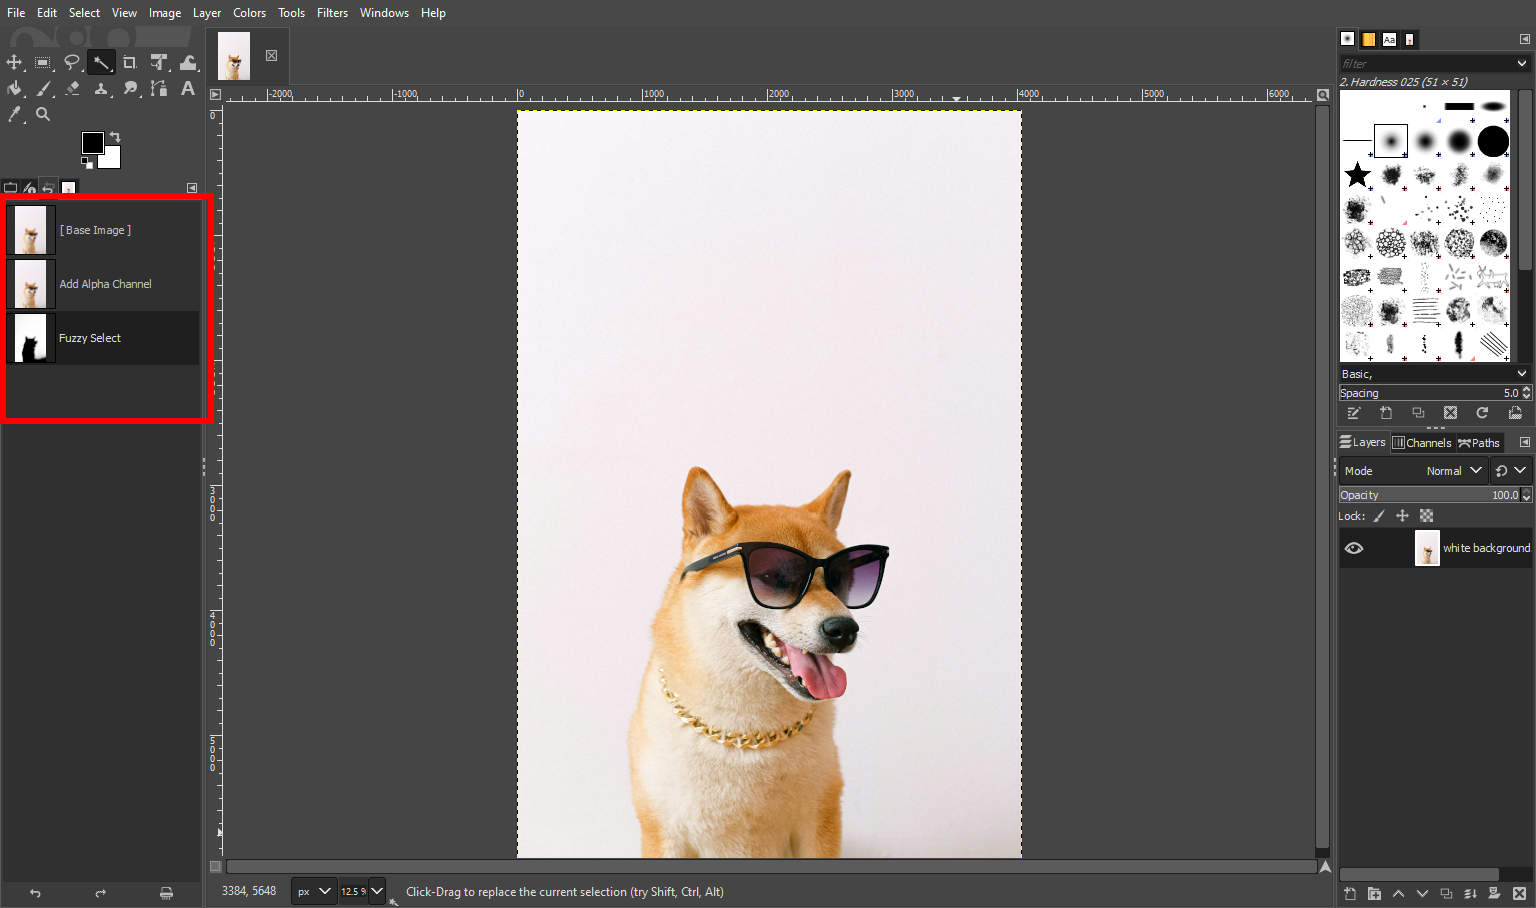
- Remove background from image in GIMP.
After the background is selected, you can press the Delete key on keyboard to remove background in GIMP.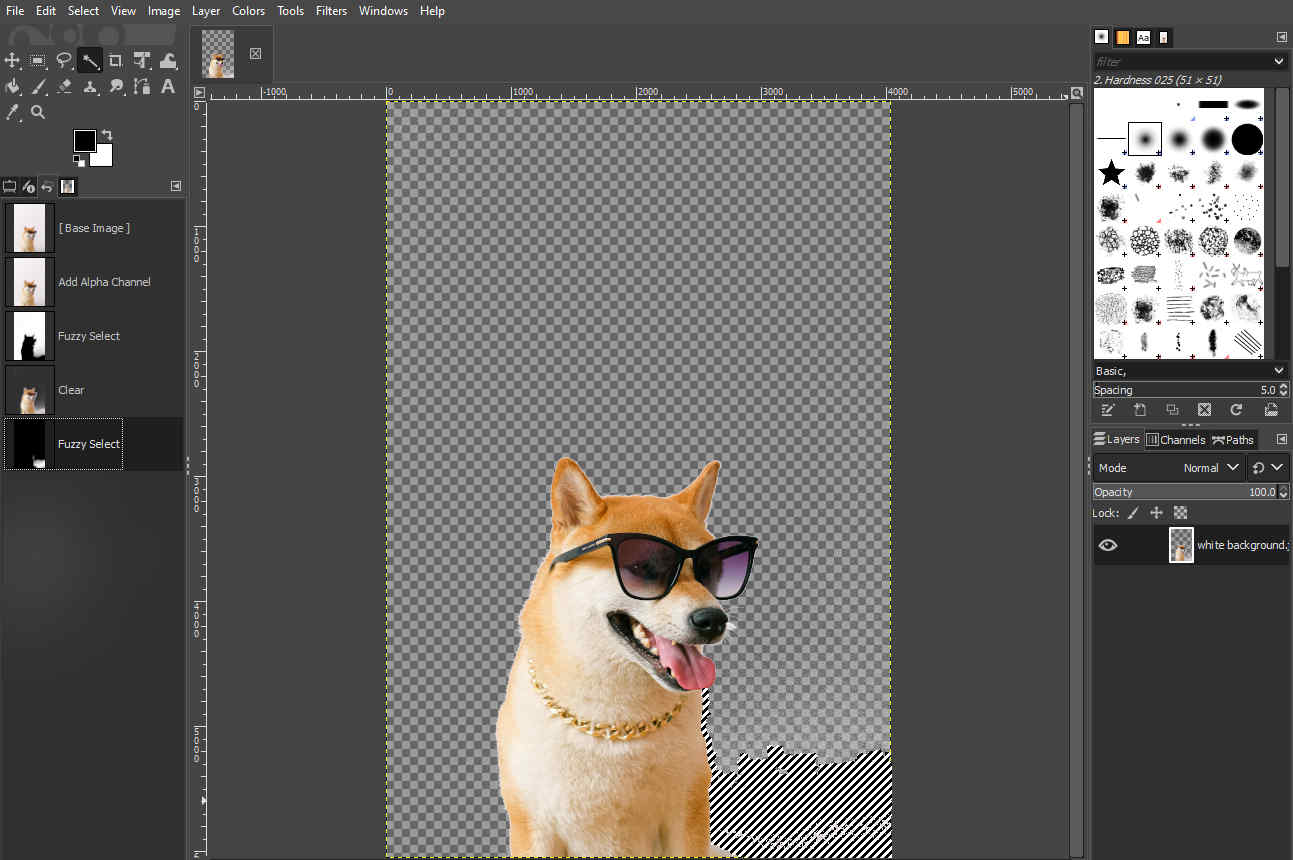
With the Fuzzy Select Tool in GIMP, you can remove precisely the white background. So, don’t hesitate using GIMP to remove background color for your photos!
However, this tool takes much more time in detecting a background whose color is similar to its subject. Besides that, you have to repeat the step of selecting and deleting if the background embeds many colorful elements.
For this, please keep reading to get more handy tools.
2. Using the Free Select Tool
Free Select Tool allows you to select a region with a hand-drawn outline. You can freely circle the area you want to keep or discard. This tool is helpful in removing a fixed background, which is supposed to be an annoying task for the Fuzzy Selection tool.
Keep reading to learn how to make image transparent in GIMP.
- Open an image and add an alpha channel.
First, head to File > Open, and then choose a picture. Second, right-click the photo canvas to get a menu and select Layer > Transparency > Add Alpha Channel.
The steps are the same as I mentioned in the last part. You can go back to get the graphic illustrators. - Use the Free Select Tool to outline your subject.
Click the round rope icon which means the Free Select Tool, and start drawing around your subject. A dotted frame contains the selected subject.
- Invert the selection.
Move to the top section bar to choose Select > Invert. The dotted circle will surround the background. This step speeds up the process of depicting a messy and complex background.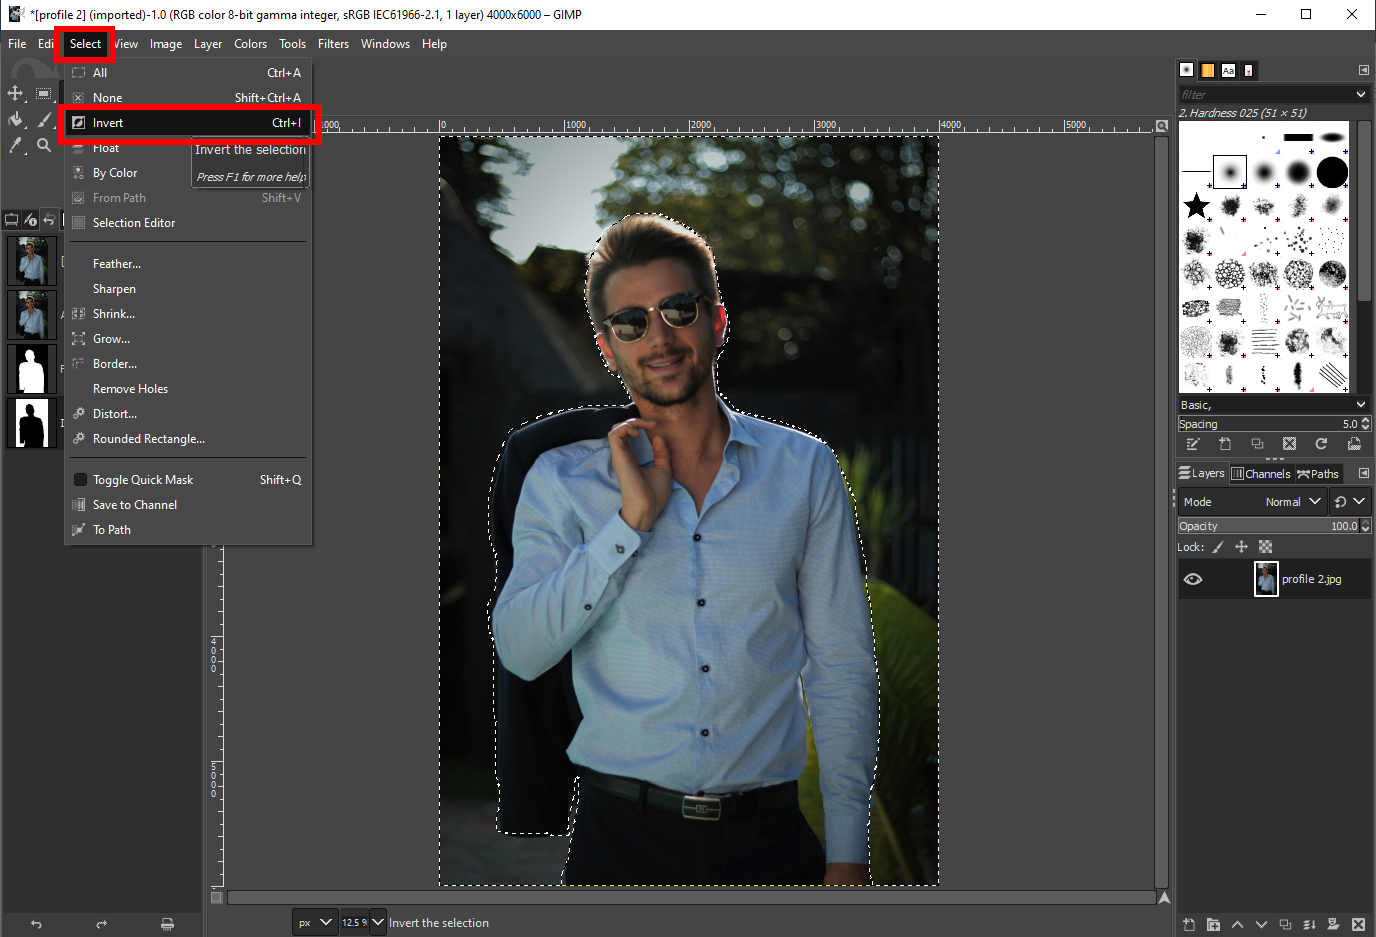
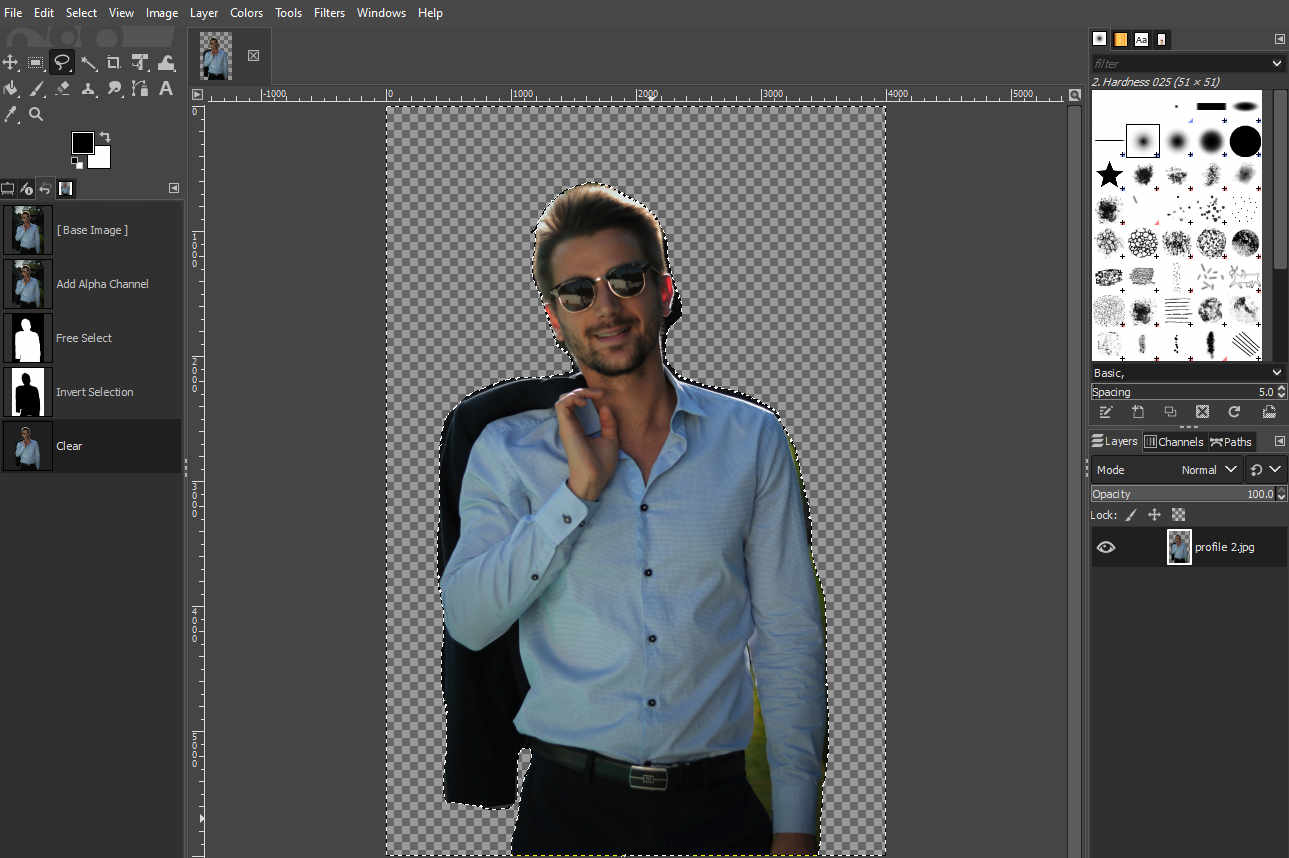
- Hit Delete on your keyboard to eliminate the background.
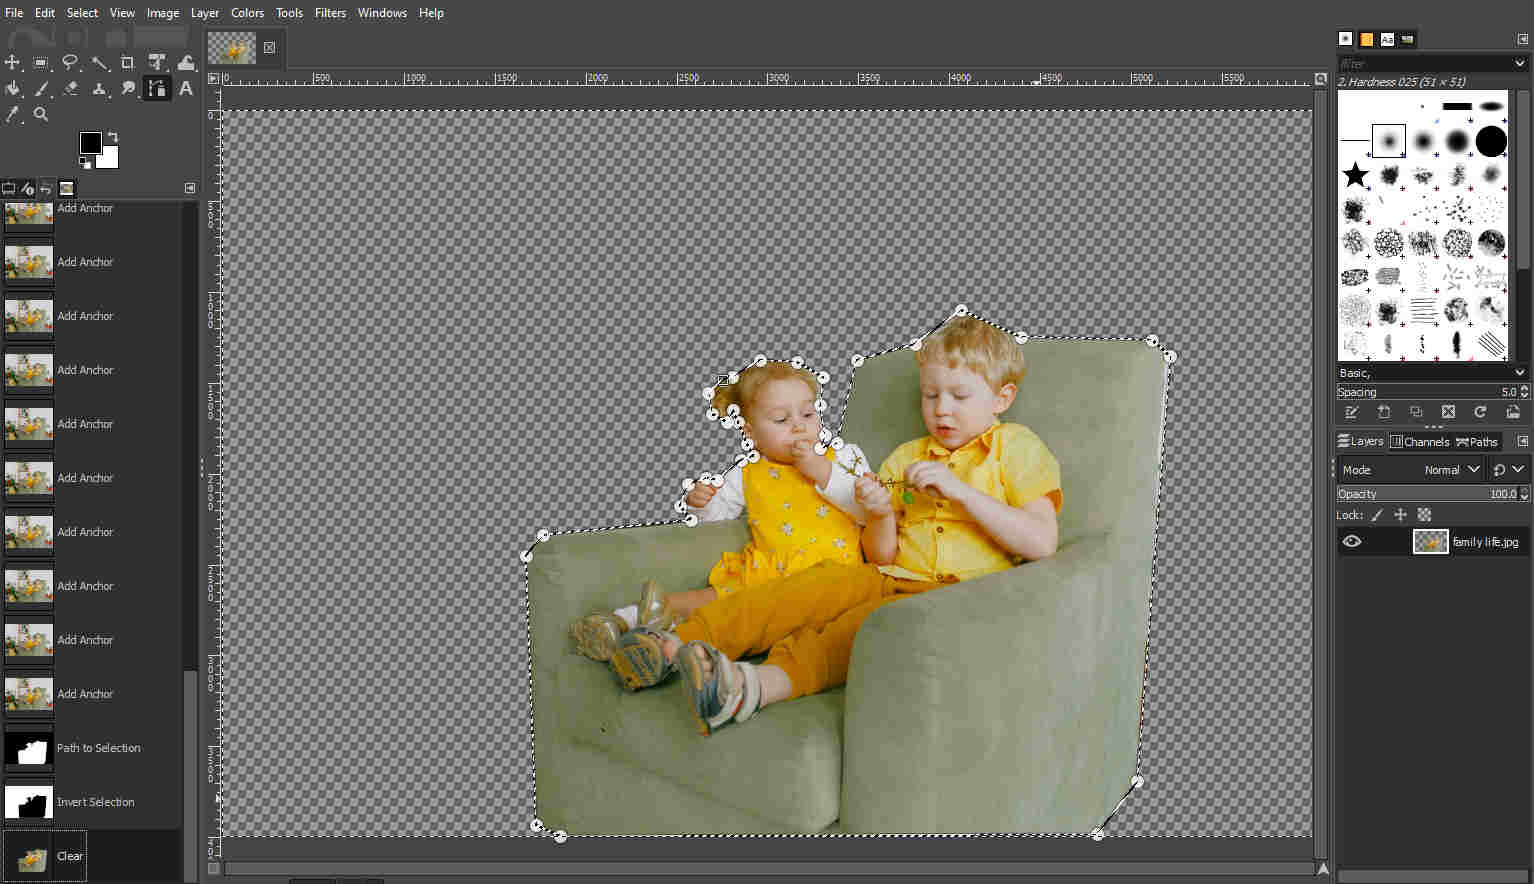
3. Using the Path Tool
The Path Tool is another helpful way to erase background in GIMP. It requires no skill but more time, especially when you try to outline an item with a much-curved edge. But it is the most exact tool because it empowers you to place spots and adjust the curvature to fit the item tightly.
Here’s how to remove background in GIMP with the Path Tool.
- Upload a photo and add an Alpha Channel for it.
You can choose a picture in your file and open it with GIMP. Next, turn to Layer > Transparency > Add Alpha Channel in the top menu. Alpha Channel tells transparency information for you, so you’d better have it. - Activate the Path Tool.
Click the Path Tool icon in the toolbox, and you can mark the path around the item you want to keep.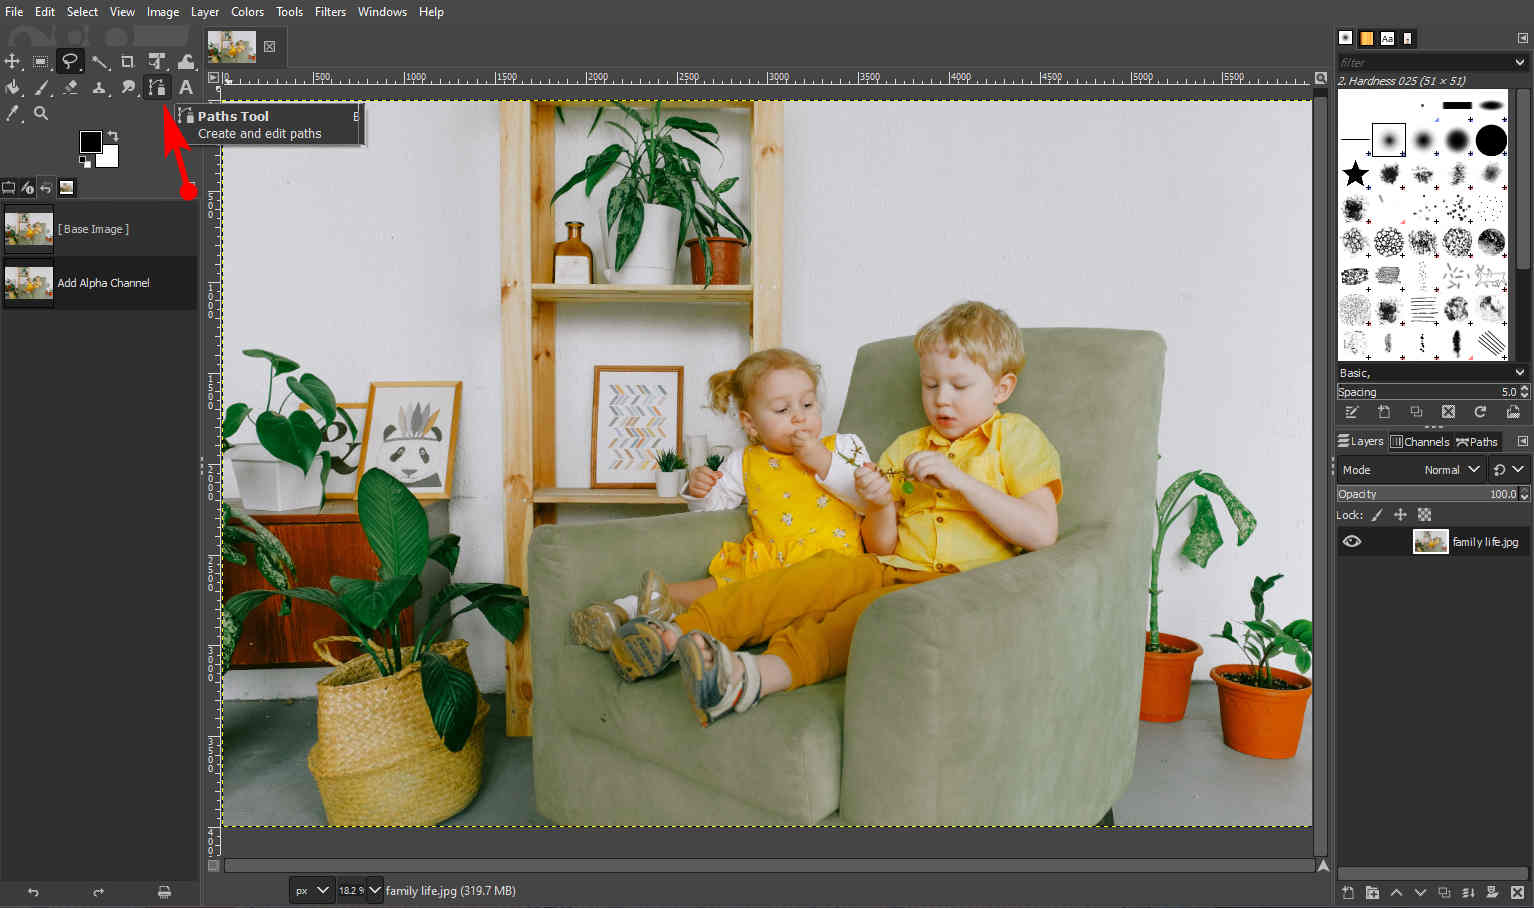
- Start with a point and move forward to add anchors continuously until you draw an exact path.
You could drag the handles coming out of the anchor to make a curve, which helps you outline the subject precisely. If you lay a wrong point, hit the Backspace key to undo the anchor. After you get a perfect line, hit the Enter key to complete the selection.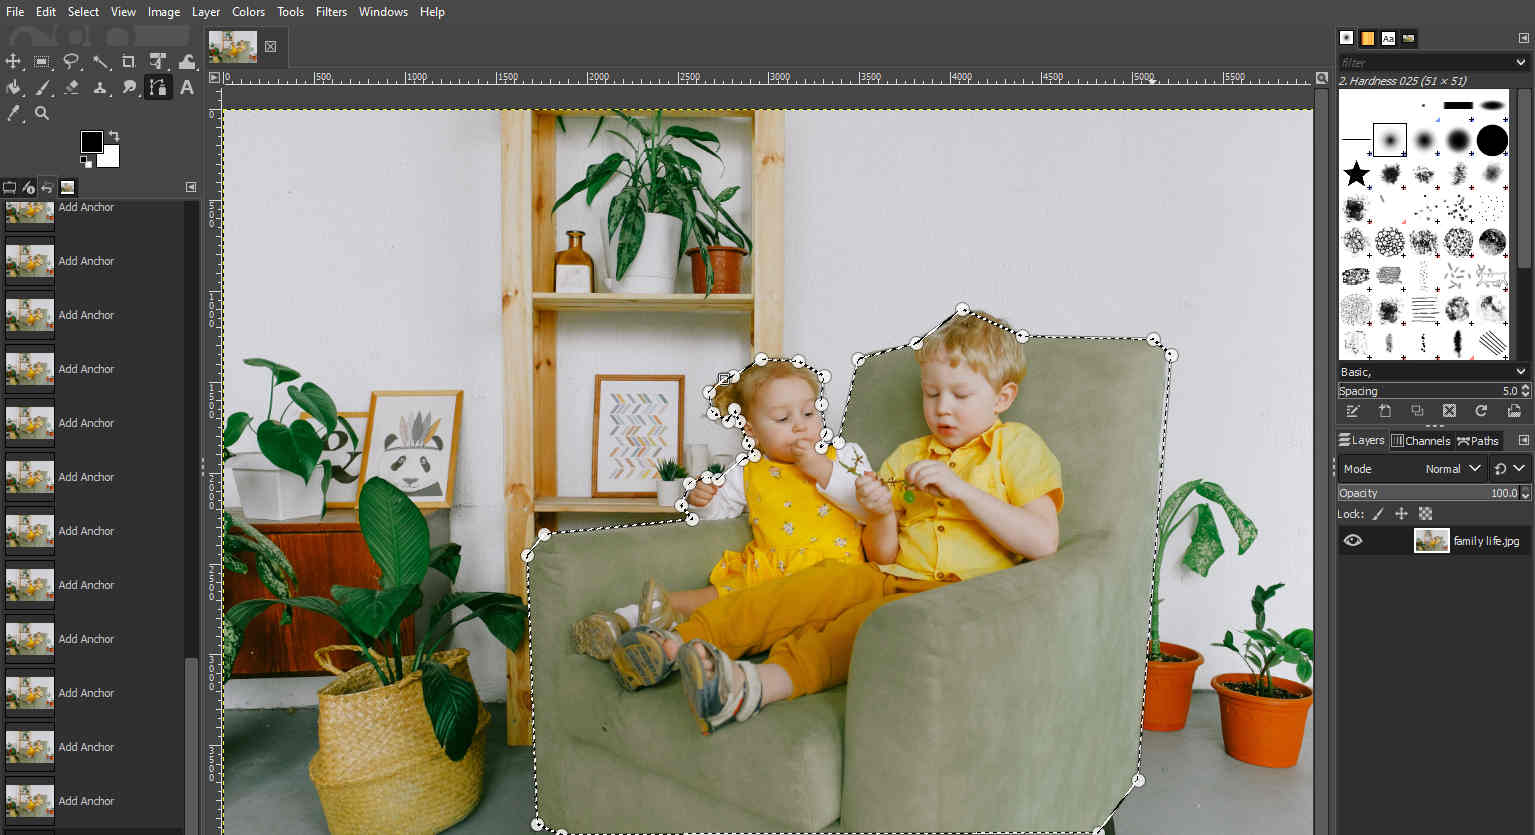
- Invert the selection.
You can right-click on the photo canvas, and click Select > Invert to select the background inversely. - Tap the Delete key to remove background in GIMP.
How to Make White Background Transparent with Time-Saving Solutions
GIMP offers enough tools to resolve the editing tasks, but it is a little difficult and time-costing. Don’t worry. In the following part, I have prepared some handy background removers that help you make the background transparent in one click.
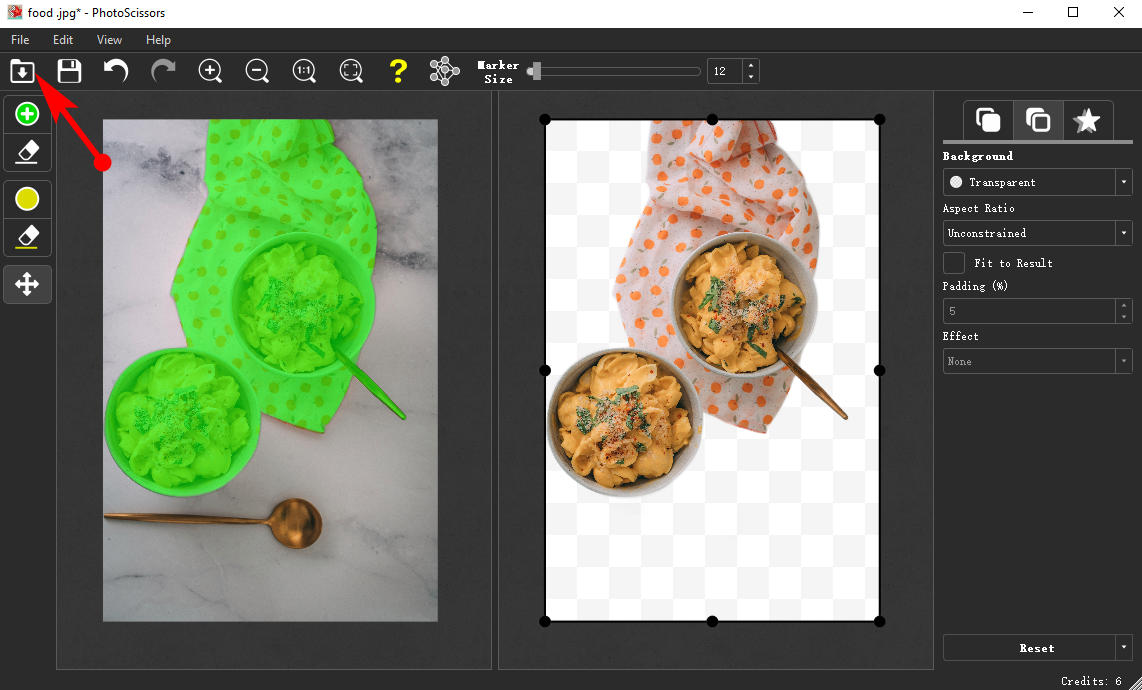
4. PhotoScissors
PhotoScissors, powered by AI technology, is one of the most well-known background removal software. It changes white background to transparent as soon as you upload the photo.
The fantastic show is put on the following list.
- Download PhotoScissors to your computer. And upload an image to the editor windows. To achieve it, go to File > Open image, or click on the arrow-down icon.
- The background is removed instantly and replaced with a white background.
Sometimes, PhotoScissors ignores parts of your subject and deletes them together. You need to use the Foreground marker – the green round icon, to depict the elements that should be preserved and check that the whole subject is selected.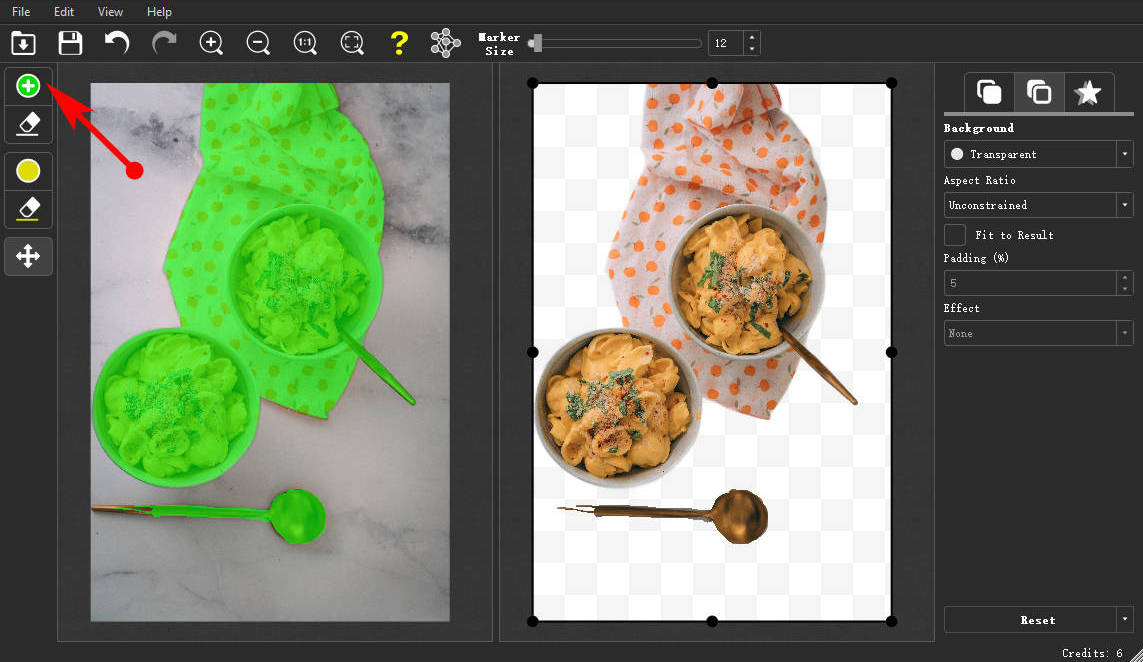
- Click the first option from the drop-down menu in the right panel, then you can make background transparent in GIMP. Besides, you can change the background patterns as well.
After you get a good background, go to File > Save as in the top menu to export the photo with a transparent background or click the Save icon to get it.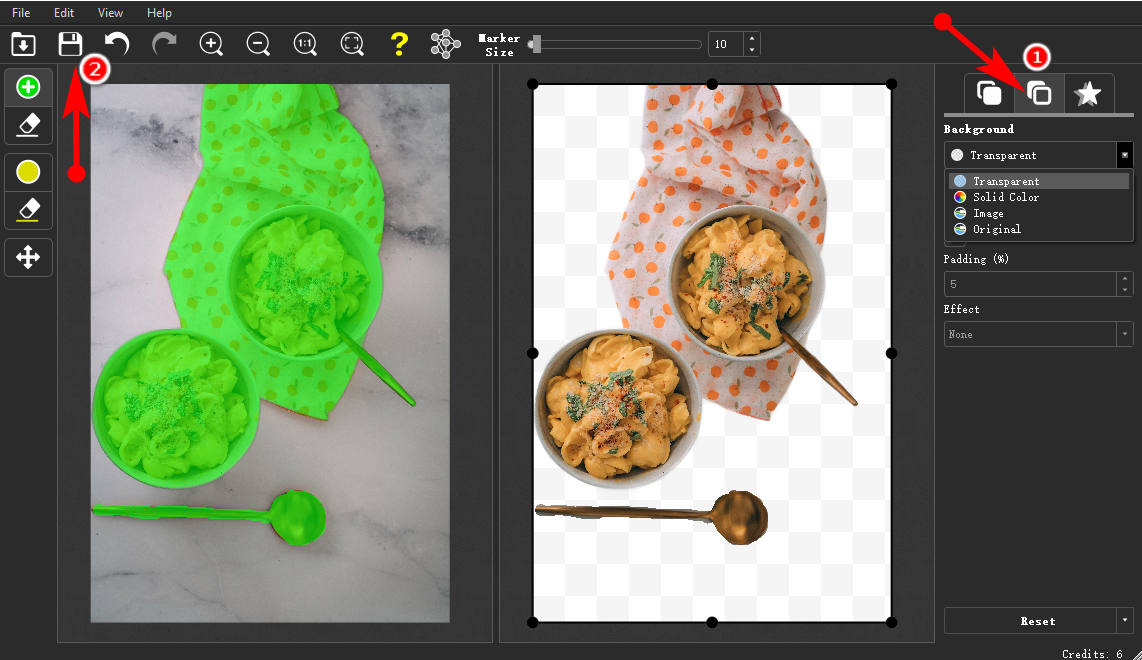
Tip: You can also directly get the background removal service on its official website, and the online tool doesn’t cost money yet.
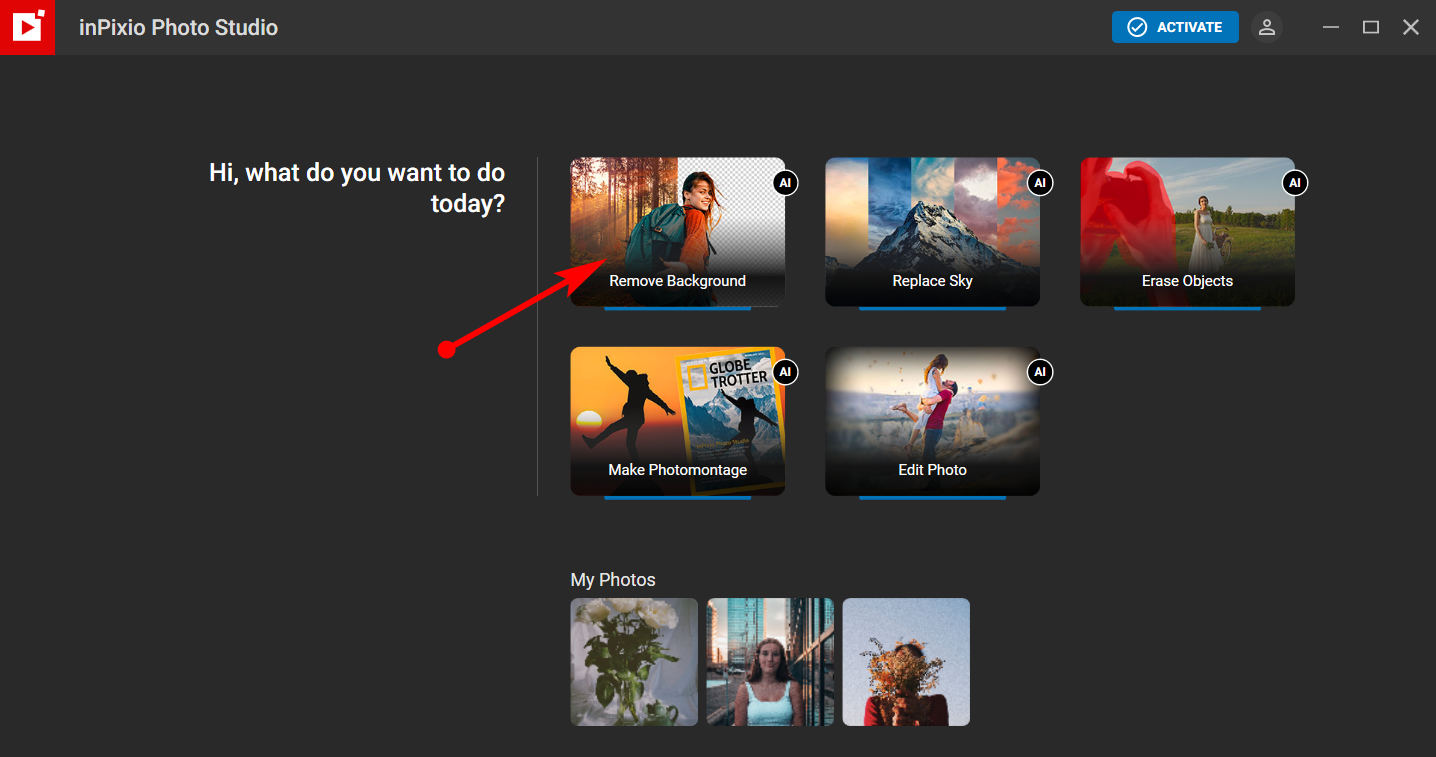
5. inPixio
inPixio is a straightforward photo editing platform. Its removal service is targeted so you can use the proper function to make white background transparent in one click.
Let’s see how the Remove Background tool works.
- Open inPixio, and you can see an intuitive interface. There are several editing tools; you can enter the Remove Background section.
- Once you click the Remove Background box, the photo folder comes out, and you need to decide a picture to be rectified. And the tool automatically deletes the background and returns a processed photo with a white and gray checkerboard indicating a transparent background.
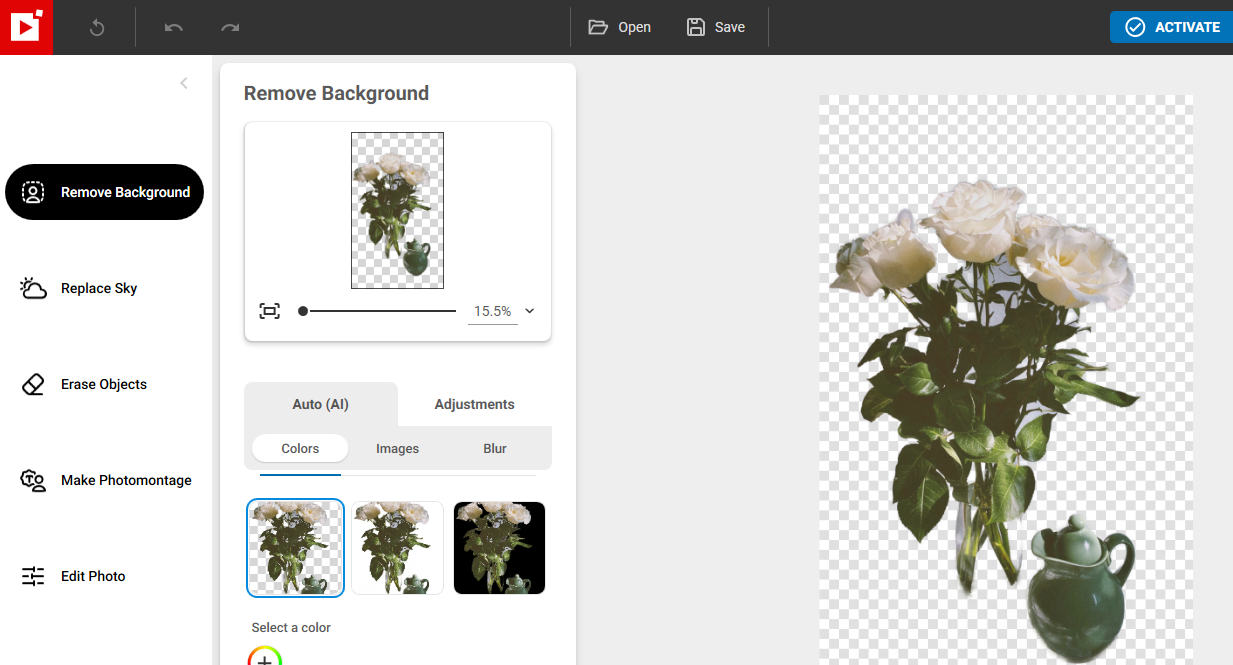
- Click the Save option to download the processed photo if you don’t need other adjustments.
Conclusion
In a nutshell, GIMP remove background effectively and precisely with some fantastic tools, such as the Fuzzy Select Tool, the Free Select tool, and the Path Tool. You can use these tools to work like a pro.
But using GIMP to remove background may be a little challenging and time-consuming for an amateur photo editor.
Therefore, you can resort to some advanced transparent background makers like PhotoScissors and inPixio to make a transparent image. Backed up by AI power, these background erasers can automatically delete the background.
FAQ
1. How does GIMP remove the background with fuzzy select?
The Fuzzy Select Tool is designed to select areas of the current layer or image based on color similarity.You could use the Fuzzy Select Tool to select the background segment in the same color, and press the Delete key on your keyboard to remove it. Repeat this step until the background is cleared up.
2. Why can't I add an alpha channel in GIMP?
Because the layer already has an alpha channel and the Add Alpha Channel option would be gray, you can’t add an alpha channel. You could delete the alpha channel and add a new one.