Apple products are arguably the best combination of sense and simplicity. The primary reason you cannot resist the appeal of Apple devices is its internal ecosystem, where you can find a wide array of local programs perfectly suited for OS systems. These baked-in tools take care of your needs to create funny stuff and solve problems.
Take Mac for example; it provides the most fluid video-making platform. But it can also deal with video compression and conversion.
This article aims to inform you how to compress video on Mac with its own software. But other better alternatives may tempt you to step out of Apple’s comfort zone.
Most Effective Way to Compress Video on Mac
It cannot be denied that Mac has a few solutions to make video smaller. However, professional video compressors are more adept in compressing videos to meet certain standards, e.g., compressing video to less than 20 MB for email. Whether it is for sharing or work-related purposes, a reliable third-party program is backed up by a support team and offers you a smoother solution to reduce video size.
BeeConverter
BeeConverter is a lightweight video compressor for Mac. Its total file size is around 200 MB, and it doesn’t bundle its download packages with other software. To get you inducted into the skills of video compression quickly, BeeConverter arranges its interface in a very user-friendly way and removes all the incomprehensible jargons. Directly compressing a video is an ideal solution, but BeeConverter can do more than that:
⭐ Download smaller videos from 1000+ sites by choosing lower quality
⭐ Reduce video file size by chopping a long video
⭐ Compress multiple videos simultaneously
⭐ Compress MP4 files and more 300+ file formats effortlessly on Mac
⭐ Ensure the minimal quality loss to the original video
Below is a picture-aided tutorial to teach you how to compress video on Mac step by step. BeeConverter supports both Mac and Windows and both systems share the same compression procedures.
Video Converter
Convert videos to MP4, MOV, MP3, GIF, and more
- for Windows 11/10/8
- for Mac OS X 14+
- for Android
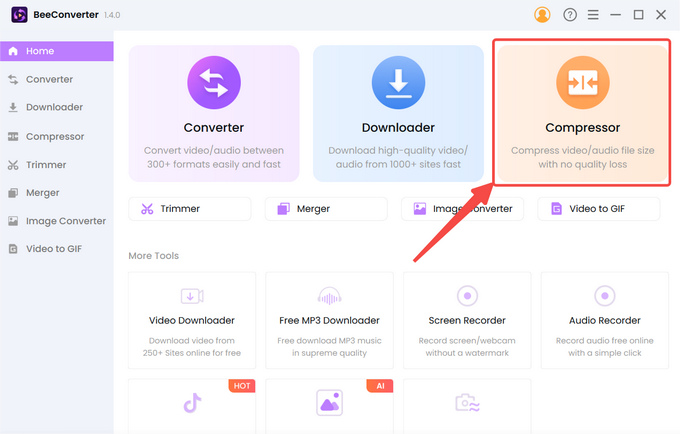
- Choose the video compressor tool on the Home tab.
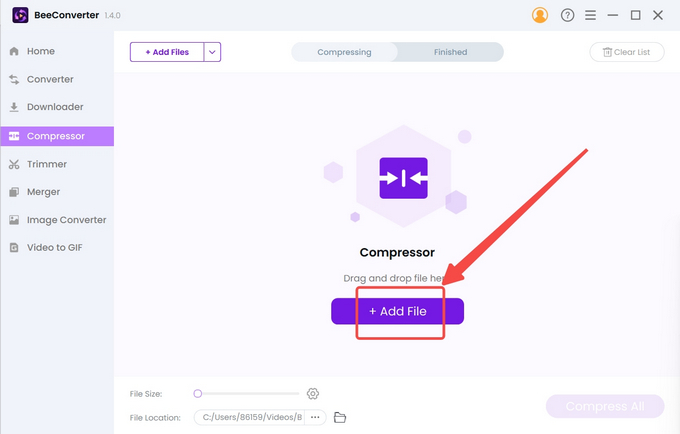
- Click “+ Add File” to import your video.
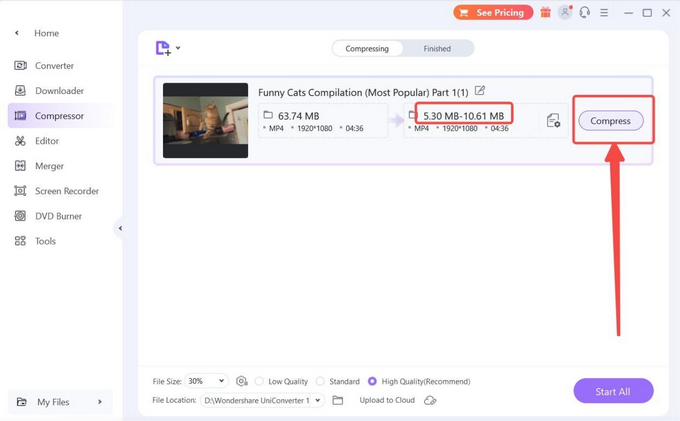
- Select the target size, quality, and output format, and hit “OK” to confirm the settings.
- Tap the Compress button to start.
How to Compress Video on Mac Using Inbuilt Software
You must be familiar with iMovie and QuickTime Player, two free video compressors for Mac. After going through many iterations and capturing time after time of media attention, these programs have their best presence in Mac, if not perfect. They both enable video compression on Mac. But there is one drawback to note: you make video smaller by decreasing the resolution so there is no assurance that the target size can meet your demand. If you just want to downsize video to save some space, then they are enough to get things done.
iMovie
iMovie, a cousin of QuickTime, mainly handles the video editing. Video compression won’t be your first impression of this Apple-designed application. But it indeed doubles as a video shrinker, though in an unnoticeable way. If you want to compress a long video, you need to prepare for the sudden crash of your PC. After all, iMovie was not born out of the idea of being a video compressor.
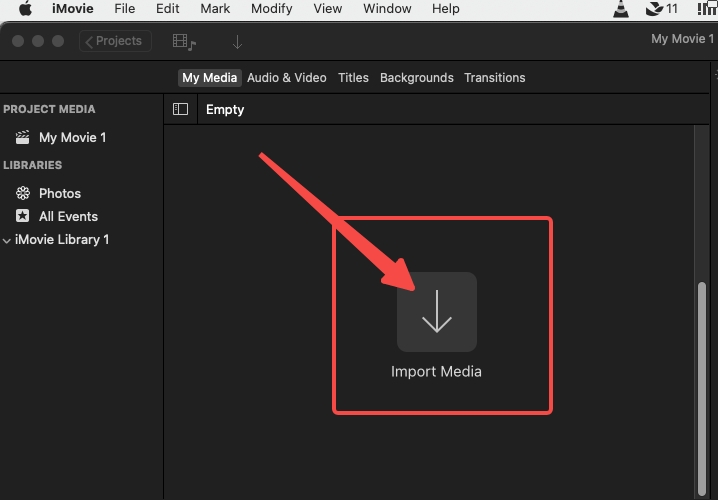
- Launch iMovie and upload the local file by clicking the “Import Media” icon.
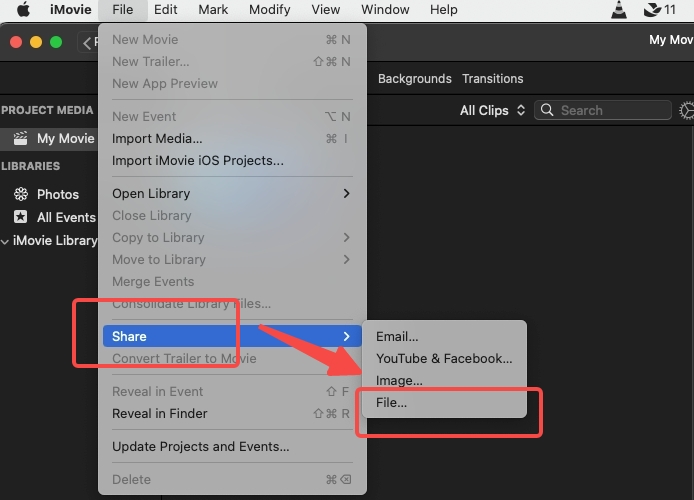
- Open the File menu and click “Share” where you can find “File…”.
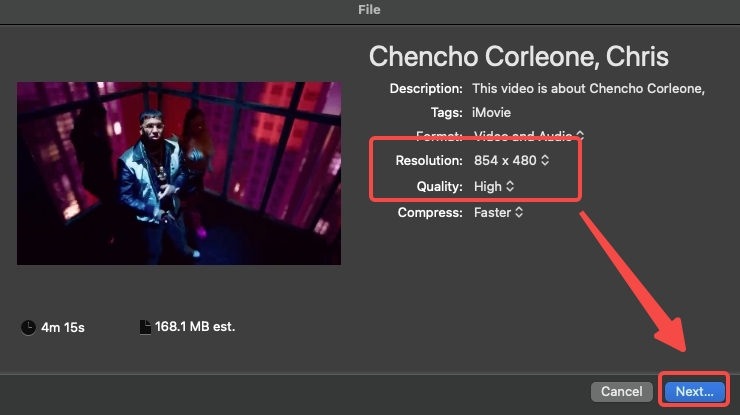
- Enter “Share File” and adjust the resolution & quality to go to the Next step.
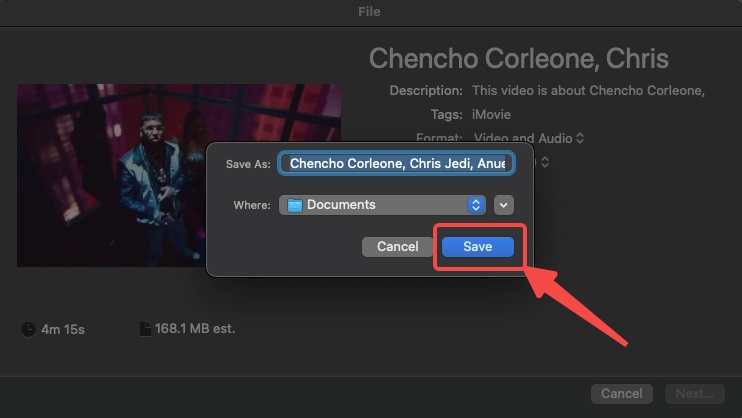
- Set your output path and save the file.
QuickTime Player
QuickTime Player complements iMovie by allowing users to playback the videos. You can deem the free video compression on QuickTime as a serendipitous discovery. The working mechanism of QuickTime to compress video file size resembles that of iMovie. They can both condense video by lowering quality to 720P or 480P.
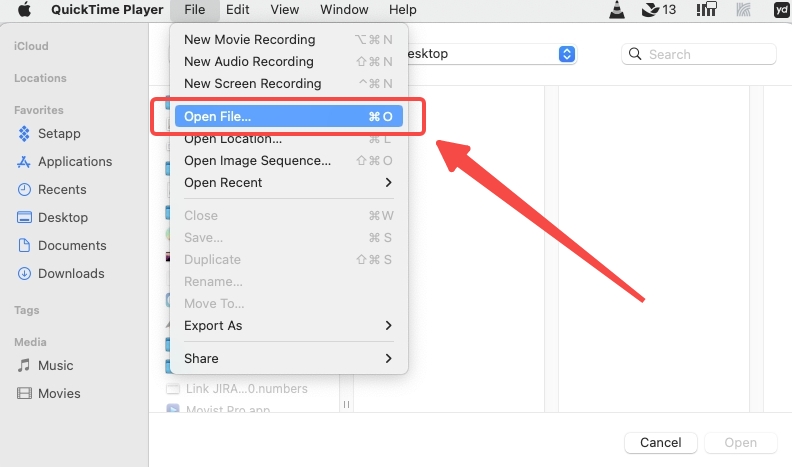
- Launch QuickTime and click “Open File…” to upload the video.
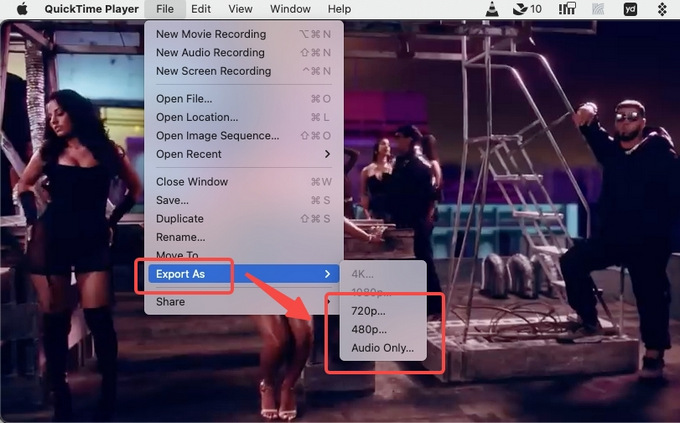
- Open the file menu and click “Export As”. Then you choose a target video quality.
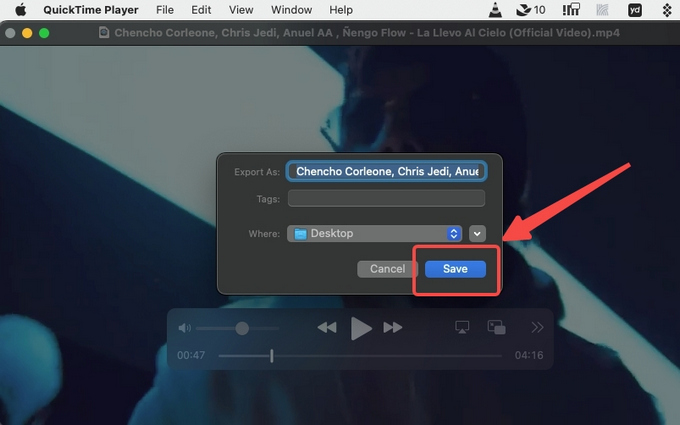
- Save the output path and get ready for video compression.
How to Compress Video on Mac via Free Video Compressor
After learning from the potential inconvenience caused by inbuilt programs, you may want to find other Mac video compressor candidates that are also free. This section will present you with an open-source tool and a free online video compressor.
VLC
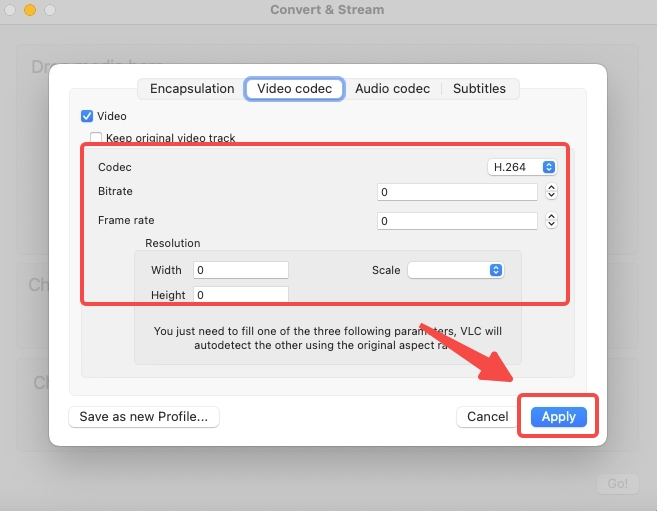
VLC is compatible with Mac and Windows, though it provides a slightly different interface for Mac. Being known for its being open source, VLC may get you stumped by its complicated language and procedures. This video compressor is recommended for experienced users with the prior knowledge of the jargon, like “codec.”
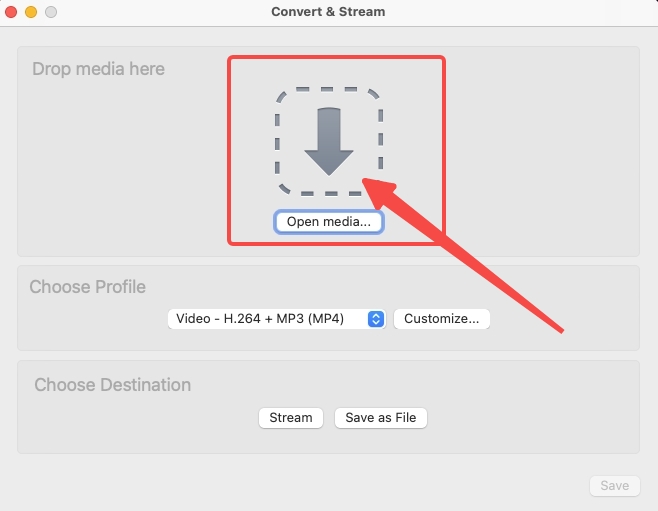
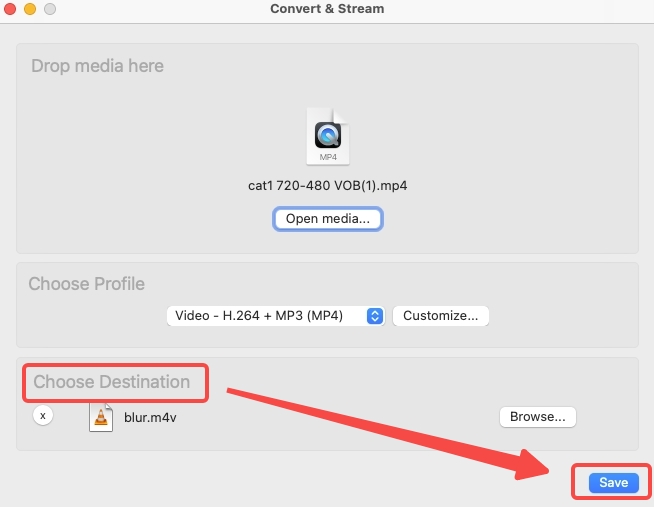
- Enter “Convert/Stream” on VLC’s File menu.

- Import the video to VLC by clicking “Open media…”.
- Go to the “Customize…” settings and alter the codec, bitrate, and frame rate.
- Click “Save” after you set the output destination.
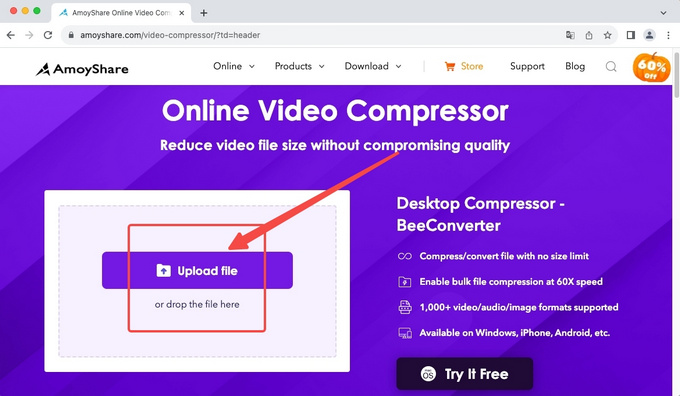
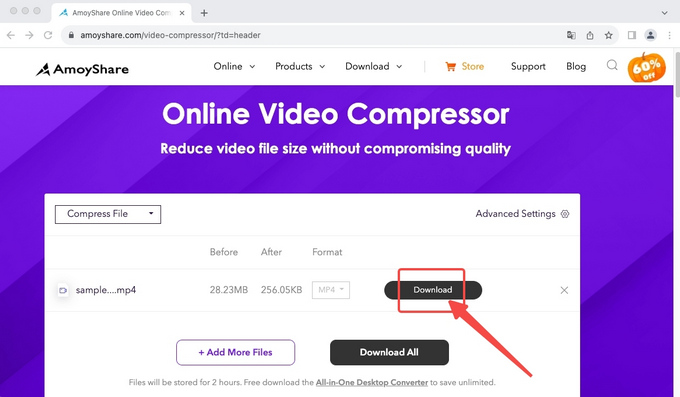
AmoyShare Online Video Compressor
AmoyShare is one of the best free online video compressors easily accessible. The cloud-based services it provides save you a lot of storage space. In addition, it’s clean and safe.
- Upload the video file to AmoyShare site.
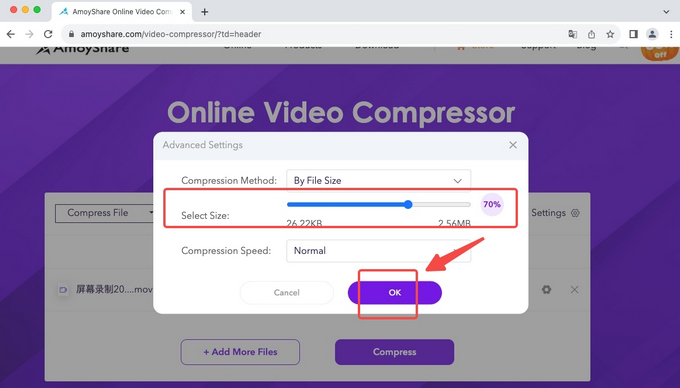
- Move the slider to decide the target size and click “OK” to confirm the compression setting.
- Hit Download button to download the compressed result.
Conclusion
Free video compressors abound within Mac and beyond. iMovie, QuickTime, and VLC mentioned above all have their own core businesses, with video compression as a sideline. Sometimes, you need to compress video below a specific number (20 MB or 25 MB for email); in that case, these tools won’t be the top choice. Another question will emerge over how to compress video on Mac when the video is too large. Then you can turn to BeeConverter for a more effective solution.
Fequently Asked Questions
How can I compress MP4 videos on Mac?
You may have encountered incompatible MP4 files, which iMovie or QuickTime rejects. Converting and Compressing MP4 in that situation is tricky. But if you download BeeConverter, you can avoid the incompatibility problem. What’s more, you can compress video file size while converting MOV to MP4.
What is the best video compressor for Mac?
BeeConverter can be one of the top options to reduce video file size. Regarding long videos, inbuilt programs on Mac and some free alternatives find it hard to handle. In contrast, BeeConverter is armed with a hardware acceleration engine to cut your waiting time.
How to compress video files on Mac without losing quality?
When the file size is reduced, the details will be lost. Therefore, it’s hard to ensure 100% loss-free compression. However, BeeConverter can minimize the damage to your video to the lowest level.