Minecraft, commonly referred to as a “sandbox game,” is a computer game developed by the Swedish video game company Mojang Studios.
After many early private testing versions, it was initially publicly disclosed in May 2009 before being completely released in November 2011.
Minecraft has subsequently been adapted to numerous platforms and became the best-selling video game of all time, having sold over 200 million copies and having 126 million monthly active users as of today. Given such figures, it’s not surprising that Minecraft has become one of the world’s most popular video games recently.
As an outcome of its popularity, many individuals love playing Minecraft and exploring the game, seeking materials, and avoiding creepers.
Sometimes, you may wish to record and share your winning successes and joy in the game with your pals. But, of course, you need excellent Minecraft recorder software to accomplish so.
Fortunately, you’ve arrived at the right page. This post will teach you how to record Minecraft on your computer using several Minecraft screen recorders.
Let’s start digging to learn more about these tools!
Navigation of Content:
Part I: Best Way to Record Minecraft on Mac & PC
User Friendliness: This tool suits extensive demands for capturing screen activities with audio, gameplay, streaming videos, music, lectures, meetings, and other moments.
Available Output Format: MP4, WMV, MOV, F4V, TS, AVI, and Gif.
To effortlessly record Minecraft gameplay, you’ll need a tool with the functionality required to capture app aspects of gameplay without using the computer’s resources. That being said, AmoyShare Screen Recorder is a one-stop solution that meets these requirements.
The tool will allow you to smoothly record activities on your screen and edit your Minecraft Gameplay videos to perfection using the program’s comprehensive editing suite.
If you also wonder how to record Minecraft without lag, you can rely on this tool. This Minecraft recording software can record gameplays without taking up a huge CPU and memory, making it possible to capture HD gameplay smoothly, without any lag.
Key Features:
● It can help you capture your favourite gameplay for up to 4K UHD resolution.
● This program includes a separate audio recorder to capture audio tracks from the system, such as streaming music, audio, and BGM.
● With this tool, you can record your screen, webcam, gameplays, and audio as long as you need without any length restriction.
● It also features a task scheduler where you can schedule tasks to record your screen at a predetermined time.
To learn how to record Minecraft with the help of this tool, kindly follow the detailed walkthroughs below.
Screen Recorder
Capture HD video and audio instantly
- for Windows 11/10/8
- for Mac OS X 14+
- for Android
- Install the Minecraft Screen Recorder
- To start with, grab the set-up file of the tool by clicking the Free Download buttons provided above. Next, make sure to download the set-up file based on what computer OS you’re using. Once downloaded, follow all the instructions from the wizard prompt to install the program properly. Then, launch the tool afterwards and familiarize yourself with its buttons and interface.
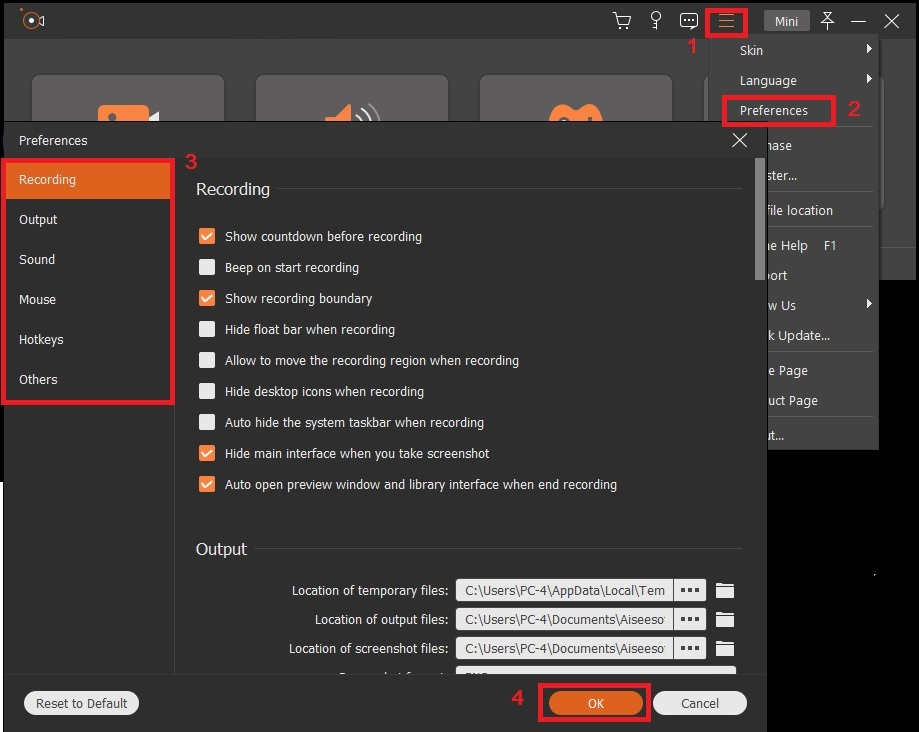
- Customize the output settings
- Next, configure the settings of the tool based on your choices. To do so, navigate to the “Preferences” by clicking on the three-horizontal menu icon from the tool’s interface. A window will show up, and from here, you can access all the tool’s settings, including the Output, Sound, Mouse, Hotkeys, and others. Once done configuring, don’t forget to hit the “OK” button to save the changes you made.
- Next, configure the settings of the tool based on your choices. To do so, navigate to the “Preferences” by clicking on the three-horizontal menu icon from the tool’s interface. A window will show up, and from here, you can access all the tool’s settings, including the Output, Sound, Mouse, Hotkeys, and others. Once done configuring, don’t forget to hit the “OK” button to save the changes you made.
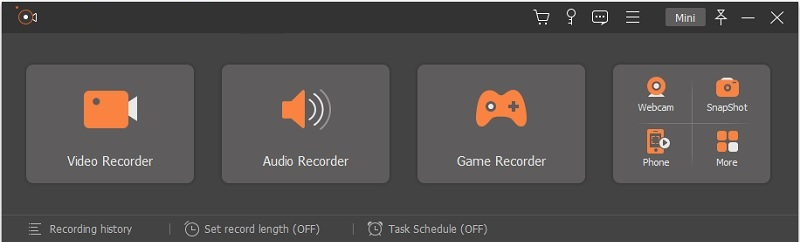
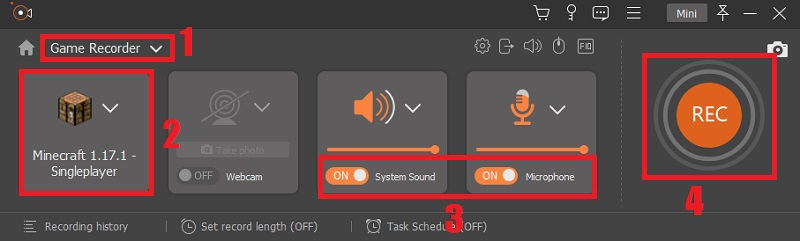
- Start recording Minecraft gameplay
- Now, click on the “Game Recorder” option from the Minecraft screen recorder. After that, select your Minecraft gameplay as the window to be recorded by the tool. Then, make sure to toggle on the “System Sound” or even the “Microphone” to record both background music and your voice from the game. Once done, start recording by hitting the “REC” button.
- Now, click on the “Game Recorder” option from the Minecraft screen recorder. After that, select your Minecraft gameplay as the window to be recorded by the tool. Then, make sure to toggle on the “System Sound” or even the “Microphone” to record both background music and your voice from the game. Once done, start recording by hitting the “REC” button.
- Save the Recorded Minecraft Gameplay
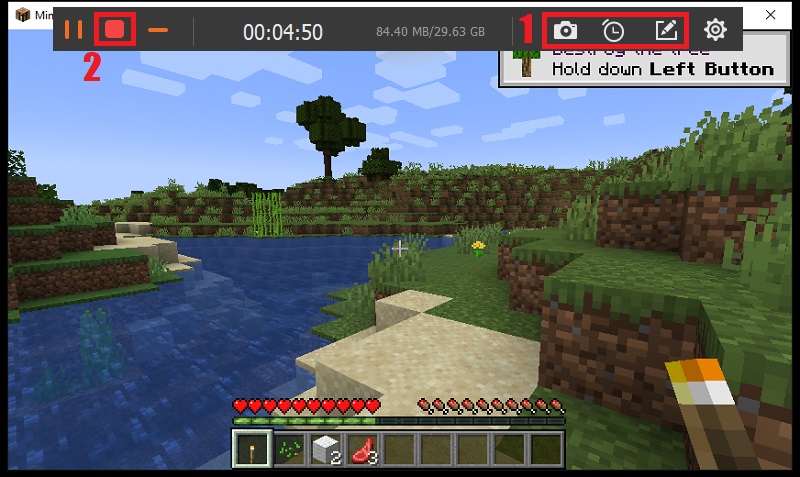
- You will know when the recording starts after the three-second countdown. Then, a toolbar will appear while the Minecraft gameplay is being recorded. With it, you can pause, take screenshots, and add annotations like texts, lines, arrows, and more to make the recorded gameplay interactive. When you are done with your game, you can click the “Stop” button from the floating toolbar.
- You will know when the recording starts after the three-second countdown. Then, a toolbar will appear while the Minecraft gameplay is being recorded. With it, you can pause, take screenshots, and add annotations like texts, lines, arrows, and more to make the recorded gameplay interactive. When you are done with your game, you can click the “Stop” button from the floating toolbar.
- Play the recorded Minecraft gameplay
- Once you have clicked the stop button from the toolbar, the tool will allow you to preview the recorded Minecraft gameplay. If you want to see the preview, click the “Play” button. Then, proceed on saving it by clicking the “Save” button. Besides that, you can even cut the beginning and the end of the recording directly.

- Once you have clicked the stop button from the toolbar, the tool will allow you to preview the recorded Minecraft gameplay. If you want to see the preview, click the “Play” button. Then, proceed on saving it by clicking the “Save” button. Besides that, you can even cut the beginning and the end of the recording directly.
Part II: Steps on How to Record Minecraft with OBS
Best Feature: The tool has a modular ‘Dock’ feature that allows you to rearrange the layout precisely as you like. You can even pop out each Dock to its window.
OS Compatibility: Windows, Mac, And Linux.
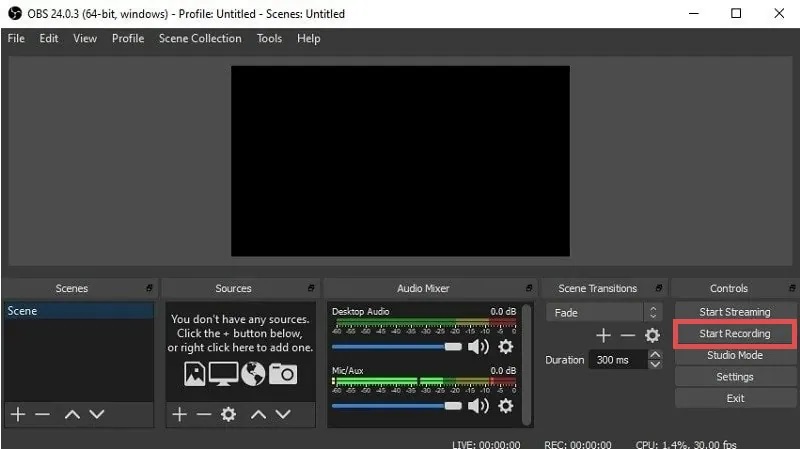
Another Minecraft recording software that you can use is OBS. Open Broadcaster Software, also known as OBS, is a free and open-source program for live broadcasting and video recording. Since it is widely known to record gameplay, it is one of the best choices to record Minecraft. Aside from recording games, it can also record various screen activities such as movies, live broadcasts, online meetings, and more. In addition, OBS has a high level of performance when it comes to real-time video capture. With this tool, you are capable of creating scenes from a variety of sources, including photos, text, window captures, and many more, to make high-quality recordings. Moreover, the tool allows you to customize shortcut keys to quickly navigate between scenes and start and stop recording.
Here are the simple walkthroughs on how to use OBS to record Minecraft gameplay.
- Install the OBS screen recorder tool on your computer and then launch it.
- Modify the hotkeys based on your preference for quick start and stop capabilities.
- To add screen and images to your recordings, right-click the “Source Area” and choose the “Add > Game Capture” option from the list.
- Launch Minecraft and choose it from the application list. Then, start the game in full-screen mode.
- You can use the “Start Recording” button to begin recording. And when you’re done, you can click on it again to stop the recording process.
Part III: How to Record Minecraft with Xbox Game Bar
Best Feature: The preinstall Minecraft recording software on Windows enables you to record gameplay without hassle.
OS Compatibility: Windows.
The Xbox Game Bar is integrated into Windows 10 and works with most PC games. You can use it to record videos and take screenshots while playing PC games like Minecraft. However, before you can use it and learn how to record Minecraft on Windows 10, you need to make sure the Xbox Game Bar has been installed on your computer.
User guide on how to record Minecraft on Xbox:
- To open Xbox Game Bar while you’re playing Minecraft, hit the Windows logo key + G on your keyboard.
- Next, press the Xbox button if you have an Xbox 360 or Xbox One controller connected to your PC.
- Begin the recording process by clicking the record button on the Xbox Game Bar. While it’s recording, you’ll see a timer located at the top right corner of your window.
- Once done playing, click on the blue stop button to end the recording session of the game. All videos recorded by Windows are saved to your account as MP4 files. Each one is labelled with the name of the game and the time you captured it.

Part IV: Two Other Amazing Tools to Record Minecraft
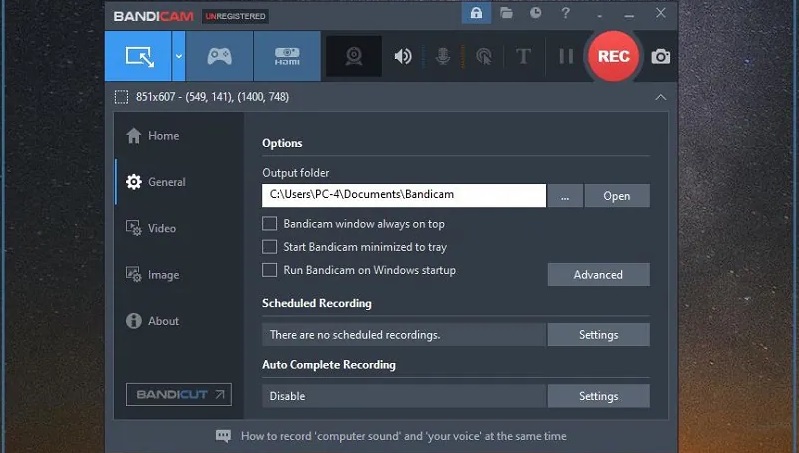
1. Bandicam
Best Feature: Bandicam is a high-performance game recorder that uses hardware acceleration to record the newest high-quality gameplays demanding up to 4K UHD and 480 FPS resolution.
OS Compatibility: Windows.
Bandicam is a lightweight Windows screen recorder that can capture your Minecraft gameplays as a high-quality video. This program also allows you to record a specific region of a PC screen or capture a game that employs DirectX/OpenGL/Vulkan graphics technology.
Bandicam can perform a high compression ratio screen capture while retaining the video quality of the original work. Aside from that, the tool provides performance considerably better than other Minecraft recording software. In addition, Bandicam has a feature where you can capture gameplay with the live face and voice of the player using a webcam and a mic. Plus, you can use the chroma-key function to make the background translucent and save the video for editing.
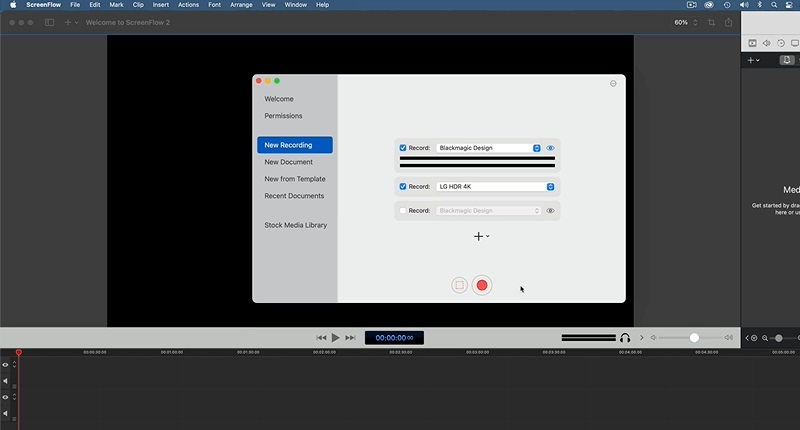
2. ScreenFlow
Best Feature: ScreenFlow is well-known not just for its video capturing features but also for its editing capabilities. The editing tools enable you to apply professional effects to make visually appealing videos.
OS Compatibility: Mac and iOS devices.
ScreenFlow is another excellent Minecraft recorder software for Mac and iOS systems. It is a screen recorder and editing program that allows you to capture high-quality video of gaming, webinars, Webex, and other events. With this fantastic tool, you can do demonstrations, tutorials, presentations, and various other things.
What is even more likeable with ScreenFlow is that it includes everything you need to make stunning game casts, app previews, and software demos. In addition, you can use its pre-built styles and templates to make the editing process go more smoothly. Furthermore, the tool also allows you to record your gaming session, iOS screen, or computer screen, highlight areas of interest, add text, voice-overs, and effects, then share it on your preferred social networking platform.
Conclusion
When it comes to how to record Minecraft gameplay, go to try the tools mentioned above. In addition, there are many Minecraft recording software that you can use to record Minecraft gameplay.
However, among these tools, AmoyShare Screen Recorder is undoubtedly the best recording software for Minecraft on Windows and Mac. It has a lot of features that will surely make your recording experience better than ever.
Frequently Asked Questions
How to record Minecraft on PC with voice?
You can easily record Minecraft gameplay with voice with the help of Amoyshare Screen Recorder. Then, all you need to do is make sure to toggle on the button from the Microphone. In addition, the tool has an independent audio recorder for recording audio tracks from the system, such as streaming music, audio, and BGM. This specialized recorder can improve audio quality by eliminating background noise and increasing the volume of your voice. That's why it's effortless to record your voice using a microphone, even when you're playing games.
How do you record high-quality Minecraft videos?
With the use of the Amoyshare Screen Recorder, you can record high-quality videos smoothly without lag. To do that, navigate to the tool's Preferences like what we have mentioned in Step 2 above. Next, go to the Output section, and from here, select the highest possible video quality that the tool can support.