In today’s life, it is unavoidable that we need to screen recording. For example, if you are a teacher, you may need to make courseware; if you are a staff, you may need to make a how-to presentation for customers; if you are a blogger, you may need to create a tutorial for your fans. All the situations above require screen and audio recording at the same time.
Well, how to screen record on Mac with audio?
You can record screen and audio at the same time with Mac preinstalled tools – QuickTime Player & Screenshot Tool. Yet, they are not that ideal when you need to annotate and grab the viewer’s attention.
Hence, I will also add a feature-packed screen recorder to level up your screencast.
Please keep reading. I will walk you through how to record screen and audio at the same time on Mac.
Best Way to Record Screen on Mac with Audio
AmoyShare Screen Recorder, a well-designed and easy-to-use screen recording tool with comprehensive features, helps you capture any activity on Mac. You can use it to record video with audio at the same time. It is capable of capturing audio from internal and external devices. Besides that, you can also add annotations in the recording process. In this way, you can well catch the audience’s attention and express points clearly.
How to screen record with sound on Mac?
The steps are straight. First of all, please install AmoyShare Screen Recorder on your MacBook.
Screen Recorder
Capture HD video and audio instantly
- for Windows 11/10/8
- for Mac OS X 14+
- for Android
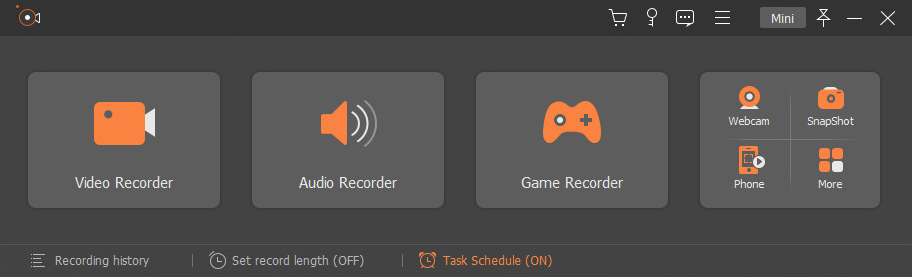
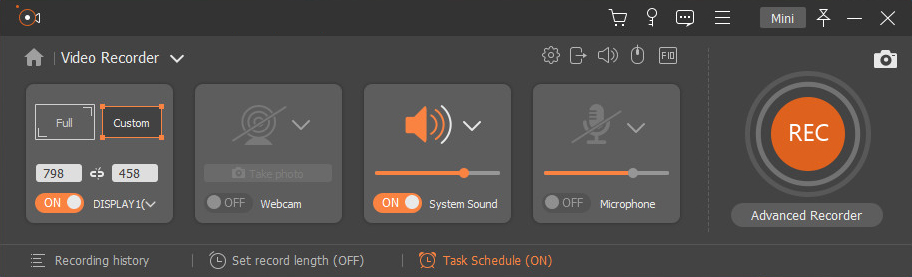
- Launch Screen Recorder and hit the Video Recorder to enter the screen recording interface. Then you can adjust the recording area and enable the system sound and microphone. Now hit the REC to start capturing the screen on your Mac.
- Add annotation in the recording process if necessary.
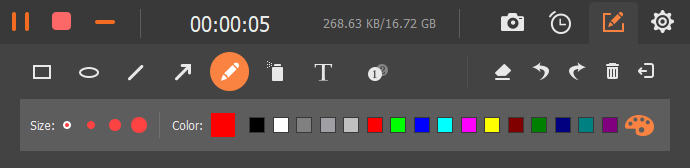
- Hit the red square icon to fishing the recording. Now preview, trim and save the screencast to your computer instantly.
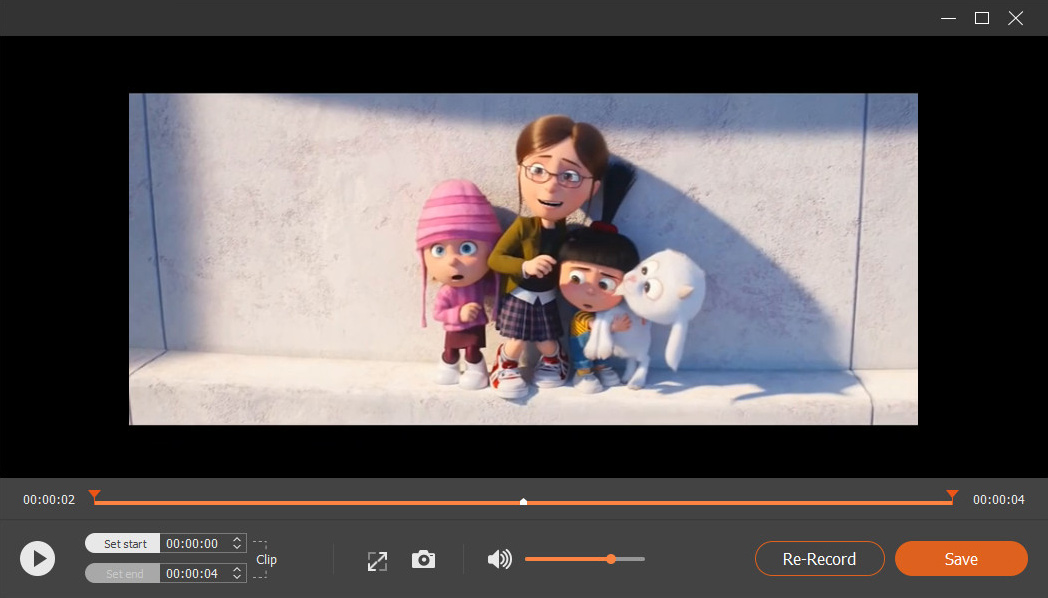
Besides recording screen with audio on Mac, this screen recorder features an independent audio recorder to capture sound from the system and microphone and save them in an audio file.
Give it a shot now!
QuickTime Screen Recording with Audio
QuickTime Player is another frequently-used tool to record screen and audio on Mac. It can save you the trouble of downloading any applications to your Mac.
How to record screen on Mac with audio via QuickTime Player? Please read on.
- Launch QuickTime Player on your Mac, click the File on the top menu bar and choose New Screen Recording.
- Click the down arrow icon next to the record button on the Screen Recording box. Then you can decide to record audio from the internal microphone or an external microphone from the drop-down menu.
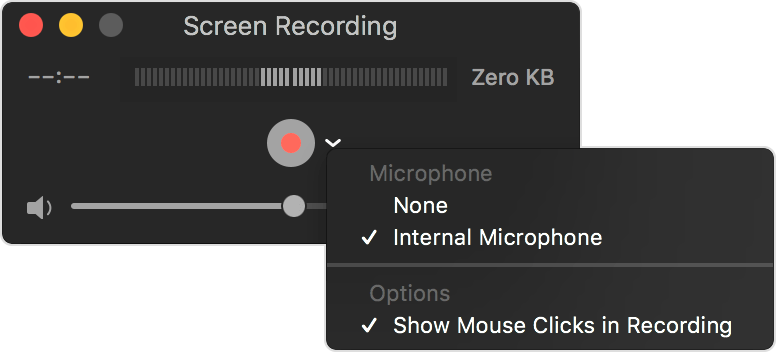
- After choosing the microphone, click the red record button to capture the Mac screen with sound.
- Click the small square icon in the menu bar to stop recording. Or you can press the hotkey Command-Control-Esc.
How to Screen Record on Mac with Audio via Screenshot Toolbar
Similar to QuickTime Player, the Screenshot toolbar is also preinstalled on your Mac. And the recording process is simple.
How to screen record on Mac with Screenshot toolbar
- Press Command + Shift + 5 together on your keyboard to open the Screenshot toolbar.
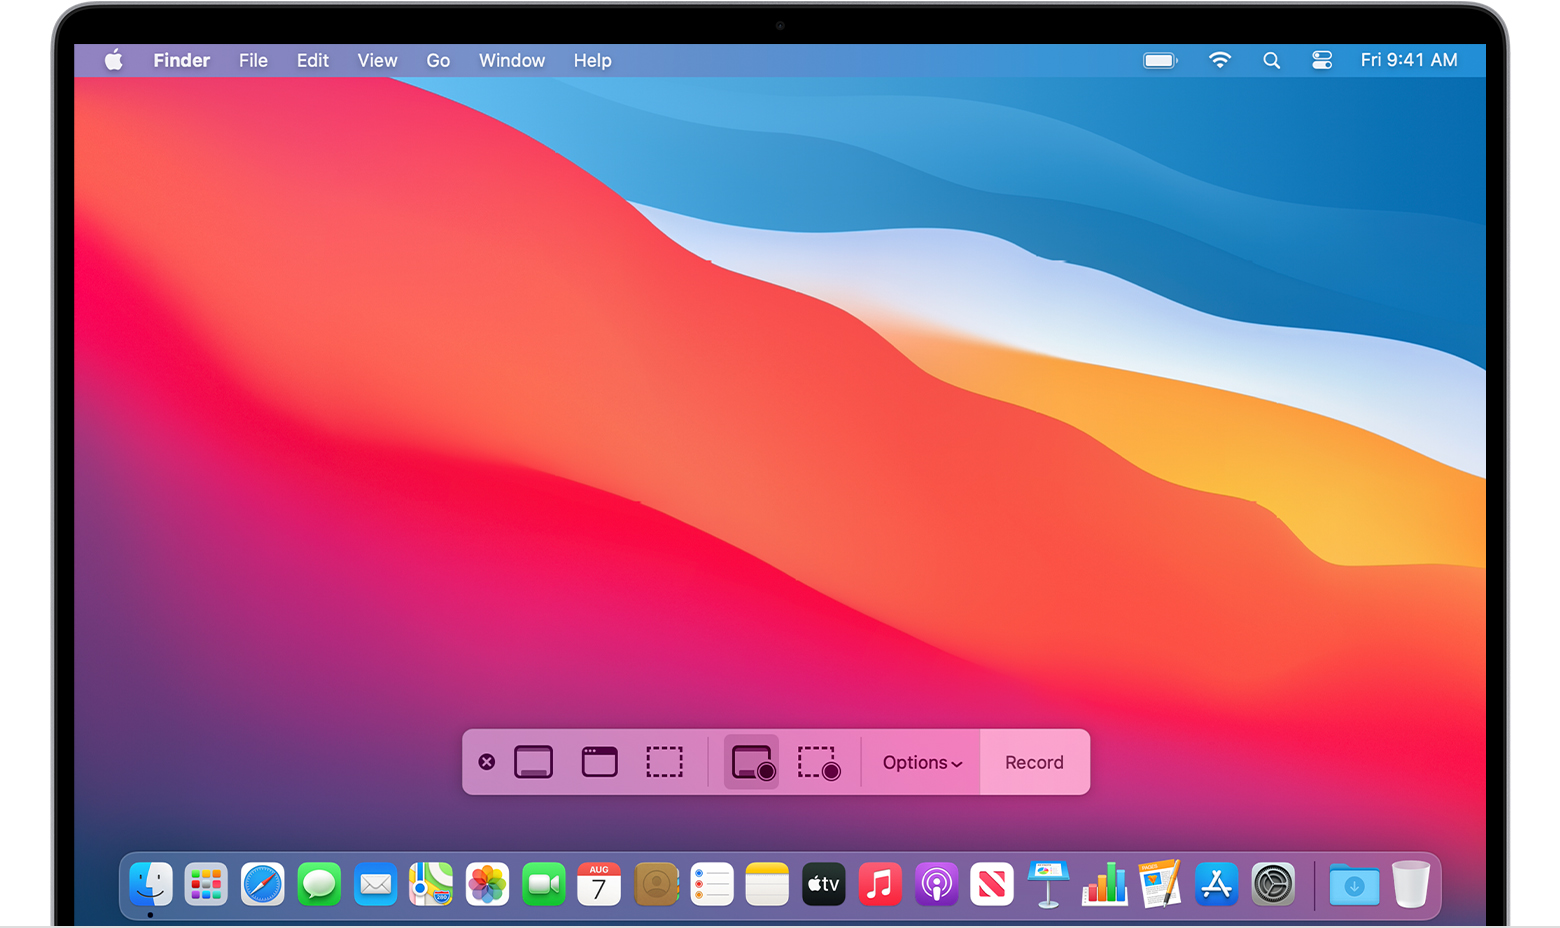
- Click the “Record Entire Screen” icon or “Record a selected portion of the screen” icon on the onscreen controls. After that, your pointer will change to a camera, and the recording starts.
- To stop recording, click the “Stop Recording” icon in the menu bar. Or you can press Command-Control-Esc to finish it.
After the recording finish, the screencast is saved automatically. Click the thumbnail to open it, and then you can trim or share it.
Conclusion
How to screen record on Mac with audio? Have you got the answer?
Both QuickTime Player and Screenshot toolbar let you screen record on Mac with audio. However, you can’t annotate or adjust output formats and quality with them.
If you need a highly customizable screen recorder to capture screen and audio at the same time, AmoyShare Screen Recorder is definitely your best choice. It offers a simple yet practical editing panel for you to add text, lines, shapes, steps in the recording process. That is a good way to draw your viewer’s attention.
Give it a shot now!
Screen Recorder
Capture HD video and audio instantly
- for Windows 11/10/8
- for Mac OS X 14+
- for Android
Frequently Asked Question
How to stop screen recording on Mac?
If you are using QuickTime Player to record screen and audio, the stop button shows at the middle of the top menu bar. Hit it, and you can finish the recording process instantly.
How to record Mac screen with an internal audio source?
Launch AmoyShare Screen Recorder on your Mac. Then hit the Video Recorder, set the recording area, and enable the system audio. Now hit the REC icon to start screen recording with internal audio.When you want to finish the recording, hit the red square icon to finish it. Congratulation!.