
You’ve got crucial audio recordings scattered across several separate files—an interview, a podcast segment, or a multi-part lecture.
Trying to play them back-to-back is clunky and unprofessional when you need one clean track.
The good news is, learning how to combine voice memos is easier than you think, and you don’t need complicated, expensive software to get a seamless result.
We’re diving straight into the best methods to merge voice memos so you can quickly create that single, polished file for sharing or archiving.
Part 1. The Easiest Ways to Merge Voice Memos
When you need to combine voice memos fast and effectively, you have three excellent routes: a quick online audio editor, a dedicated desktop application, or a powerful native Apple app. Choosing the right audio joiner depends on whether you prioritize speed, quality, or accessibility. Here are two top choices that simplify how to put voice memos together.
Quick Fix Method: Using Clideo (Web-Based)
For a very quick, one-off task with small file sizes, an online audio joiner like Clideo is a great way to handle how to merge voice memos on iPhone recordings without downloading any software at all. It runs entirely in your browser, making it accessible from any device.
How to Combine Voice Memos with Clideo:
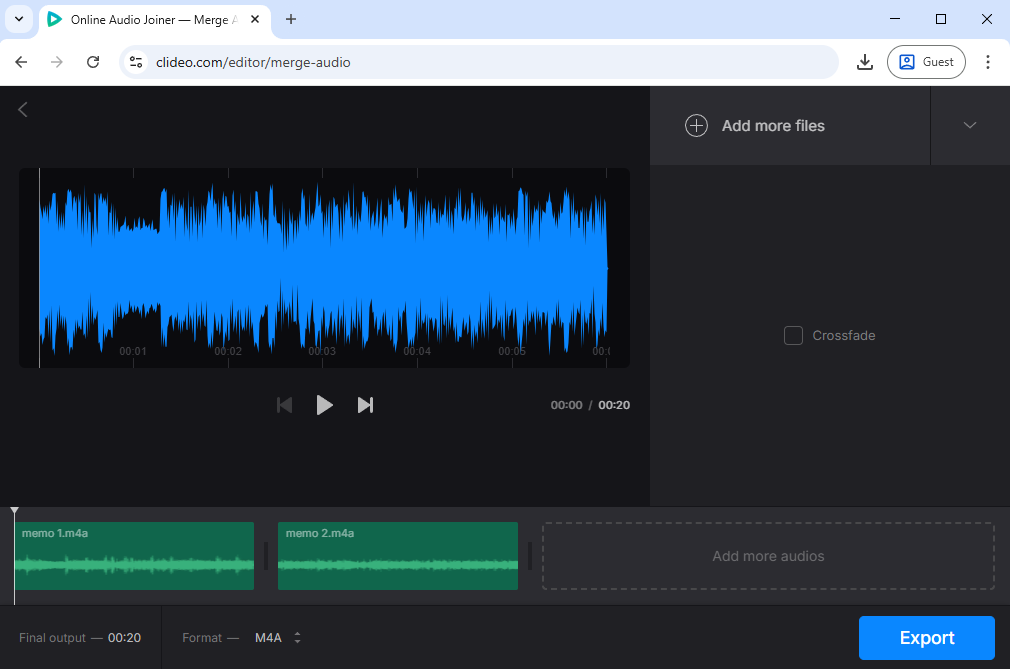
- Upload Your Files: Visit the Clideo website and select your voice memos from your device or cloud storage.
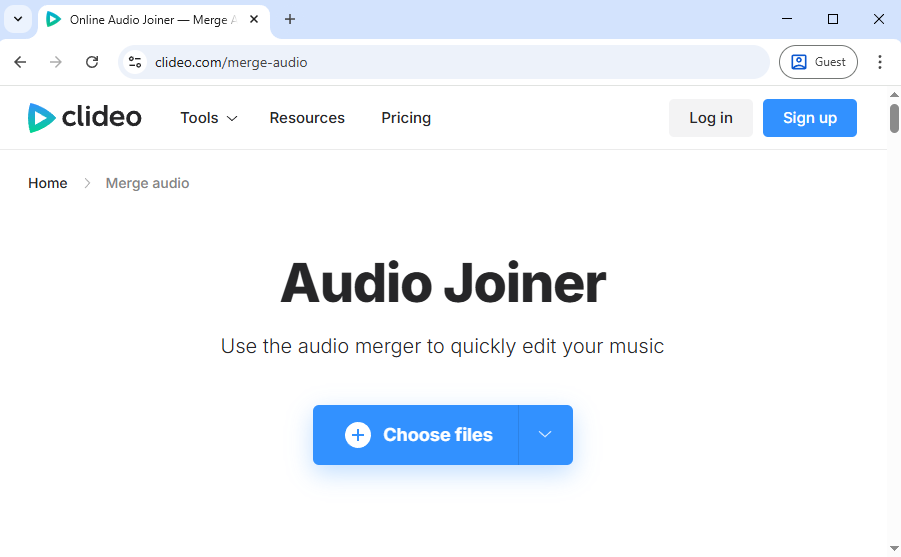
- Arrange and Merge: Once uploaded, you can easily drag and drop the files to ensure they are in the correct order.
- Export: After processing, export your single, combined file. This method is incredibly fast and convenient for standard M4A files from your Voice Memos app.
The Power User Method: TuneBer Audio Converter (Recommended)
If you prioritize audio quality, need to handle large files, and value privacy, a dedicated desktop solution is the definitive choice. A tool like TuneBer Audio Converter is designed to expertly handle how to combine two voice memos with professional features and zero quality loss.
Here’s why a desktop toolkit is the recommended route for important recordings:
Zero Quality Loss: Unlike online audio joiner tools that re-encode files, dedicated software preserves the original quality of your recordings, which is crucial for musical tracks or high-stakes interviews.
Intuitive Workspace: TuneBer offers a simple drag-and-drop interface, so combining recordings is straightforward without a steep learning curve.
Multiple Functions: Besides merging, you can also convert your audio to MP3, trim clips, and add fade-in/out effects to polish your content.
Now let’s install TuneBer Audio Converter on your Windows and Mac and start merging your audio recordings.
TuneBer
Convert, trim, and merge audio for perfect sound
- for Windows 11/10/8
- for Mac OS X 14+
- for Android
Here’s how to combine your voice memos with TuneBer:
- Transfer Files: Get the voice memos you wish to combine from your iPhone to your computer.
- Launch the Joiner: Open the TuneBer Audio Converter and select the Joiner tab.
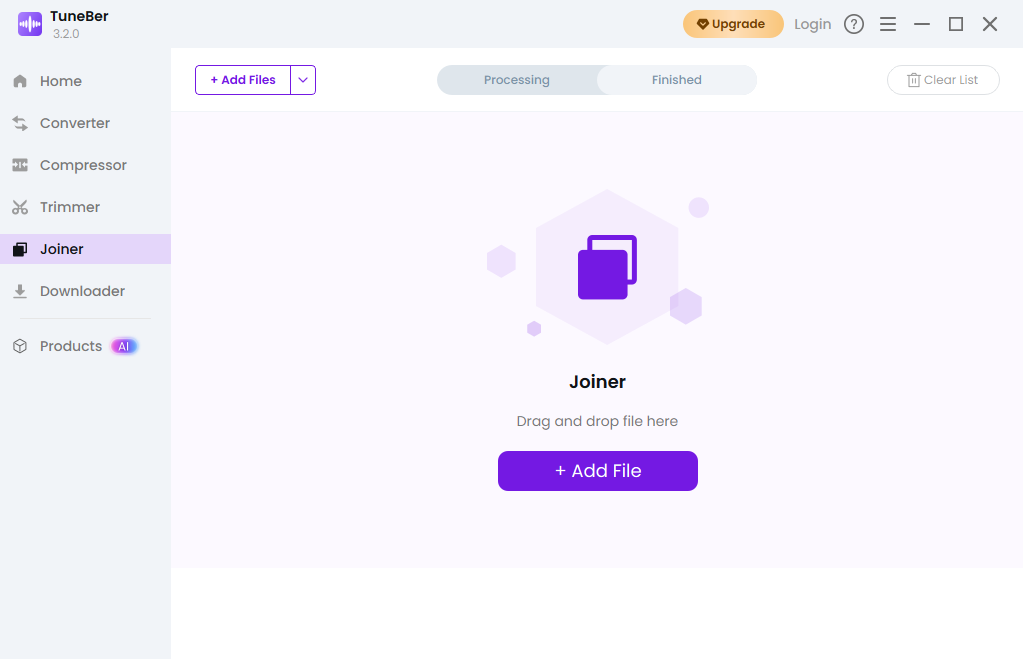
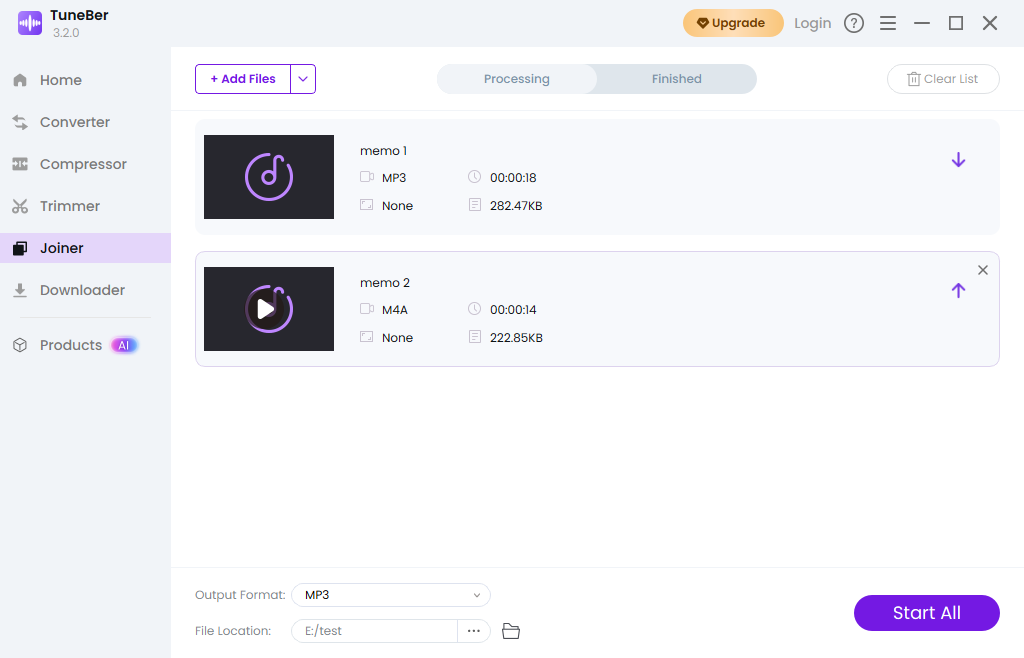
- Import and Arrange: Drag all your M4A voice memos into the window. Arrange them correctly with the arrow icon.
- Execute the Merge: Select your desired output format (M4A for quality, MP3 for universal use) and click Start All. You get a single, professional-quality file in seconds.
Part 2. The Free, Native Way: How to Combine Voice Memos on iPhone Using GarageBand
If you want a free, powerful, audio-specific solution that keeps your files local and private, your best bet is GarageBand. GarageBand is essentially a mini recording studio on your phone, offering full control over the timing and positioning of your audio clips. And it’s already installed on most modern Apple devices (or available as a free download.)
Step-by-Step for Combining Voice Memos:
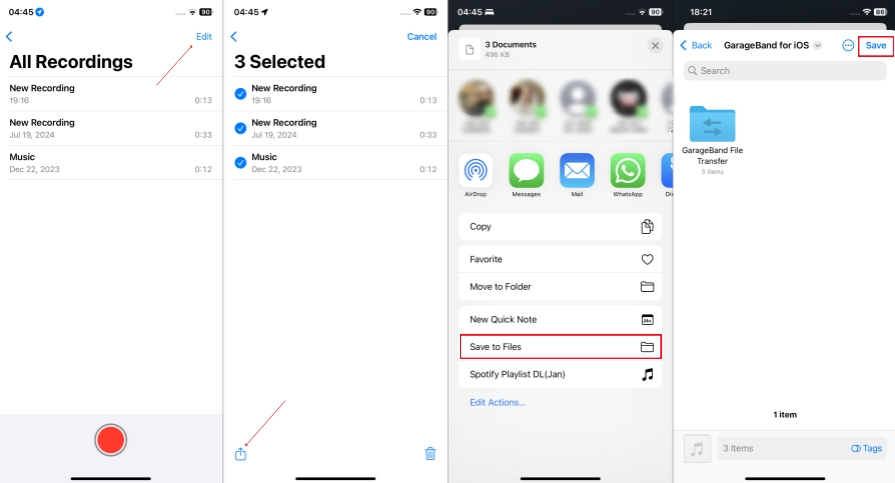
- Transfer Files to GarageBand. Open your Voice Memos app. Go to All Recordings and tap Edit to select the recordings you need. Once selected, tap Share, then choose Save to Files. Crucially, navigate to the GarageBand for iOS folder and save the selected voice memos into the GarageBand File Transfer folder. This step successfully prepares your files to share voice memos to GarageBand.
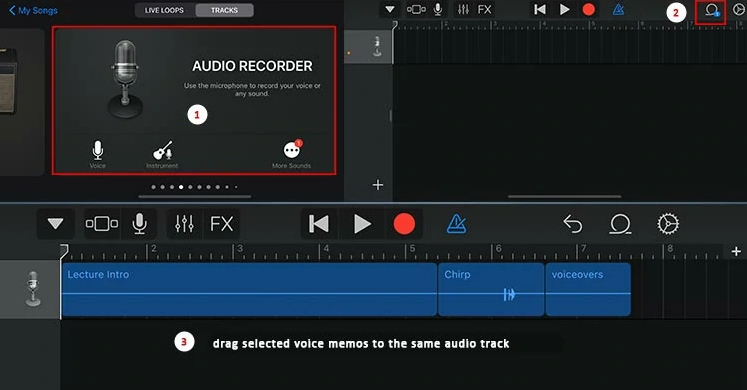
- Import to the Project. Now, launch GarageBand on your iPhone and start a new project using the Audio Recorder. In the audio editor view, tap the Loops icon (it looks like a coiled wire or lasso) in the upper right corner. From the Files tab, you can now drag and drop your exported voice memos onto separate or the same audio track in the timeline to add voice memos to GarageBand.
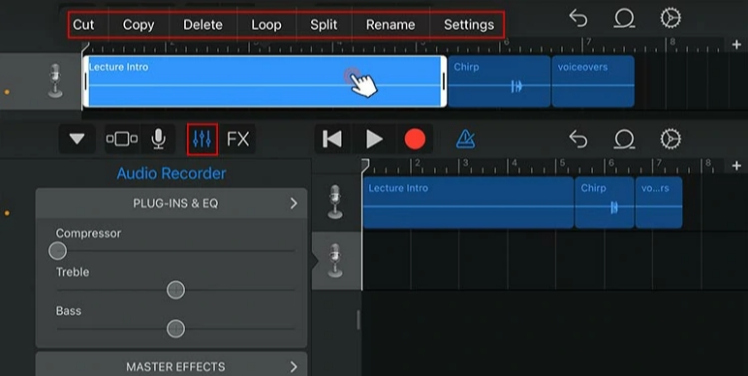
- Arrange and edit. This is where you make it seamless. Drag the clips to line them up end-to-end in the sequence you want. Tap on a voice memo segment to access editing tools—you can split it or drag the ends of the clip to trim any unwanted silences or noise, letting you cut and edit audio in GarageBand precisely. You can also adjust volume and apply basic effects here.
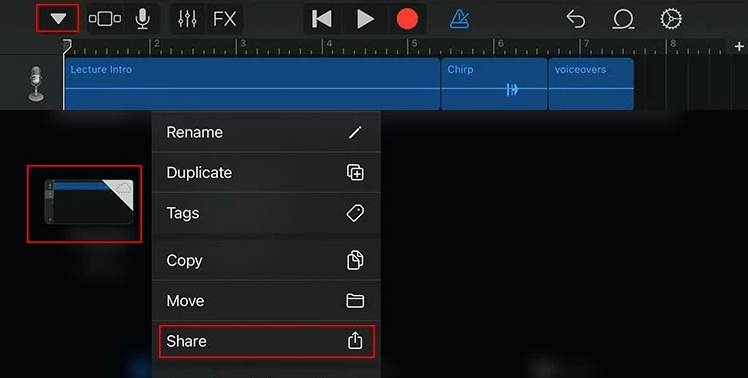
- Save and export the final track. After you’ve arranged and edited the entire track, tap the inverted triangle icon in the upper left corner and tap My Songs. Rename the file so you know which combined voice memo it is. To export the final product, tap Share, select Song, choose your audio quality, and tap Share again. Finally, select Open in… and then Save to Files to save your polished, merged recording outside of the GarageBand app.
Part 3. Choosing Your Tool: Speed, Privacy, and Quality Trade-offs
When deciding how to merge voice memos, it’s helpful to weigh the benefits and drawbacks of each method. Your choice depends entirely on the importance and sensitivity of your recordings.
| Method | Best For | Speed | Privacy/Security | Quality Control |
| Clideo (Online) | Very small, non-sensitive files. | Slow | Lowest (data leaves your device and is uploaded to a third-party server). | Audio can be recompressed. |
| GarageBand (Native) | iPhone/iPad users wanting a free, precise tool. | Medium (requires manual setup/export). | Highest (files remain on your local device only). | Excellent control over splicing and track positioning. |
| TuneBer (Desktop/Recommended) | Large files, professional use, and preserving original quality. | Fast (bulk processing, minimal upload time). | Highest (files are processed locally on your computer). | Total control; zero-quality-loss guarantee; precise trimming. |
If you are dealing with sensitive client notes or interviews, sticking to the TuneBer audio converter ensures your data remains private and your audio fidelity is preserved.
Install it right now.
TuneBer
Merge, trim, and convert audio easily
- for Windows 11/10/8
- for Mac OS X 14+
- for Android
Part 4. FAQs About Combining and Merging Voice Memos
Can you combine voice memos directly in the Voice Memos app?
Unfortunately, no. The native Voice Memos app is great for recording and simple trimming, but it lacks the necessary functionality to splice or merge voice memos together into a single track. You must export them to a dedicated editing application. Or you can resort to tools like TuneBer Audio Converter.
What is the best file format when I put two voice memos together?
To preserve the maximum quality after you merge voice memos, export the final combined file as M4A, as this is the native format. For better compatibility when sharing with non-Apple users, choose MP3.
How can I ensure my merged voice memo sounds seamless?
The key is to use a dedicated editor like GarageBand or TuneBer Audio Converter. Use the zoom function to carefully trim any silence, background noise, or awkward pauses right at the joint of the two clips. This makes your combined voice memo flow perfectly.