
An appropriate background will coordinate the subject and gives off an intoxicating atmosphere, while a disconcerting one will degrade the visual effect. That’s why we tend to remove the cluttered background from our selfies. On the other hand, some internet surfers are fond of cutting out a subject from a background and making it a funny sticker. The above cases tell us that removing the background is one of the most common needs in photo editing. Now the problem is which tool we can use to remove the background.
On a market that’s awash with background remover software for creatives, choosing the best option for your needs is becoming increasingly difficult, but the main competition comes down to these competing programs: Adobe Photoshop and Affinity Photo. How to make a background transparent in Photoshop has been elaborated on in many features. So, this post is going to discuss how to use Affinity Photo to remove background. Moreover, this post appends a bonus of using handy tools to remove background from photos in one click.
Let’s dive in.
CONTENTS
Affinity Photo Removes Background with Advanced Tools
Although Affinity Photo has developed into a competing alternative to Photoshop, offering many of the same tools and features to adjust and manipulate images.
Personally speaking, Affinity Photo is much more friendly for a beginner to learn.
Today, taking how to remove background from a photo as an example, this section walks you through three usable tools that Affinity Photo offers to remove background. Actually, removing the background is an unbelievably easy thing in Affinity Photo.
It’s time to learn how to remove background in Affinity Photo.
Complex Background – Using the Selection Brush Tool
The Selection Brush Tool in Affinity allows you to paint over the subject, and it will intelligently detect the edge between the subject and the background, grabbing the subject pixels exactly. Therefore, you can utilize the Selection Brush Tool to circle out a subject from a complex background.
Now, let’s start exploring how to remove the background in Affinity Photo with the Selection Brush Tool.
- Open an image to get started editing the photo.
Launch Affinity Photo on the desktop so that you can see the workplace. Next, to open an image in this tool, you should go to the File > Open option on the top menu bar.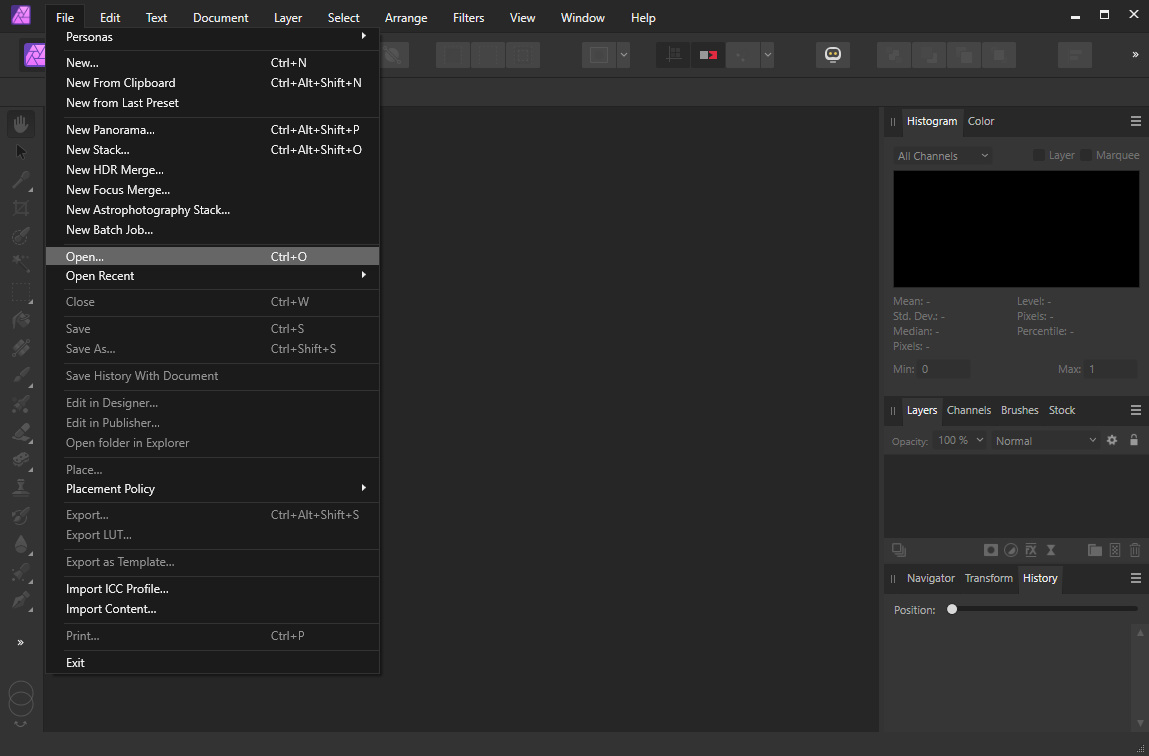
- Select the subject with the Selection Brush Tool.
There is an array of tools list on the left toolbar where you can find the Selection Brush Tool icon. After you activate it, go on to click and hold the mouse to drag over the area you need. A dotted line frame will surround the area you paint over.
If you incidentally cover some unnecessary backgrounds in the frame, use the Subtract tool on the Mode panel to exclude them from the frame.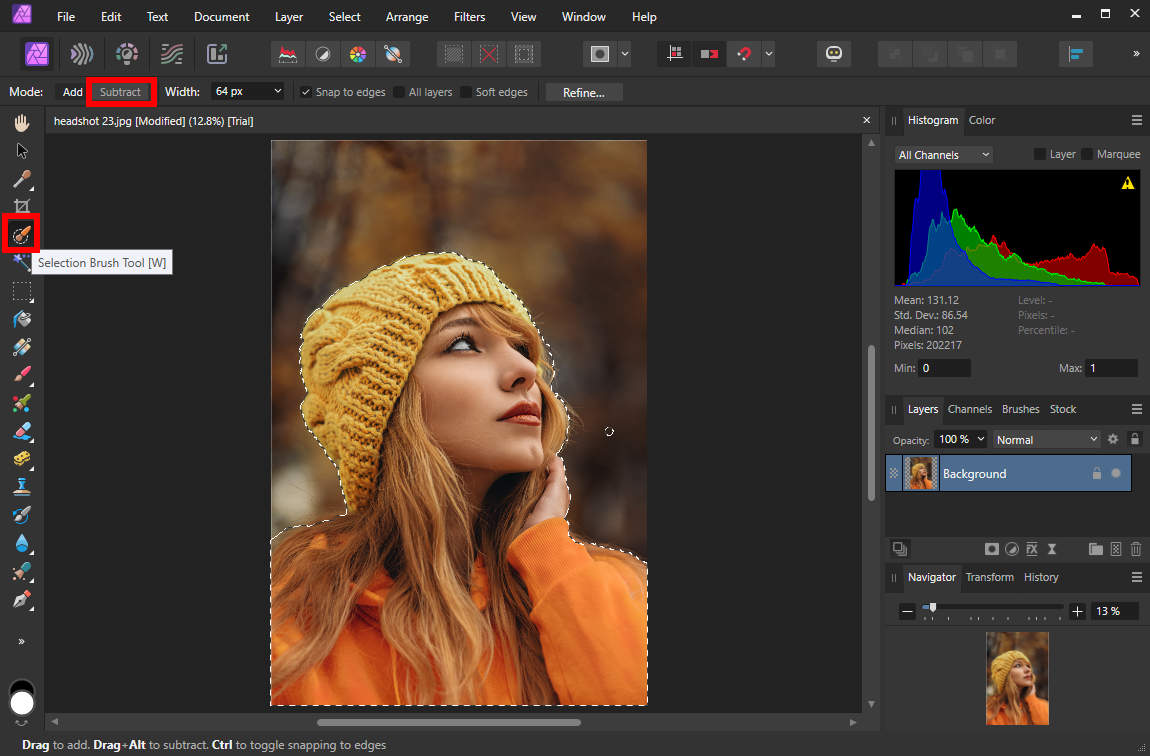
- Select the background inversely.
You have selected the subject in the last step, but what we want to delete is the background, right? Well, the background can be selected easily by choosing the Select > Invert Pixels Selection option on the top menu.
- Delete the background.
Press the Delete key on your keyboard to remove the background from the photo, and the transparent background will display as a gray-and-white checkerboard. - Save the final photo.
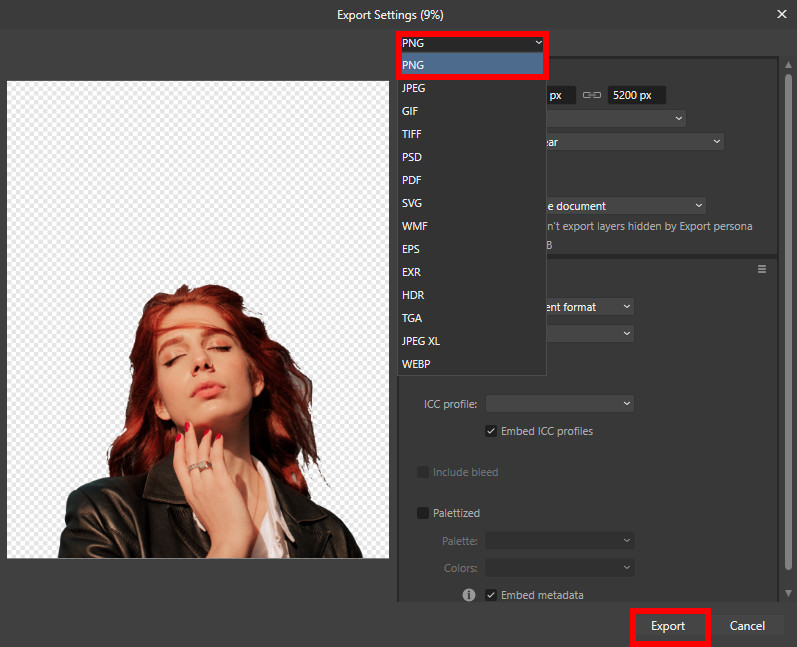
Move your mouse to the File > Export option on the top menu to download the final photo without a background.
Remember to choose the PNG format when you save the photo because only the PNG format supports displaying a transparent background.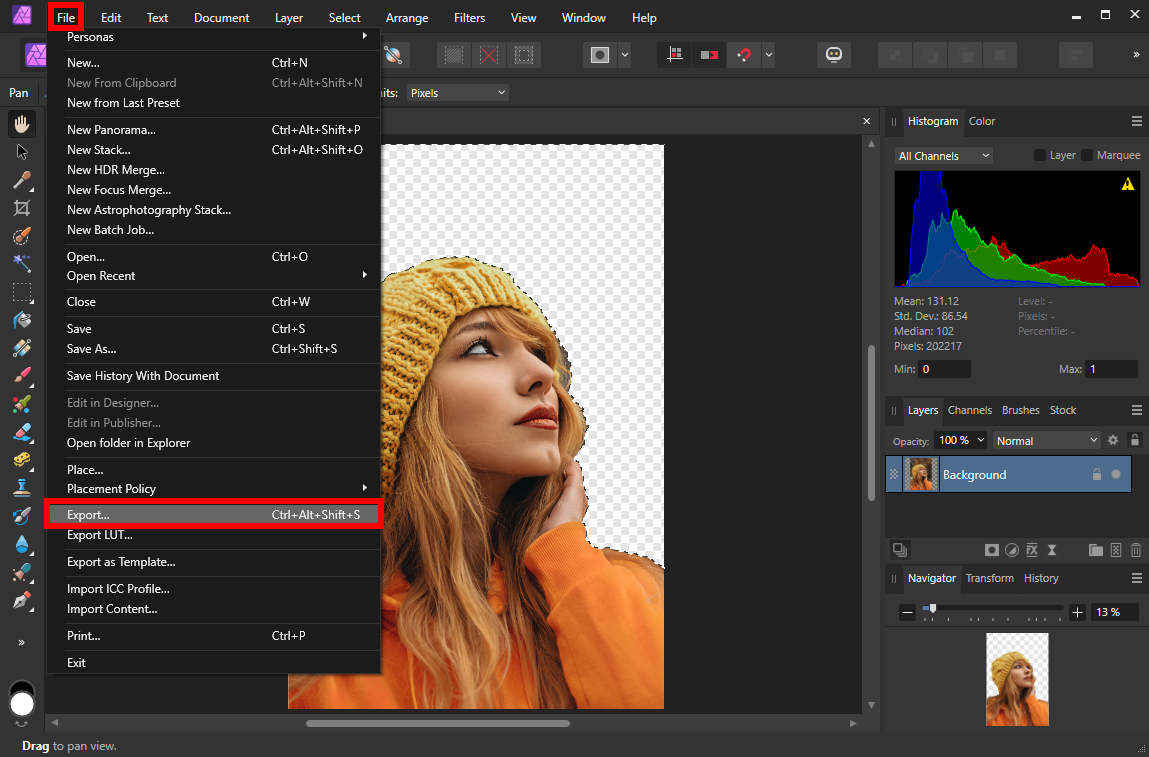
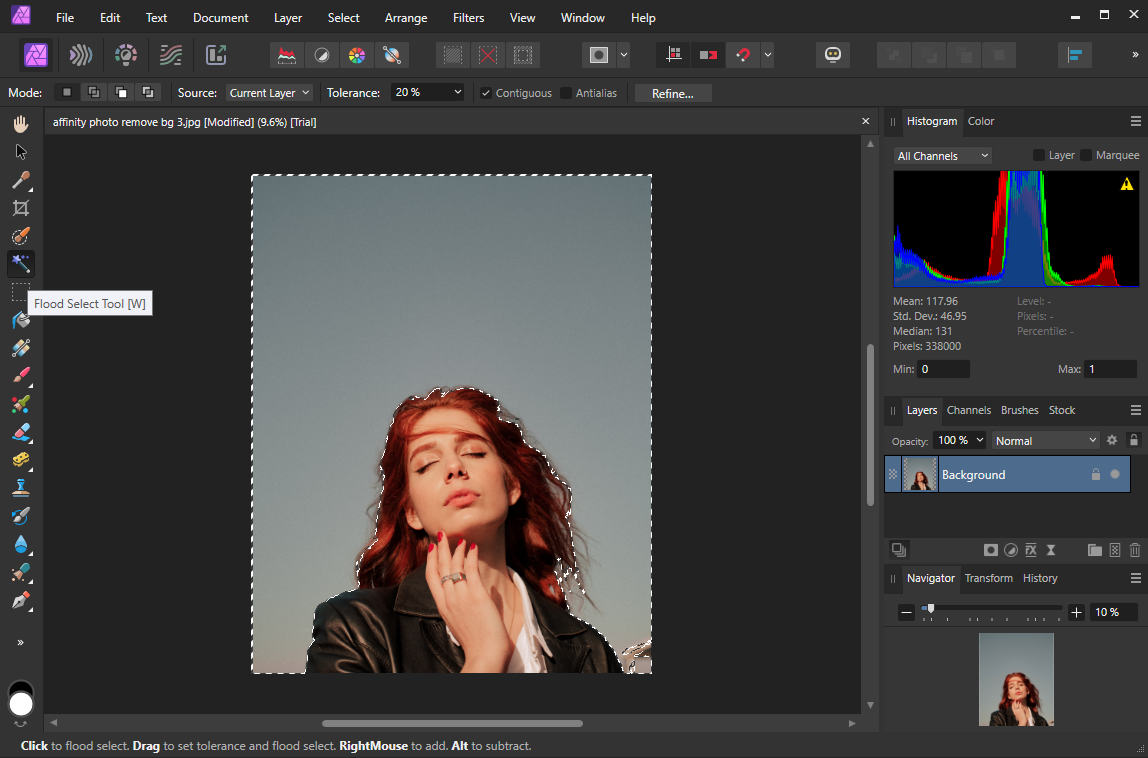
Solid Color Background – Using the Flood Select Tool
The Flood Select Tool works on pixels of a similar color. When you use this tool to make a selection, the pixels of the same color can be selected in one go. For example, you click on a red color zone, and all the red color elements of this photo will be added to this selection.
Based on this function, the Flood Select Tool plays a greatly efficient role in dealing with a solid background. Read on to seehow to remove a solid background in Affinity Photo with the Flood Select Tool.
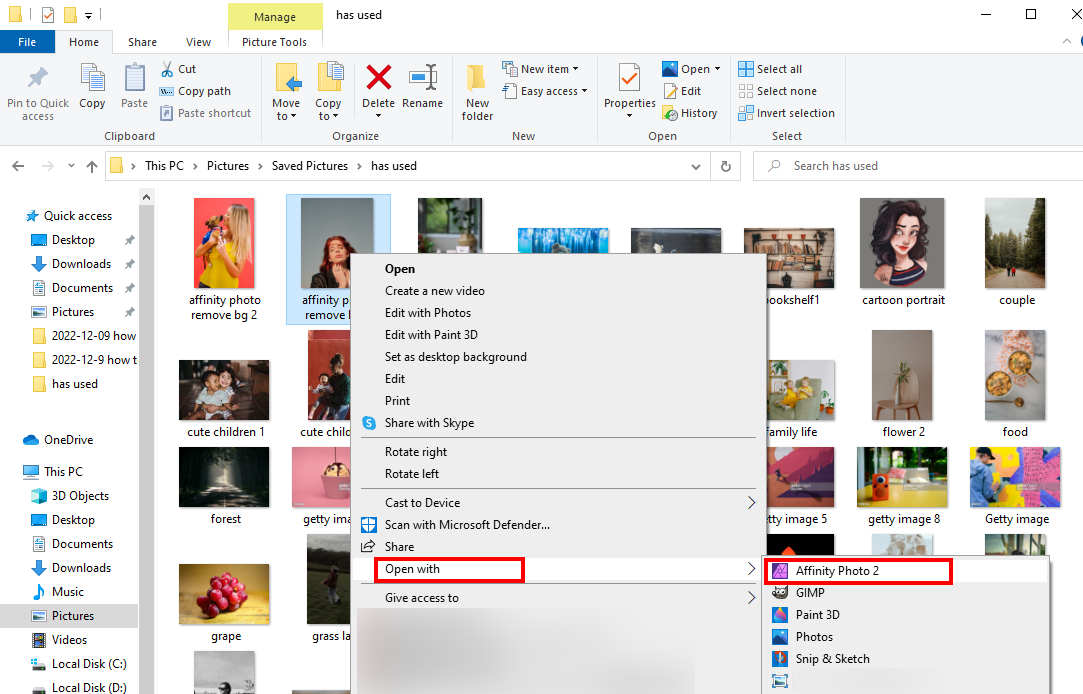
- Find the images in your library and then right-click on the one that needs editing, choose Open with > Affinity Photo 2.
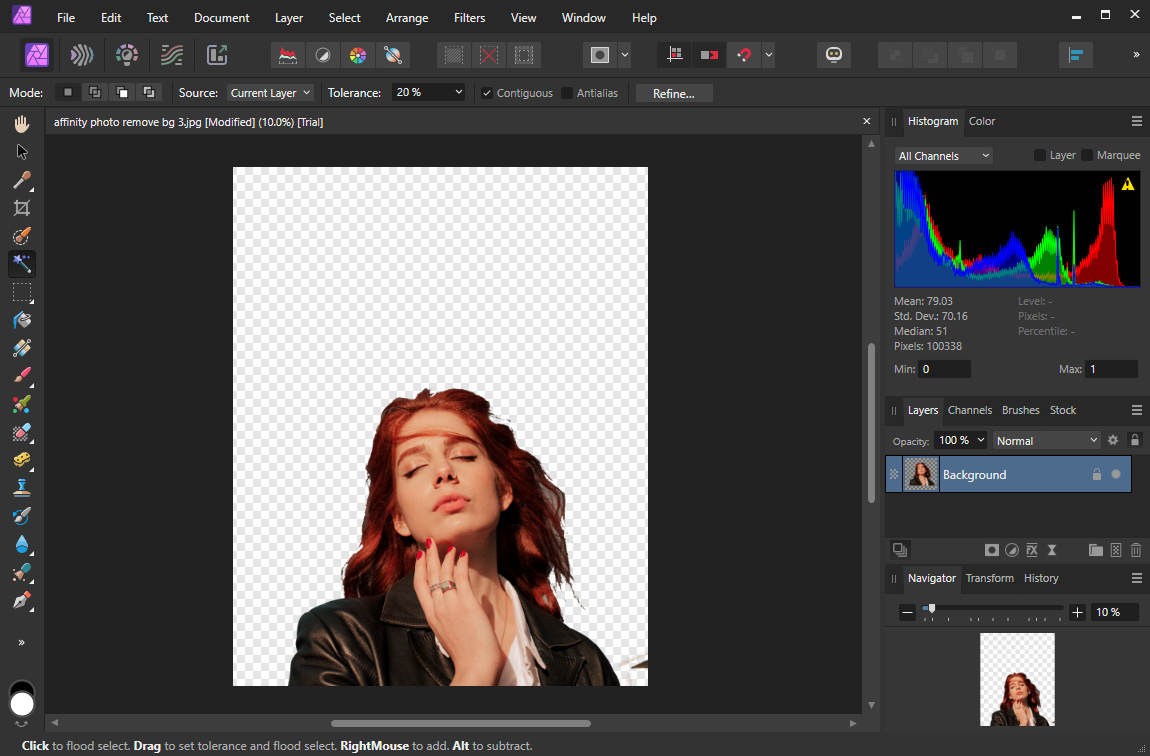
- Seeing the photo is shown on the workplace, you can move forward to the Flood Select Tool on the left panel and then click on the background that you want to remove. One click is enough if you are fighting with a solid background. Otherwise, you have to repeat using this tool to pick all the background elements.
- Hit the Delete key on the keyboard to remove the background in one click.
- Navigate to the File > Export option on the top menu bar. The Export Settings page will pop up, and you can see a variety of different file formats to save your works. Please remember to choose the PNG and click the Export button. By doing so, you can finally get a picture with transparent background on your computer.
For Most Cases – Using the Erase Brush Tool
It seems that the Erase Brush Tool should be the first choice when we talk about removing backgrounds in Affinity Photo because it is designed to remove the background. However, the better usage of the Erase Brush couldn’t live without the help of the selection tools we mentioned above.
Keep reading to know how to remove background in Affinity Photo.
- Open a picture in Affinity Photo. Launch Affinity Photo and move to the File > Open option on the top menu, and then you can open a picture in Affinity Photo.
- Activate the Selection Brush Tool to select the subject quickly and then go to the Select > Invert Pixel Selection option to select the unwanted background inversely.
Actually, you can skip this selection step and directly remove the background with the Erase Brush Tool as long as you have the patience to depict the foreground edge carefully.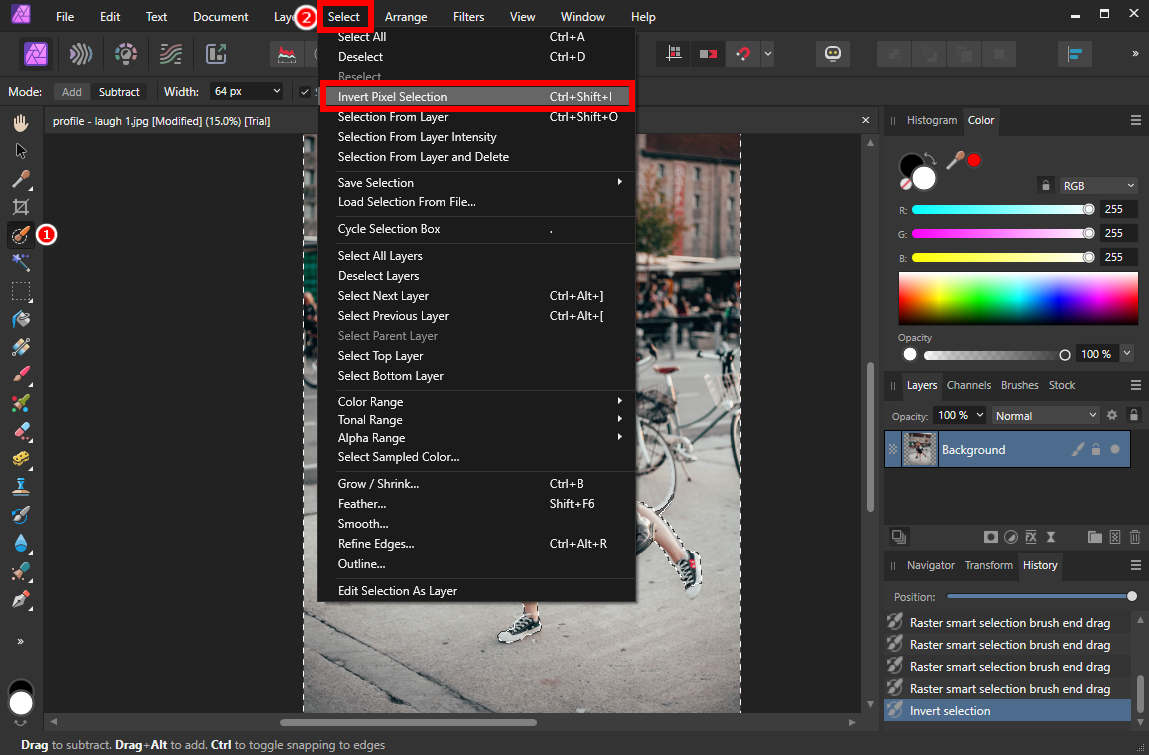
- Navigate to the Erase Brush Tool on the left toolbar. Under the premise that you have circled out the background area before, you can adjust your brush size as big as possible and then draw over the photo freely. You will discover that the background is cleaned up while the subject remains intact.
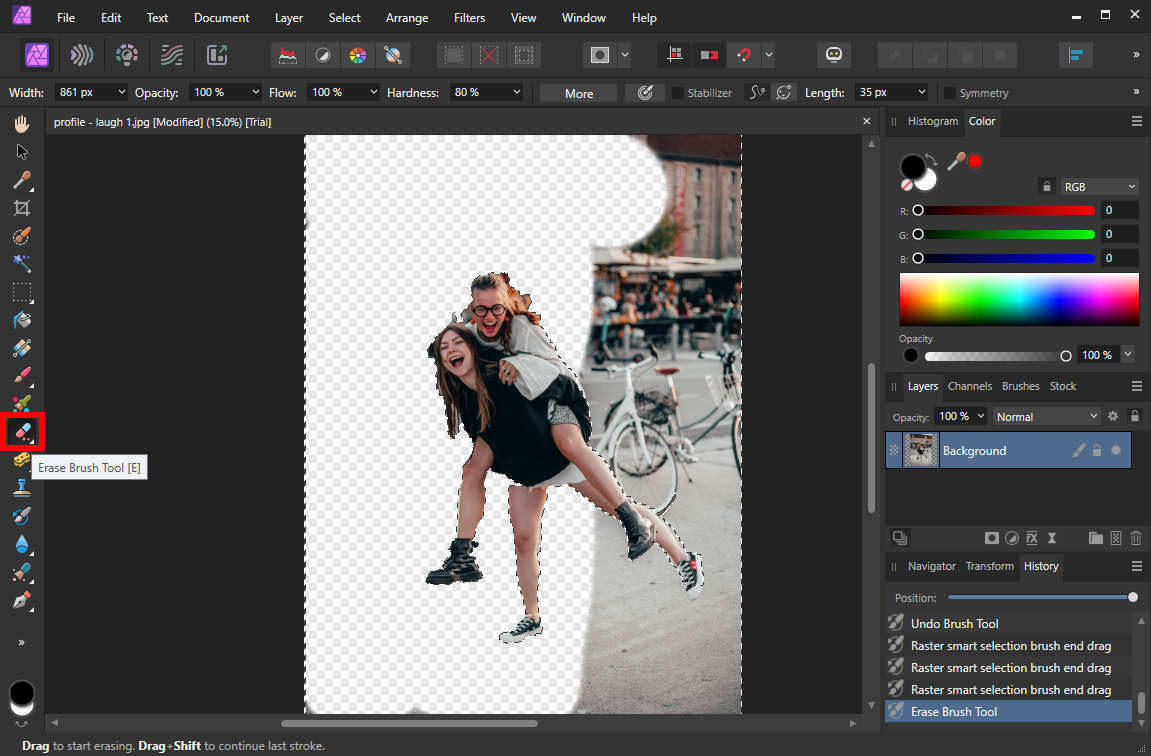
- Step 4: Move to the File > Export option on the top panel to save the final photo.
1-Click to Remove Background – Using Online Tools
You have witnessed that Affinity Photo works excellently in removing the background but hesitate to use it because of its complicated operation. Considering this situation, this feature provides accessible online tools to remove the background from a photo without effort.
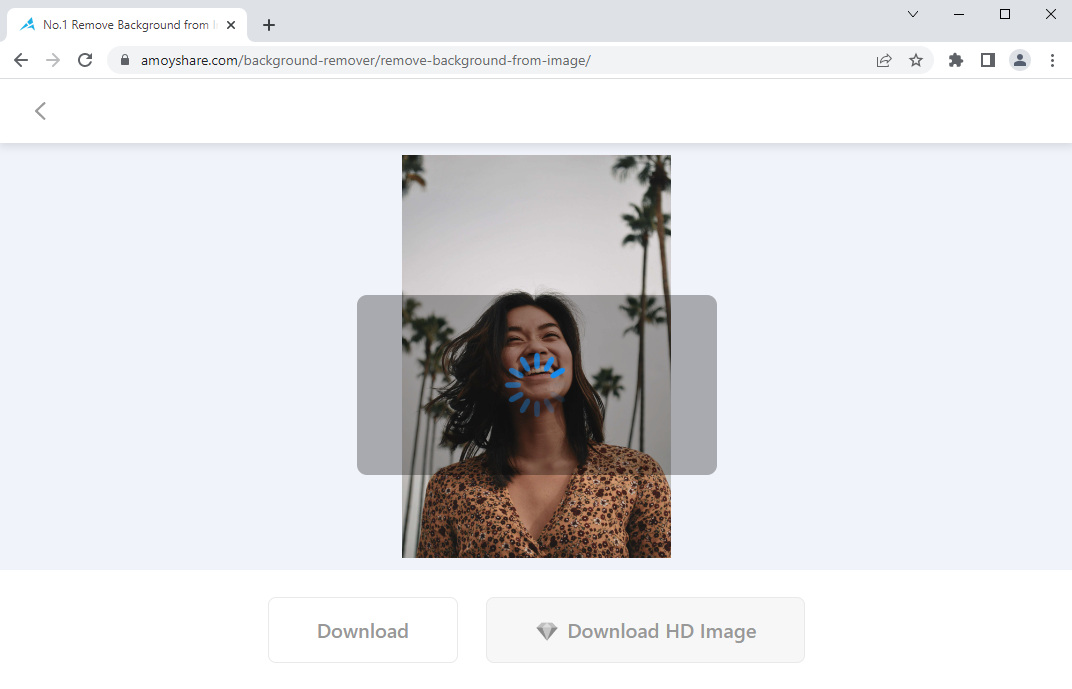
AmoyShare Background Remover
Supported by AI technology, AmoyShare Background Remover is able to take the background out of the photo automatically, leaving a neat and clean cutout. Moreover, it is applicable for different usages, such as photography, social media, e-commerce, personal cases, and so on.
Now, let’s see how to take the unwanted background out of the image with AmoyShare Background Remover.
- Visit AmoyShare Background Remover on your browser.

- Drag and drop an image that needs improving to the working pane. Waiting for a second, you can get a clean photo effortlessly.
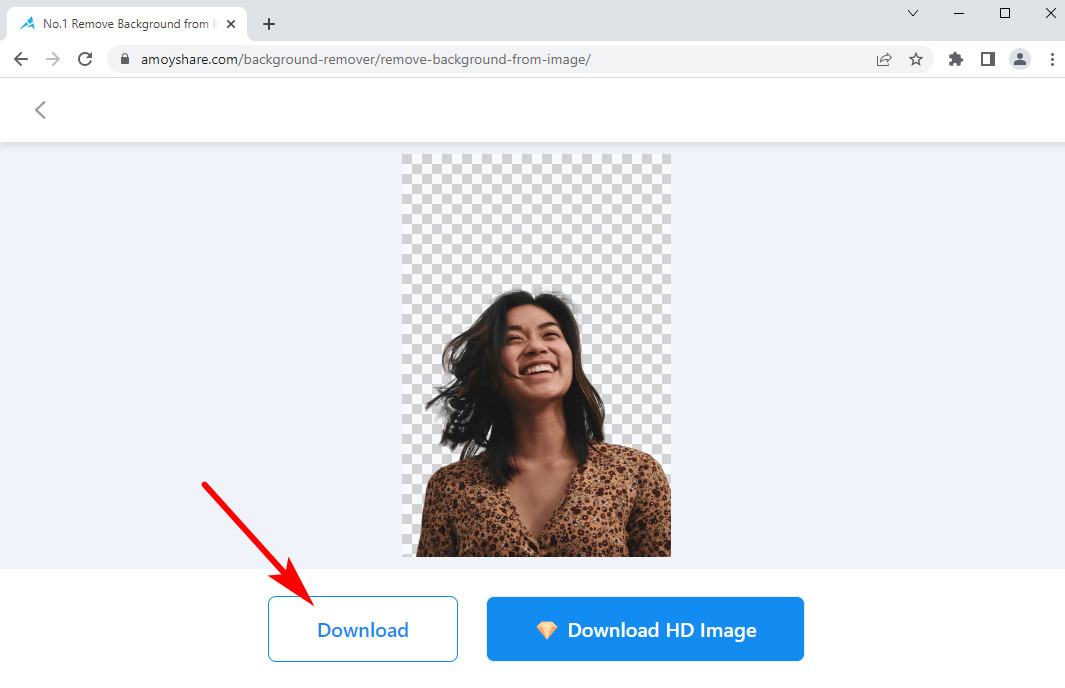
- Click the Download button to save the final photo.
Pixlr
Pixlr is a photo editor which provides everything you need to create stunning designs. You can also get a removal service with its online background remover, which helps to cut out the subject you need in one go.
The following is about how to remove background with Pixlr’s removal service. Please keep going.
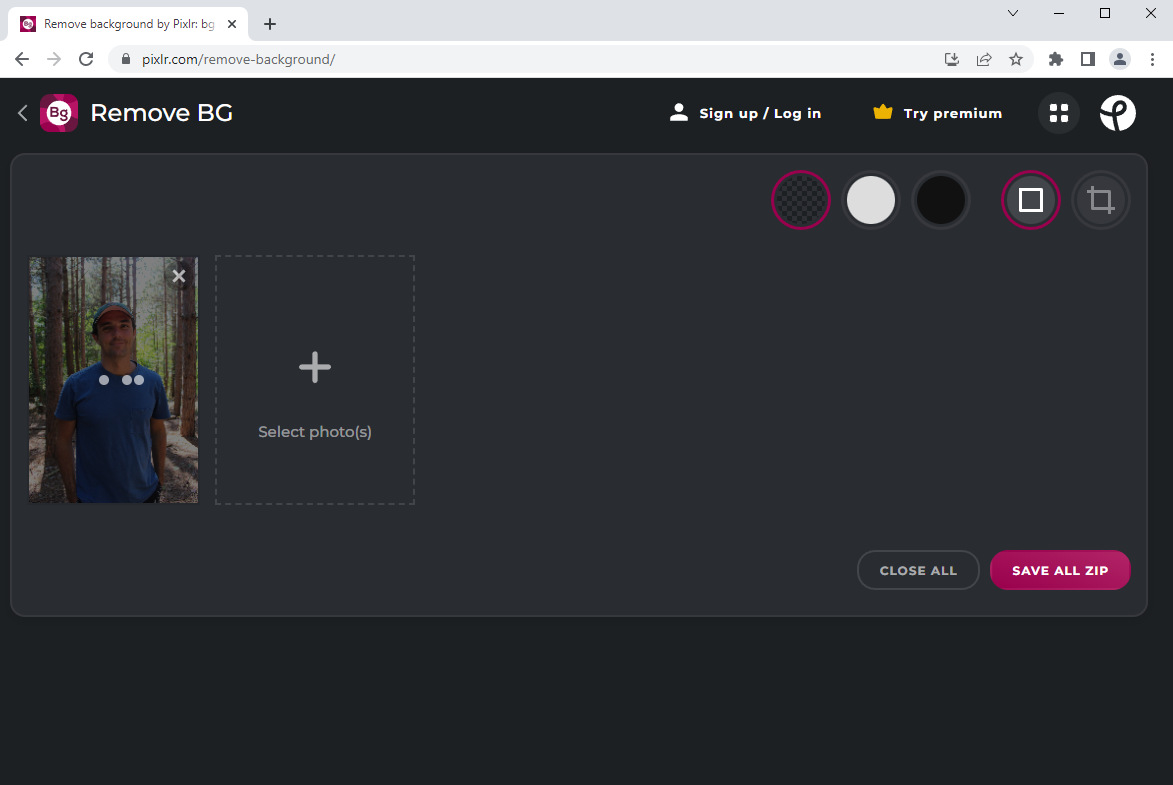
- Enter Pixlr’s Remove BG website.
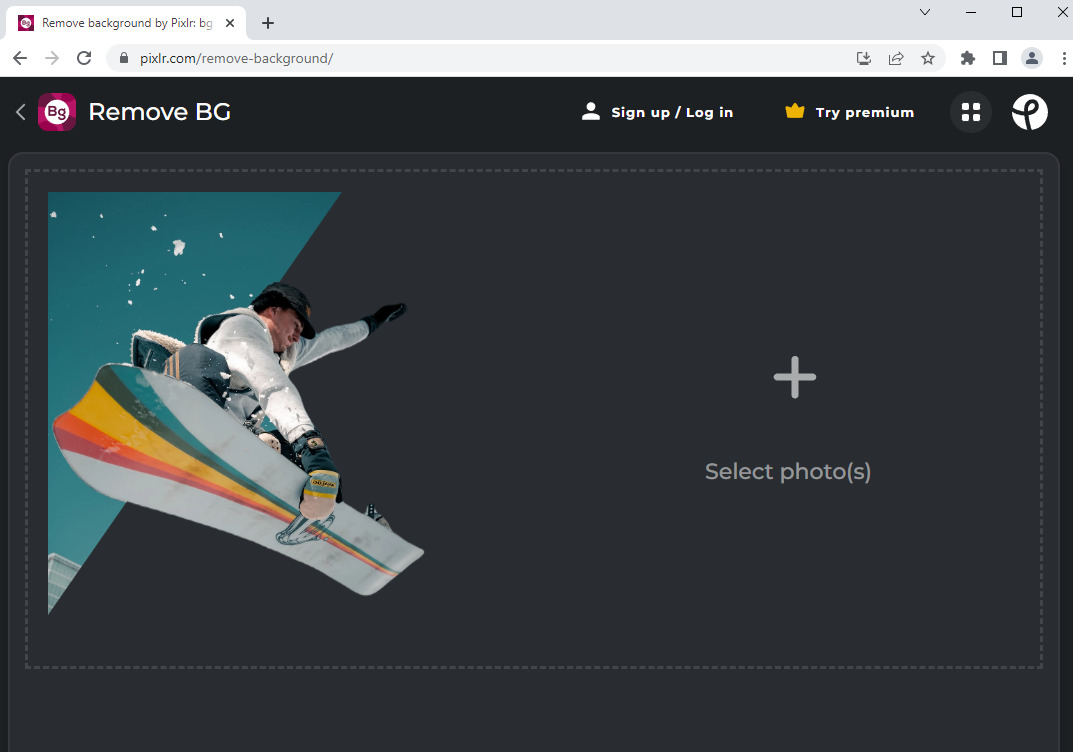
- Click the “+” mark to upload a photo to this site, and this tool will remove the background automatically.
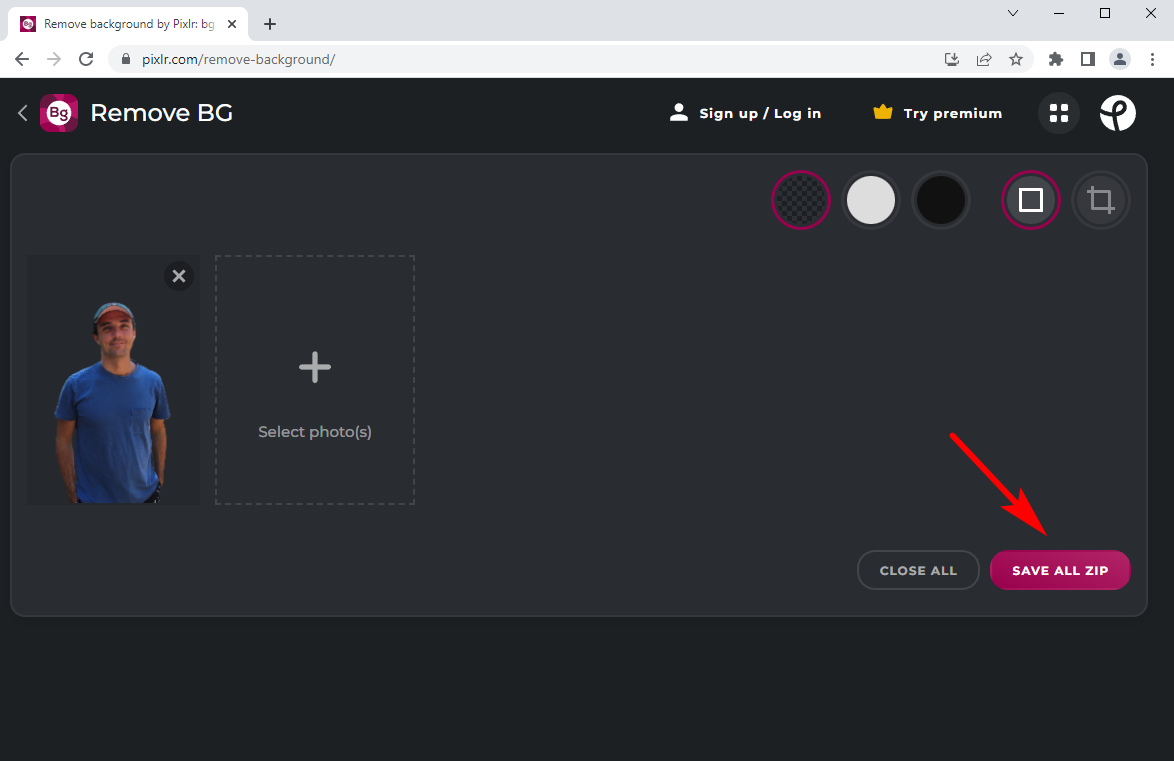
- Go to the SAVE ALL ZIP button to export the final photo, and then the edited photo will be kept in a ZIP file. So, you need to unzip the edited photo with a ZIP extractor.
remove.bg
remove.bg is a professional operator designed to remove the background. It devotes itself to providing the best removal effect, and it actually does. With its powerful AI technology, remove.bg not only slashes your time in removing a complex background but allows you to edit the background.
- Visit the remove.bg online page, and click the blue pane labeled “Upload Image” to add a photo to this remover platform.
remove.bg removes the background from the photo automatically. So, you will get an edited photo displayed on a transparent background as soon as you upload an image to it.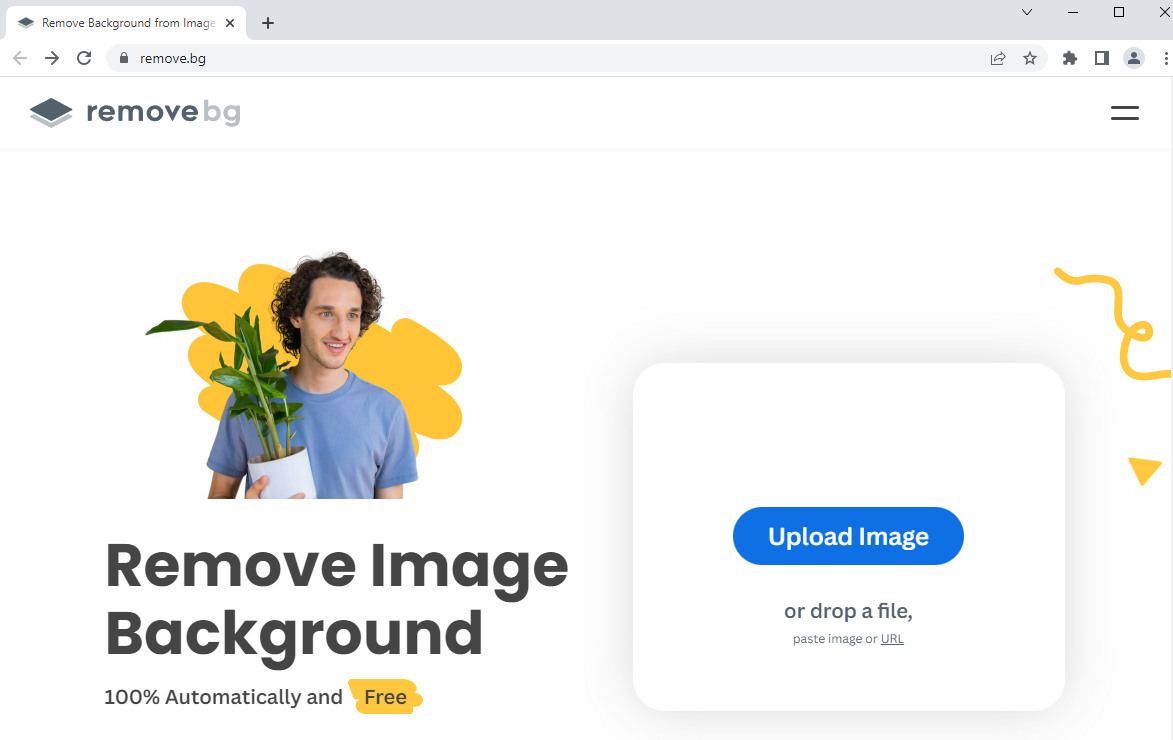
- You can click the Edit option to refine the edited photo. For example, if remove.bg deletes some elements you want to maintain, you can choose the Restore tool to restore them manually.
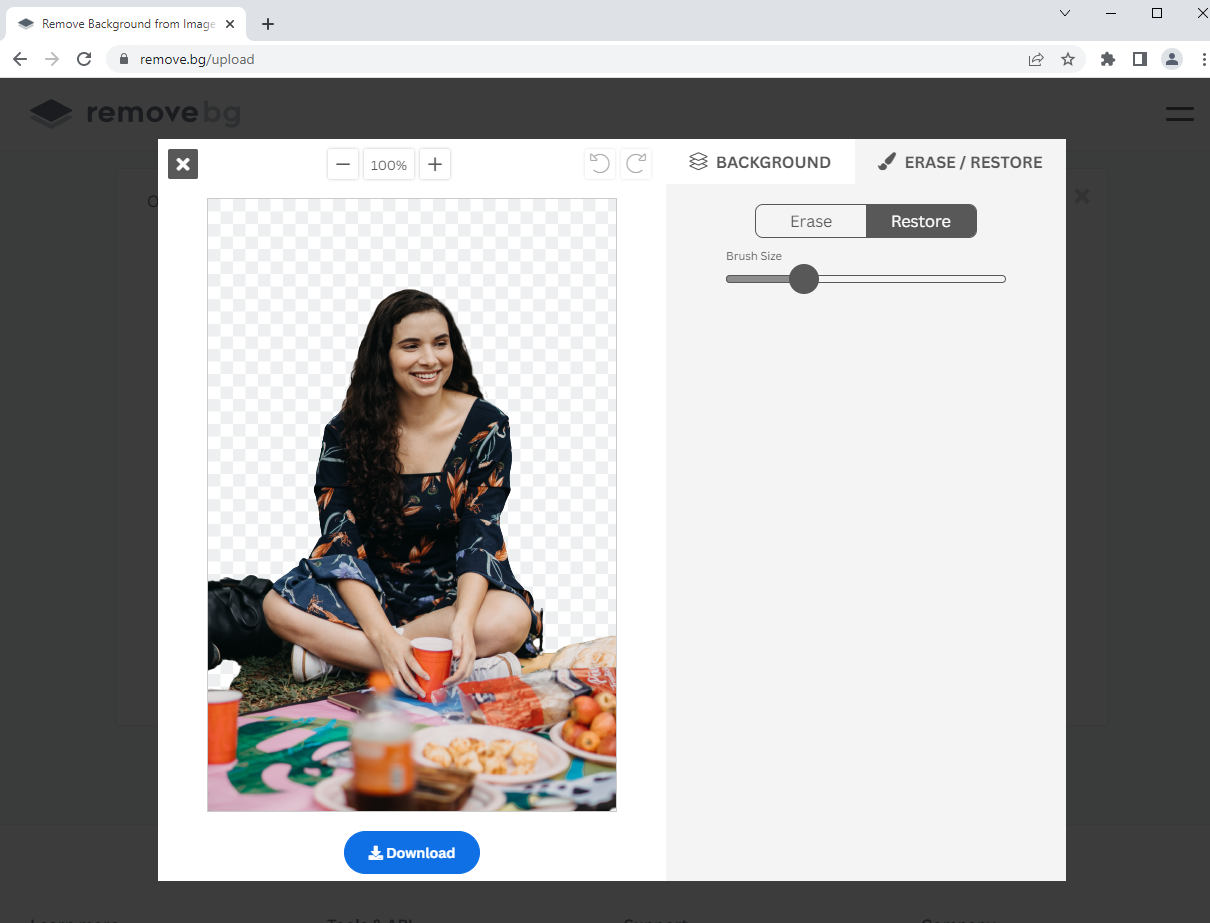
- Click the Download option to save the final picture.
Conclusion
In a word, using Affinity Photo to remove background from the photo is operational, while the vital step lies in the selection of the background. This post introduces 3 usable tools and elaborates on how to remove background in Affinity Photo with these tools.
Considering some people require a totally easy and free background remover, this post also recommends AmoyShare Background Remover to get rid of backgrounds. The detailed guide is already there, and you might as well have a try.
FAQ
1. How do you easily remove the background from a photo?
Using the online AmoyShare Background Remover to erase the background in one click.First, you need to upload an image to the website and then AmoyShare Background Remover will delete the background automatically. Finally, you could click the Download button to save the clean photo.
2. How do I remove the white background from an image in Affinity Photo?
1. Open an image in Affinity Photo.2. Activate the Flood Select Tool and then move your cursor to the white background area and click on it.3. Hit the Delete key on your keyboard, and you can successfully remove the white background from the image.4. Choose the File, Export option on the top main menu and choose the PNG format file to save the photo with a transparent background.