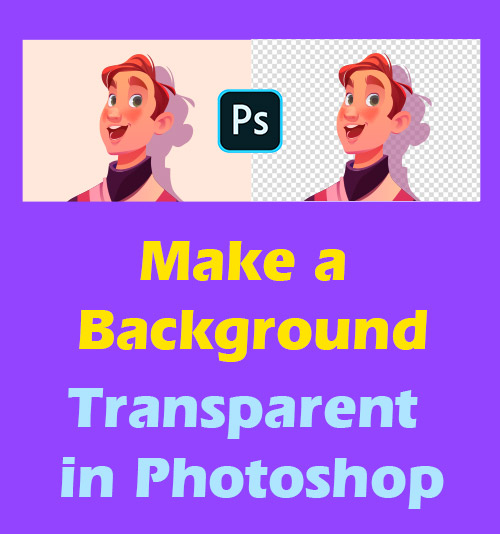
Have you noticed that we benefit a lot from adding transparency to photos. For instance, making a background transparent endows your featured product with multiple possibilities. You can replace the outdated background with an eye-catching one, which will make your content engaging.
In addition, it has been the most common means to record life with pictures by sharing flattering photos on social media. Creating transparent background also offers you an opportunity to re-edit your images whose backgrounds are cluttered with unexpected objects.
However, many people are often frustrated by the tricky problem that how to give a picture a transparent background.
Thankfully, there are a bunch of tools that can be utilized to make image background transparent. One of them is the most popular and professional photo manipulation tool – Photoshop.
In the post, we are going to share how to make a background transparent in Photoshop with you, including 2 straightforward ways and step-by-step tutorials. If you can’t wait to learn more about it, please go on reading.
Method 1: Utilize the Background Eraser Tool to Create Transparent Background
When it comes to editing images by using Photoshop, many novices will feel daunted. But, in fact, if you grasp the right tools, it could be easy to manipulate picture in Photoshop.
In the upcoming section, we will guide you to make background transparent in Photoshop step by step by utilizing the first tool – “Remove Background” quick action. It is one of the quickest and simple solutions to facilitate the process of transparentizing photo background.
- Open Photoshop to upload image. Then you can view in the bottom right that the uploaded image is automatically locked in the “Layer” panel.
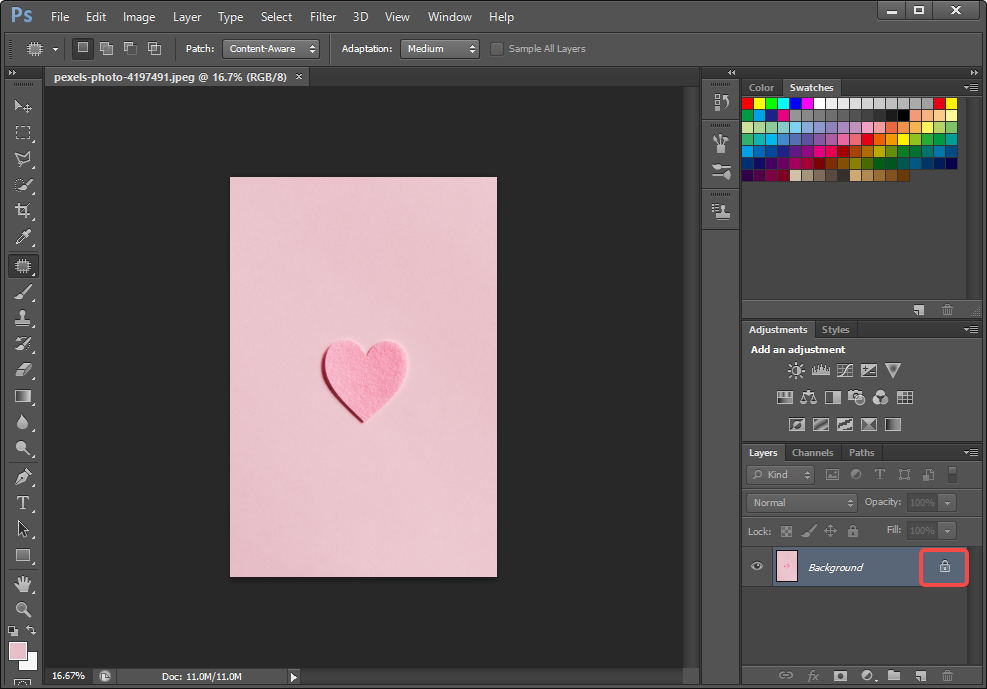
- Now you need to unlock the “background” layer by double click the “lock” icon. Then a window will pop up, and you just need to click the “OK.” You will find that the “lock” icon is invisible.

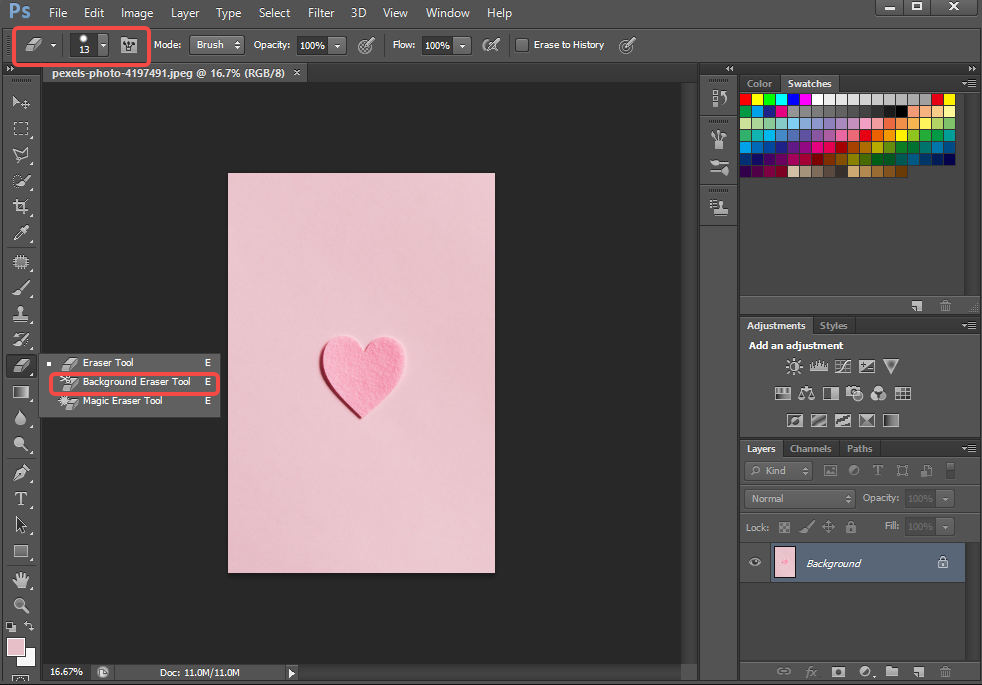
- Go to the tool bar in the left. Next you need to click the “Background Eraser Tool.” Now you can erase the background by left-clicking the mouse while moving around the background. To make the photo transparent more precisely, you are allowed to use a tool in the top left area of screen to adjust the eraser size.
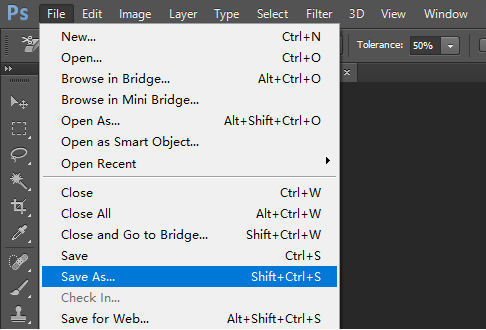
- Click “File” > “Save As.” Select “PNG (*.PNG) as the file format.
Method 2: Employ Selection Tools to Make a Background Transparent in Photoshop
Photoshop provides you with several selection tools that can be used in the process of creating image with transparent background. Selection tools contain Quick Selection Tool, Magic Wand Tool, Lasso Tool, Polygonal Lasso Tool and Magnetic Lasso Tool. They enable you to draw the object you want to keep, and eliminate the area of background.
But which one is the best tool for transparentizing photo?
I hold that what the best depends on the characteristic of your image. Different selection tools are valued for different features. So you need to take every element on image and the feature of every tool into account when selecting selection tools.
Do you feel it hard to squeeze time to get yourself familiar with these tools?
In a bid to save time and effort, we will make a brief introduction about these selecting selection tools in the following paragraphs. What’s more, here comes the detailed tutorial concerning how to make a background transparent in Photoshop by employing these selection tools.
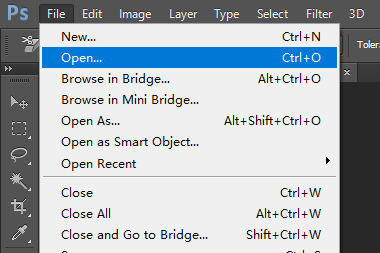
- Launch Photoshop, then go to the “File,” and a menu will slide down. Select “Open” to import image.
- Go to the toolbar in the lower-right corner. Select the “Layer.” You will view the “Background Layer” that is locked automatically. Double click the lock icon to unlock the “Background Layer.”

- You need to circle the object that you want to keep with a selection tool now. Photoshop boasts 4 selection tools that are suitable for different types of images. Selecting one selection tool based on your needs. Here are some introductions about them.
- Quick Selection Tool: Located in the right tool bar, Quick Selection Tool is unfolded or unfolded by right-clicking on the fourth tool “Magic Wand Tool (w).” You can use Quick Selection Tool to choose an area accurately and quickly. This tool works great for pictures with high contrast and well-defined edges. There are 2 options “–“ and “+” icon to delete or add the selection.
- Magic Wand Tool: Set in the same position as the Object Selection Tool, the Magic Wand offers a convenient way to select the area with the same color. Use it to select any color in your image, and you will find that all area containing the same color is circled. This tool is best for pictures with distinctive objects and solid color background.
- Lasso Tool: Found in the third place of the tool menu, the Lasso tool allows you to draw freely around the object you desire to select. However, the tool can’t circle object in a precise level. You can employ it when you need create a rough selection. Therefore, it is not suitable to select an object with complex shapes.
- Pen Tool: Sit in the Sixth place from the bottom, Pen Tool does a great job in selecting background with straight lines and smooth curves. It gives you access to create path and shape that you can duplicate and edit to create complicated selections and objects.
- After determining which tool you want to use, you can circle the object you want to keep in photo.

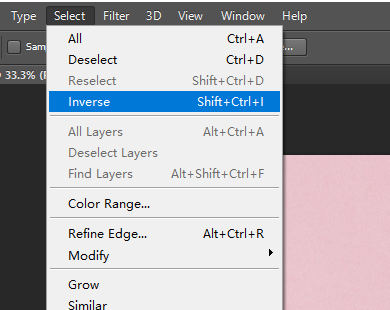
- Now you have to select the background to which you need to add transparency. Go to the upper “Select” menu and click on the “Invert” option.
- Hit the Backspace key on keyboard to make a background transparent in Photoshop.

- Go to the “File” and select “Save As” to save image with transparent background.

Conclusion
In sum, creating image with transparent background in Photoshop is not a tiresome task. What You need to do is to select the appropriate tools and apply your patience.
The above we have shown 2 easy ways that certainly can tackle with how to make a background transparent in Photoshop. We expect this post will help you get a clear idea of making transparent photo backgrounds.
FAQs
How to make a white background transparent in Potoshop?
1. Open Photoshop to upload image. 2. Double click the lock icon to unlock the background layer. Then a window will pop up, and you just need to click the OK.3. Go to the toolbar in the left and click the Background Erase Tool. You can erase the background by utilizing the Background Erase Tool.4. Click Files, Save as, and select PNG as the file format.
How to make a logo transparent in Photoshop?
1. Click File and open your image in Photoshop.2. In the layers panel, double click the lock icon to unlock the Background Layer.3. Use the Magic Wand Tool to draw the area you want to turn transparent.4. Hit the Backspace key on keyboard to give a picture a transparent background.5. Go to the File and select Save As to save image with transparent background.